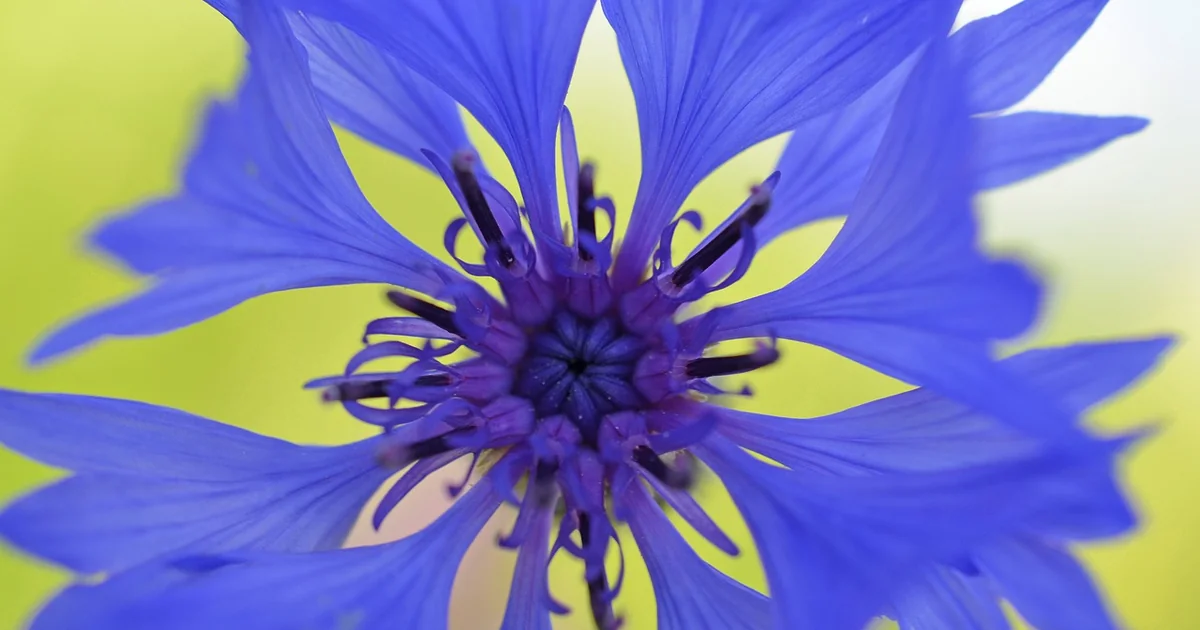
Few flowers capture the essence of a rustic meadow quite like centaurea. Their vivid blue blooms, reminiscent of summer skies, have earned them a beloved spot in cottage gardens and wildflower patches alike. But achieving a thriving display of these plants requires more than just scattering seeds. Understanding the nuances of growing centaurea plants can transform a mediocre patch into a breathtaking tapestry of color. While the genus includes both annuals and perennials, the basic care principles remain surprisingly consistent. However, a few lesser‑known tricks separate a casual planting from a truly spectacular one. Below, we uncover seven secrets that will help you cultivate centaurea with confidence and flair.
Secret #1: Match Your Soil pH to the Plant’s Preference
Many gardeners assume centaurea will thrive in any average garden soil. And it often does — but only if the pH leans slightly alkaline. The ideal range sits around 7.0 or a touch higher. In acidic soils (below 6.5), the plants may produce fewer blooms and develop weaker stems. A simple soil test kit from a garden centre can reveal your native pH. If you discover acidic conditions, incorporate a handful of garden lime per square metre a few weeks before planting. This adjustment mimics the chalky, limestone‑rich soils where wild centaurea naturally flourish. In my own garden, a single lime application raised the pH from 6.2 to 6.8, and the following season’s flower count nearly doubled. Avoid over‑liming, though; a pH above 8.0 can cause nutrient lockout. One application every two to three years is usually sufficient for maintaining balance.
Testing Without a Kit
If you prefer a quick visual clue, look at neighbouring wild plants. The presence of chicory, yarrow, or Queen Anne’s lace often indicates neutral to alkaline soil. Those species share centaurea’s tolerance for high pH. Alternatively, take a small soil sample to a local cooperative extension office — many offer free or low‑cost pH testing.
Secret #2: Seed at the Right Temperature, Not Just the Right Date
Timing seed sowing by calendar alone can lead to disappointing germination. Centaurea seeds respond strongly to soil temperature. Annual varieties germinate fastest when the soil consistently stays above 65°F (18°C). Perennial types prefer a slightly cooler window, around 55–65°F, but still require warmth. Using a simple soil thermometer eliminates guesswork. Insert it two inches deep at midday; if the reading hovers below 60°F, wait another week. For gardeners in short‑season climates, starting seeds indoors four to six weeks before the last frost gives a head start. Use peat pots or cell trays filled with seed‑starting mix, and maintain bottom heat with a propagation mat set to 70°F. Once seedlings reach four to six inches tall and outdoor soil reaches the magic threshold, transplant them after hardening off. In regions with mild winters, a mid‑fall sowing of annual centaurea rewards you with early spring blooms — the seeds overwinter and sprout as soon as the ground warms.
The “Second Planting” Trick
For a longer bloom period, sow a second batch of seeds three weeks after the first. This staggering technique works especially well with annual bachelor’s buttons. A third sowing, another three weeks later, extends colour well into late summer. Just be sure your local frost‑free season allows the final planting enough time to mature.
Secret #3: Space for Sturdiness, but Crowd for Support
One of the most counter‑intuitive secrets for growing centaurea plants is that annuals benefit from close spacing. While most perennials need two to three feet between them to spread, annual centaurea should be planted about twelve inches apart. This tight arrangement encourages the slender stems to lean on each other, reducing the need for staking. For perennial varieties such as mountain bluet (Centaurea montana), give them room — two to three feet apart — because they form clumps that expand over time. If you crowd perennials, airflow diminishes and powdery mildew can become a problem. Taller types, especially those exceeding three feet, may still require individual stakes.
Staking Without a Fuss
Use natural twiggy branches pushed into the ground around the clump when the plants are about half their mature height. The foliage will grow through the branches and hide them completely. Avoid metal or plastic stakes unless absolutely necessary — they tend to look jarring in a meadow‑style bed.
Secret #4: Water Deeply, Then Leave Them Alone
Centaurea’s reputation as a drought‑tolerant plant is well‑earned, but only after the roots are established. Newly sown seeds and young transplants need consistent moisture for the first three to four weeks. Once the plants reach about six inches tall, reduce watering frequency drastically. Water deeply once a week if no rain falls, then allow the top two inches of soil to dry out before the next soak. Overwatering is the fastest way to kill centaurea. Soggy roots invite rot and fungal diseases, especially in heavy clay soils. If your garden has poor drainage, raise the planting bed by six to eight inches or grow centaurea in containers with ample drainage holes.
Avoiding Wet Foliage
Water at the base of the plant rather than overhead. Centaurea’s thistle‑like blooms and narrow leaves dry quickly, but wet foliage overnight can still encourage leaf spot. Drip irrigation or a soaker hose works ideally. If you must use a sprinkler, do it early in the morning so the sun dries the leaves by midday.
Secret #5: Fertilize Once — and Only Once
Many flowering plants demand frequent feeding, but centaurea thrives on a lean diet. A single application of balanced slow‑release fertilizer in early spring is enough to fuel the entire growing season. Use a formula such as 10‑10‑10 or 14‑14‑14, sprinkled lightly around the base according to package rates. Avoid high‑nitrogen fertilizers; they encourage lush foliage at the expense of flowers. If your soil is already rich in organic matter, you may skip fertilizer altogether. Centaurea evolved in nutrient‑poor, sandy or chalky soils, so too much richness makes them floppy and less floriferous. In containers, a half‑strength liquid bloom booster every four weeks can substitute for the granular feed, but only if you see signs of pale leaves or slow growth.
You may also enjoy reading: Dahlia Fertilizer Decoded: 7 Tips for Giant Blooms.
The Cut‑and‑Come‑Again Effect
Deadheading spent blooms not only keeps the plant tidy but also triggers a second flush of flowers. Snip off faded flower heads just above a leaf node. For cut flower use, harvest stems when the first few petals have opened; the buds continue to open indoors. Regular cutting extends the blooming period by several weeks. If you want to encourage self‑seeding for next year’s display, leave the last round of flowers to go to seed.
Secret #6: Recognize and Manage Invasive Look‑Alikes
Not every centaurea is garden‑friendly. Spotted knapweed (Centaurea stoebe) originated in eastern Europe but has become a serious invasive species across North America. It crowds out native plants and reduces biodiversity. When you purchase seeds or young plants, always check the botanical name. Look for “Centaurea cyanus” (bachelor’s button) or “Centaurea montana” (mountain bluet). Avoid any variety labelled simply as “knapweed.” If you live near wildlands, deadhead your centaurea before seeds mature to prevent accidental spread. Some local garden clubs even recommend bagging and disposing of spent flower heads rather than composting them. Being a conscientious gardener means enjoying the beauty of centaurea without contributing to ecological harm.
Edible and Medicinal Uses (With Caution)
Bachelor’s buttons have a history of culinary and medicinal use — the petals can garnish salads or be dried for tea. However, never consume any plant unless you are absolutely certain of its identity and know it was grown without pesticides. The invasive knapweed species are not considered safe for ingestion. Stick to trusted culinary varieties from reputable seed companies.
Secret #7: Design with Drifts and Companions for Maximum Impact
Centaurea’s wildflower habit looks best when planted in drifts — sweeping clusters of five or more plants rather than isolated singles. A single mass of blue centaurea against a backdrop of red poppies creates a classic red‑and‑blue display that draws the eye. For a softer palette, pair mountain bluet with yellow coreopsis or white Shasta daisies. Because centaurea foliage can look ragged after the first bloom wave, surround them with bushy perennials such as catmint, salvia, or lady’s mantle that will fill the gaps. This hiding technique keeps the bed attractive even when the centaurea take a brief rest between flushes. As cut flowers, centaurea stems last about a week in a vase. Harvest in early morning, strip lower leaves, and change the water daily.
Container Gardening with Centaurea
Don’t hesitate to try growing centaurea plants in pots. Choose a container at least twelve inches in diameter with drainage holes. Use a standard potting mix amended with a small handful of lime to raise the pH. Place the container in full sun, and water only when the top inch of soil feels dry. A single annual centaurea in a pot can produce dozens of blooms, making it an excellent choice for balconies and patios. Perennial varieties also adapt to containers but may need repotting every two years as the clump expands.
Mastering these seven secrets will turn your centaurea patch into a reliable source of blue, purple, and white flowers from late spring through early autumn. Whether you are a beginner or a seasoned gardener, the key lies in understanding the plant’s preferences — alkaline soil, careful watering, and light feeding. With a little attention to these details, you will enjoy a carefree, pollinator‑friendly display that feels both wild and intentional. So grab your seeds, check your soil thermometer, and get ready to watch those first fuzzy buds unfurl into starlike blooms.