The 7 Essential Secrets for Dendrobium Orchid Care
Dendrobium orchids have a reputation for being both stunning and somewhat particular. Many newcomers to orchid growing struggle with getting these plants to rebloom year after year. The leaves may look healthy, but the flowers simply do not appear. The good news is that a few specific adjustments to your routine can turn things around completely. These orchids respond well to consistent, thoughtful attention, and the rewards are spectacular.
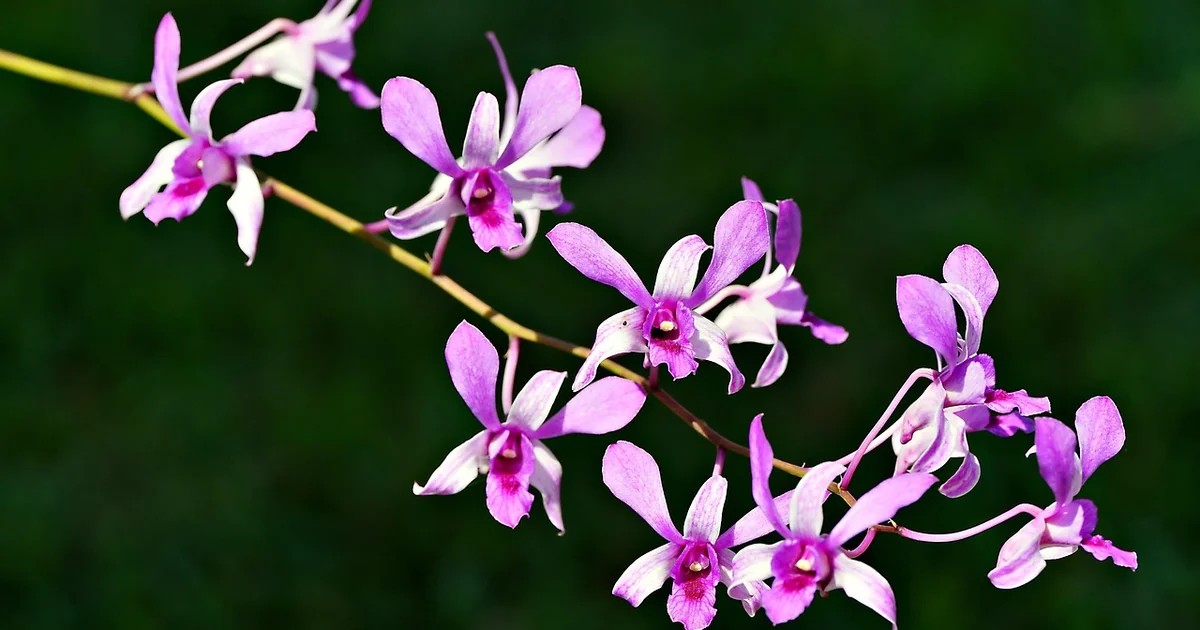
Understanding what dendrobium orchid care actually requires means looking beyond generic orchid advice. These plants come from diverse Asian habitats, from tropical lowlands to cool mountain slopes. Each type has its own preferences, but the seven secrets below cover the fundamentals that apply to most varieties. Master these, and your orchids will thrive.
Secret 1: Choose a Cramped Pot for Healthier Roots
Dendrobiums prefer to have their roots somewhat confined. A pot that is too large holds excess moisture, which can lead to root rot. When you pot your orchid, select a container only slightly larger than the root ball. The roots should feel snug, not squeezed.
Use a commercial orchid potting medium rather than regular soil. Standard potting soil is too dense and retains water for too long. Orchid bark, sphagnum moss, or a specialized orchid mix provides the aeration and drainage these roots need. The medium should allow air to circulate freely around the roots, mimicking the conditions of the tree branches where dendrobiums grow in the wild.
Repotting every two to three years is sufficient. Do it when the medium breaks down or becomes compacted. Fresh medium restores airflow and prevents salt buildup from fertilizer.
Secret 2: Maximize Light Exposure for Reliable Blooms
Bright light is nonnegotiable for dendrobium orchid care. These plants need at least six hours of direct or very bright indirect light each day during the growing season. A south-facing window is ideal in most homes. East or west windows can work if they provide strong morning or afternoon light.
One clear sign that your orchid is not getting enough light is the appearance of keikis. These tiny offshoot plants grow on young, small canes when the parent plant feels stressed by low light. Keikis are the orchid way of trying to reproduce quickly because it senses poor conditions. If you see many of them on relatively small canes, move your plant to a brighter spot.
Too much direct afternoon sun in summer can scorch the leaves, so some light filtering with a sheer curtain may help. The goal is bright but not burning. Leaves should be a medium green color. Dark green leaves often indicate insufficient light, while yellowish-green leaves suggest the light level is good.
Secret 3: Water with Precision, Not Guesswork
Watering mistakes cause more problems than any other factor in dendrobium orchid care. During the active growing season, water thoroughly whenever the medium feels slightly dry. Stick your finger about an inch into the potting mix. If it feels wet, wait another day or two. If it feels dry or barely damp, it is time to water.
Use distilled water or collected rainwater whenever possible. Tap water contains minerals and salts that accumulate in the potting medium over time. These deposits can burn sensitive orchid roots and cause leaf tip browning. If distilled water is not practical, let tap water sit out overnight to allow some chlorine to evaporate.
In winter, reduce watering significantly but do not let the medium dry out completely. Many dendrobium types need a dry winter rest to stimulate spring blooming. The frequency may drop to once every two weeks or even longer, depending on your home environment. Always check the medium before watering rather than following a rigid schedule.
Overwatering leads to root rot, which shows up as yellowing or wilting leaves. If the leaves look soft and the medium stays wet for days, you are watering too much. Cut back immediately and let the plant dry out.
Secret 4: Create the Right Temperature Rhythm
Temperature plays a major role in dendrobium orchid care, especially for triggering blooms. During the growing season, daytime temperatures between 70 and 85 degrees Fahrenheit work best. Nighttime temperatures should be about 10 degrees cooler. This natural day-to-night drop helps the plant regulate its growth cycles.
Many dendrobium types require a winter rest period at around 55 degrees Fahrenheit for several weeks. This cool, dry spell signals the plant to prepare flowers for the next season. Without this rest, the orchid may produce lots of leaves but few or no blooms. If you keep your home warm all winter, consider moving the orchid to a cooler room or a basement window for four to six weeks.
Sudden temperature swings can stress the plant. Avoid placing your orchid near drafty windows, heating vents, or air conditioning units. Consistent conditions with a gentle nighttime drop are the goal.
Secret 5: Maintain Humidity Above 45 Percent
Dendrobiums prefer humidity levels between 50 and 70 percent. Indoor air, especially during winter or in air-conditioned homes, often falls well below this range. Dry air causes brown leaf tips and can prevent flower buds from forming properly.
Brown leaf tips are the most obvious sign that the air is too dry. If you notice this, increase humidity around the plant. A small humidifier placed nearby works well. Alternatively, set the pot on a tray filled with pebbles and water. Make sure the pot sits above the water line so the roots do not become waterlogged. Grouping several plants together also raises local humidity naturally.
Misting the leaves provides temporary relief but can encourage fungal problems if water sits on the foliage too long. Focus on raising ambient humidity rather than spraying the plant directly.
Secret 6: Fertilize Strategically Through the Seasons
Regular feeding supports strong growth and abundant flowers. Use a balanced orchid fertilizer during the growing season, following the label instructions for dilution. A formula with equal parts nitrogen, phosphorus, and potassium, such as 20-20-20, works well for most dendrobiums. Apply it every two weeks while the plant is actively producing new canes and leaves.
About six to eight weeks before the expected winter rest, begin reducing fertilizer. Cut the amount by roughly half. This gradual reduction helps the plant shift from growth mode to rest mode. During the winter rest period itself, stop fertilizing almost entirely. Resume feeding when new growth appears in spring.
Overfeeding can cause salt buildup in the medium, which burns roots. Flush the pot with plain water every month or two to wash away excess salts. This simple step keeps the root environment healthy and prevents nutrient imbalances.
Secret 7: Understand Your Dendrobium Type for Tailored Care
Not all dendrobiums have the same needs. The genus is divided into several sections based on flower and growth characteristics. Knowing which type you have makes dendrobium orchid care much more precise.
Dendrobium phalaenopsis hybrids, often called den-phals, are common evergreen orchids. They usually bloom in fall. A spring rebloom is possible if you give them a three- to four-week rest period with lower temperatures and drier conditions. These are among the easier types for beginners.
Dendrobium spatulata, or antelope orchids, get their name from the twisted petals that curve like antelope horns. They bloom several times a year and do not need a winter rest. Keep them warm and watered year-round for continuous flowering.
Callista species include about ten highly desirable types with bright colors and dense floral clusters. They need warm summers but cooler, drier winters. Species like Dendrobium aggregatum and Dendrobium farmeri fall into this group.
You may also enjoy reading: 9 Ways to Keep Weeds Out of Your Garden Naturally.
Latouria orchids comprise roughly 50 species. Their flowers are large and come in yellow, white, or green with dark purple or black markings inside the petals. They prefer cool to moderate conditions all year, with nights from 50 to 60 degrees Fahrenheit and days no higher than 85 degrees.
Formosae section orchids feature fine black hairs on their canes. About 30 species belong here, and they require cool to moderate conditions year-round without extreme heat. They are more sensitive to high temperatures than other types.
If you are unsure which type you have, look at the growth pattern. Deciduous types drop their leaves in winter and need a dry rest. Evergreen types keep their leaves and need less drastic changes. Matching your care routine to the specific group is one of the most effective ways to ensure success.
Pruning and Aftercare for Long-Term Health
Once the flowers fade, clip the spent bloom stems where they join the main cane. Do not cut off the old canes themselves. These canes store water and nutrients that support new growth. They may look dry or shriveled over time, but they still serve a purpose. Only remove a cane if it has turned completely brown and mushy, which indicates it is dead.
Healthy old canes can also produce new flowers in future seasons. Leaving them intact gives the plant a built-in reserve of energy. Over time, a mature dendrobium with several old canes will produce more blooms than a young plant with only a few.
Keep the growing area clean by removing fallen leaves or spent medium. Good hygiene reduces the risk of pests like scale, mealybugs, and spider mites. Inspect your orchid regularly, especially the undersides of leaves and the crevices where canes meet.
Common Problems and How to Solve Them
Even with careful dendrobium orchid care, issues can arise. Recognizing them early makes treatment much easier.
Yellowing leaves often point to overwatering or poor drainage. Check the potting medium. If it stays soggy for more than a few days after watering, consider repotting into a fresh, coarser mix. Also ensure the pot has drainage holes.
Leaf drop, especially on lower canes, can happen naturally as the plant ages. But if leaves fall suddenly or in large numbers, the cause may be temperature stress, underwatering, or a sudden change in light. Evaluate the environment and make gradual adjustments.
Failure to bloom is the most common frustration. The usual culprit is insufficient light, lack of a winter rest period, or both. Review the light exposure and temperature cycle. Moving the orchid to a brighter window and giving it a cool, dry break in winter usually resolves this within one growing cycle.
Brown spots on leaves can indicate sunburn, fungal infection, or bacterial issues. Sunburn appears as dry, pale patches on the side facing the window. Move the plant slightly farther from the glass or add a sheer curtain. Fungal spots often have a yellow halo and may spread quickly. Remove affected leaves and improve air circulation around the plant.
Root rot shows up as soft, dark, mushy roots. Healthy orchid roots are firm and silvery or greenish. If you suspect rot, unpot the plant, trim away all damaged roots with sterile scissors, and repot into fresh medium. Reduce watering afterward until new root growth appears.
Pests such as scale insects look like small brown bumps on the canes and leaves. Wipe them off with a cotton swab dipped in rubbing alcohol. Repeat weekly until they are gone. Spider mites cause fine webbing and stippled leaves. Increase humidity and rinse the plant with lukewarm water to dislodge them.
Selecting the Best Potting Mix for Dendrobium Orchids
The right potting medium is a cornerstone of successful dendrobium orchid care. Orchid bark mixes provide excellent drainage and air pockets. Medium-grade fir bark works well for most dendrobiums. Some growers mix in perlite or charcoal to increase aeration.
Sphagnum moss retains more moisture and can be useful in very dry climates or for smaller pots. However, it is easy to overwater with moss because it stays wet longer. If you use moss, adjust your watering schedule accordingly and check moisture levels carefully.
Avoid using garden soil, compost, or standard potting mix. These materials lack the airflow that orchid roots need and quickly lead to rot. The medium should break down slowly, maintaining its structure for at least two years before needing replacement.
When repotting, soak the new medium in water for a few hours before use. This prevents dry bark from repelling water initially. After potting, water thoroughly and allow the excess to drain completely.