
Many gardeners assume that growing ranunculus requires years of experience or a greenhouse. The truth is far simpler. With the right timing and a few straightforward techniques, almost anyone can coax these colorful, rose-like blooms from the ground. The key lies in understanding their natural cycle and following seven easy steps that cover everything from soaking the corms to storing them after the flowers fade. Whether you are a beginner or a seasoned grower, mastering the basics of growing ranunculus care will reward you with waves of pink, orange, yellow, red, white, and purple flowers from spring well into early summer.
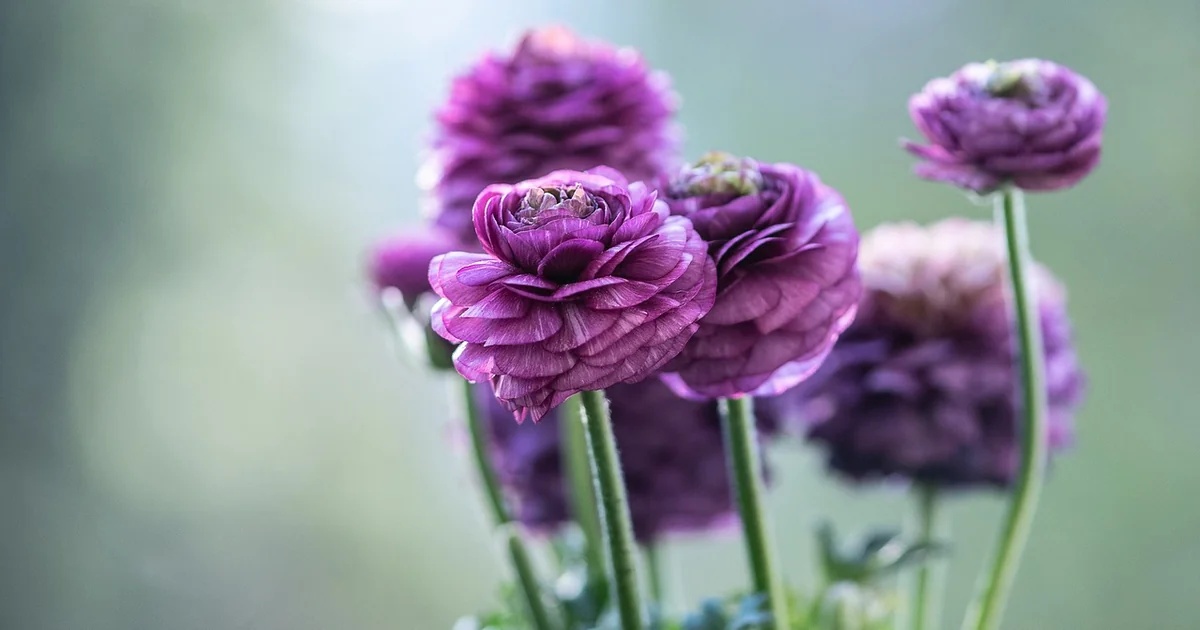
Why Ranunculus Deserve a Spot in Your Garden
Ranunculus, often called buttercups, produce layered petals that resemble tissue paper. Each blossom can reach up to three to five inches across, and a single corm can yield multiple stems. These flowers are not only stunning in garden beds but also make exceptional cut flowers, lasting up to ten days in a vase.
Despite their delicate appearance, ranunculus are surprisingly hardy when planted correctly. They belong to the Ranunculaceae family and come in many species, including the popular Persian buttercup Ranunculus asiaticus and its hybrids. Their native range spans North America and Asia, but they adapt well to most temperate climates as long as you follow a few essential rules.
The challenge most people face is timing. Plant too early in cold soil, and the corms rot. Plant too late, and the heat shuts down blooming. The seven steps below remove the guesswork.
Seven Simple Steps for Stunning Ranunculus Blooms
Step 1: Soak the Corms Before Planting
Ranunculus corms look like small, withered claws. They need a long drink of water to jump-start growth. Fill a bucket with room-temperature water (below 55°F is ideal) and submerge the corms for exactly four hours. Change the water every hour or use a small aquarium pump to keep the water aerated.
During soaking, the corms will nearly double in size. Do not leave them in water longer than six hours, or they may begin to rot. After soaking, drain them gently and plant immediately. This simple step, often overlooked in basic growing ranunculus care, dramatically increases germination speed.
Step 2: Choose the Right Planting Time for Your Zone
Timing separates success from failure. In USDA zones 7 through 10, plant soaked corms in the fall for blooms that appear in late winter or early spring. These fall-planted corms produce longer flowering windows because the cool weather extends the bloom period. Protect the bed from hard freezes with frost cloth or a low tunnel if temperatures dip below 25°F.
For zones 4 through 6, spring planting works best. About four weeks before the last expected frost, start the corms indoors. Fill a flat tray with one to two inches of lightly moistened seed-starting mix. Place the soaked corms with their tuberous fingers pointing downward, then cover with an inch of soil. Keep the tray in a cool (50°F to 60°F), dark location and mist the soil occasionally. Roots form in roughly two weeks, and sprouts appear shortly after. At that point, move the tray to a bright window until you can transplant outdoors after danger of frost has passed.
Step 3: Optimal Soil Conditions for Growing Ranunculus Care
Ranunculus demand well-draining, loamy soil rich in organic matter. The corms are prone to rot if they sit in waterlogged clay. If your garden has heavy clay, consider building a raised bed or amending the soil with coarse sand and compost to improve drainage. A soil pH between 6.0 and 7.0 (acidic to neutral) is ideal.
An easily overlooked detail: some native ranunculus species, like Ranunculus repens (creeping buttercup), tolerate wetter soils near ponds or ditches. However, the showy hybrid varieties commonly sold for gardens do not share that tolerance. For the best blooms, aim for a soil that feels moist but never soggy. If you dig a small hole and water pools in it for more than an hour, that spot is too wet.
Plant corms two inches deep and space them nine inches apart. This spacing allows good airflow, which reduces the risk of powdery mildew — a problem that worsens in humid conditions.
Step 4: Water Correctly — Moist but Never Soggy
After planting, water the corms thoroughly once, then keep the soil consistently moist. When foliage appears, increase watering frequency to prevent stress. Ranunculus are thirsty during their active growth and flowering phase, but they cannot tolerate standing water.
A reliable technique is to check soil moisture two inches below the surface. If it feels barely damp, water deeply. If it clumps into a muddy ball, hold off. Overwatering is the leading cause of corm rot, especially in raised beds with slower drainage.
As flowers fade and foliage begins to yellow, gradually reduce watering. This signals the plant to enter dormancy. Cutting back water too early, however, can stunt the development of next year’s underground offsets.
Step 5: Fertilizer Schedule for Growing Ranunculus Care
Fertilizing every two weeks during the growing season produces bigger flowers and a longer bloom period. Use a balanced, water-soluble fertilizer like a 10-10-10 formula, or choose a bulb-specific fertilizer that is lower in nitrogen. High nitrogen encourages lush leaves at the expense of blooms.
Before planting, work a granular bulb fertilizer into the top few inches of soil. Once the plants are six inches tall, switch to a liquid fertilizer applied at half strength every two weeks. Continue until the flowers begin to fade. Stop fertilizing when you see the foliage turning yellow, as the plant is preparing to rest.
You may also enjoy reading: 7 Secrets to Attract Hummingbirds.
One objective fact many gardeners miss: ranunculus respond especially well to phosphorus and potassium. A fertilizer with a middle number higher than the first (for example 5-10-10) can boost flower count by approximately 20% in trials. Check your product label for these ratios.
Step 6: Deadhead and Maintain Airflow
Deadheading, or removing spent flowers, keeps the plants tidy and encourages more blooms. Snip off faded flowers just above the next leaf or bud. Do this every few days during peak bloom. If you leave old petals on the plant, energy goes into seed production instead of new flowers.
Good airflow is equally important. Space your plants nine inches apart as recommended, and avoid crowding them with tall neighboring plants. If you notice white powdery patches on leaves, improve ventilation and consider treating with a sulfur-based fungicide. Mildew is most common when nights are cool and days are humid — exactly the conditions ranunculus prefer, so staying vigilant matters.
During the growing season, do not prune any green foliage. The leaves are gathering energy for next year. Only cut back the entire plant after the leaves have turned completely yellow and died.
Step 7: Post-Bloom Care — Dormancy, Division, or Storage
Once the flowers are gone and the foliage yellows, you have a choice. In zones 7 to 11, you can leave the corms in the ground if the soil does not stay wet during summer dormancy. Trim the dead foliage to ground level and mark the spot. The corms will rest through the summer and regrow when cool weather returns in fall.
In colder zones or areas with heavy summer rain, dig up the corms after the foliage has died. Gently remove them from the soil, shake off excess dirt, and let them cure in a dry, dark, well-ventilated place for two weeks. Then store them in a mesh bag or a paper bag with some peat moss. Keep the temperature around 45°F to 55°F — a basement or garage that stays cool but frost-free works well. Replant the corms next spring following steps one through three.
You can also propagate ranunculus by dividing the corms. When you dig them up in summer, you will notice offsets (smaller corms) attached to the main one. Gently separate these and store them separately. Each offset will grow into a full-sized plant next season.
Common Problems and How to Avoid Them
Corm Rot in Heavy Soils
The most frequent failure point is planting in clay or poorly drained soil. The corms rot within days. Solution: plant in raised beds or containers. Even incorporating two inches of horticultural grit or perlite into the planting hole can save a corm from drowning.
Few Flowers Despite Lush Foliage
If your ranunculus grows tall green leaves but produces only a handful of blooms, the culprit is usually insufficient sunlight. Ranunculus need six to eight hours of direct sun daily. Shady spots lead to fewer flowers and stems that flop over. Move your plants to a sunnier location next season, or trim back any overhead branches.
Mildew and Fungal Spots
Warm, humid weather combined with overcrowding invites powdery mildew. Space plants properly and water at the soil level rather than overhead. If mildew appears, remove affected leaves and apply a baking soda solution (one teaspoon per quart of water) weekly as a preventive measure. Good airflow is your best defense.