You can draw a convincing cat by building it from simple shapes, refining the silhouette, and adding facial details, fur, and shading in layers. You do not need advanced anatomy knowledge or expensive art supplies. The most important habits are to sketch lightly, check proportions before adding details, and make corrections as you work.
For this beginner-friendly lesson, you will draw a sitting cat facing forward. This pose is easier to construct than a walking or reclining cat because the body can be simplified into a circle, an oval, and a few curved lines.
Keep this rule in mind: Your first marks are guidelines, not permanent decisions. Draw them lightly enough that you can adjust or erase them without damaging the paper.
Drawing Supplies You Will Need
A basic pencil and paper are enough to begin. Additional tools can make shading and corrections easier, but they are optional.
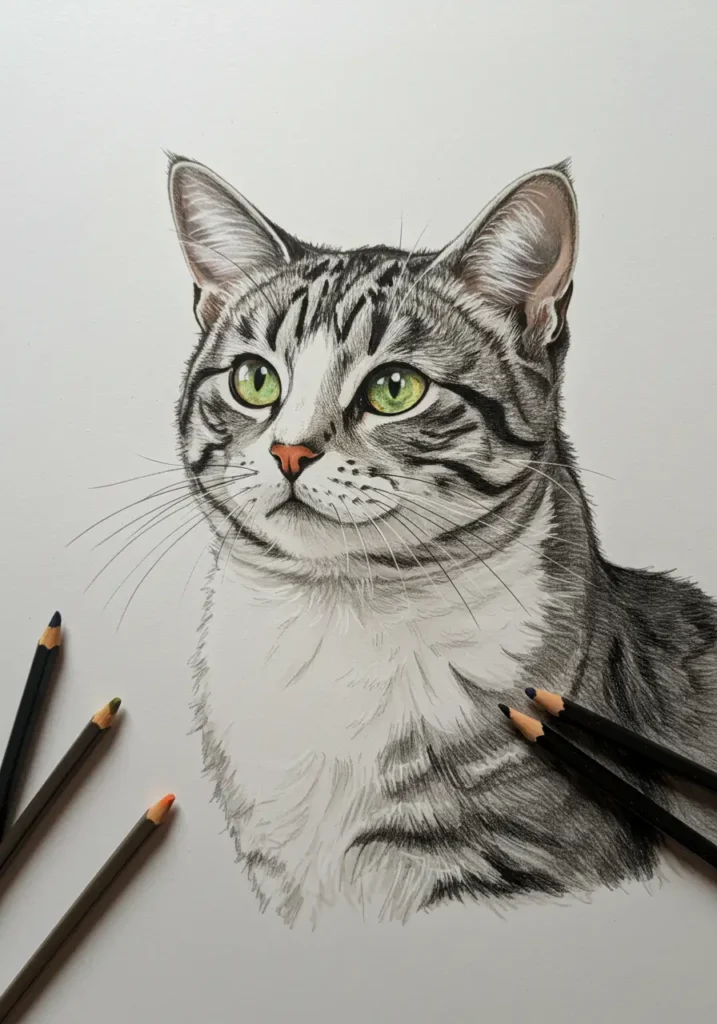
| Tool | How to use it |
|---|---|
| HB or No. 2 pencil | Draw the basic shapes, facial guidelines, and other lines that may need to be erased. |
| 2B pencil | Refine the outline and add light-to-medium shadows. |
| 4B or 6B pencil | Create the darkest shadows, pupils, markings, and areas of deep fur. |
| Drawing paper | Choose smooth or medium-textured paper that can withstand light erasing and layered shading. |
| Kneaded eraser | Lift graphite gently, soften shadows, and create small highlights. |
| White vinyl eraser | Remove larger guidelines and clean the space around the finished drawing. |
| Blending stump or tissue | Soften broad areas of shading. Use it sparingly so the fur does not appear blurry. |
If you have only one pencil, use less pressure for the construction sketch and gradually increase the pressure for darker details. Avoid pressing hard during the first steps because deeply indented lines can remain visible after erasing.
How to Draw a Cat with Basic Shapes
Before drawing whiskers, fur, or expressive eyes, establish the cat’s overall size and pose. Working from large shapes to small details makes proportion problems easier to identify and correct.
Step 1: Draw the Head and Body
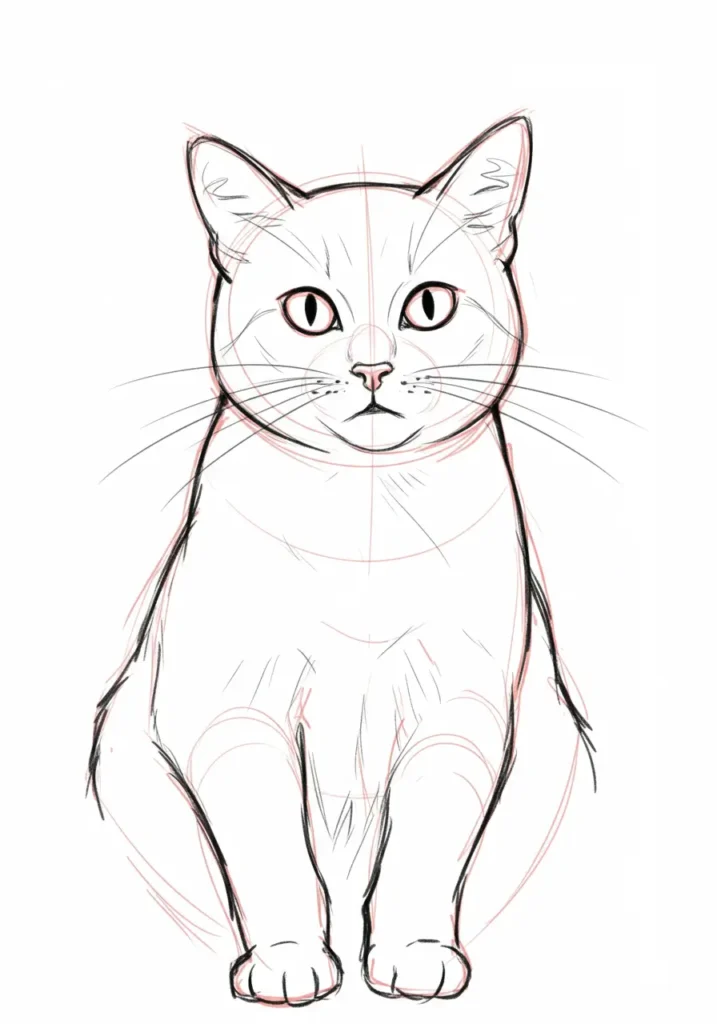
Draw a circle for the head. Beneath it, add a larger vertical oval for the torso. Let the two shapes overlap slightly rather than leaving a gap between them.
Keep both shapes loose and light. They do not need to be perfectly symmetrical. A living animal has natural curves, and you will refine the outline later.
Step 2: Connect the Head to the Body
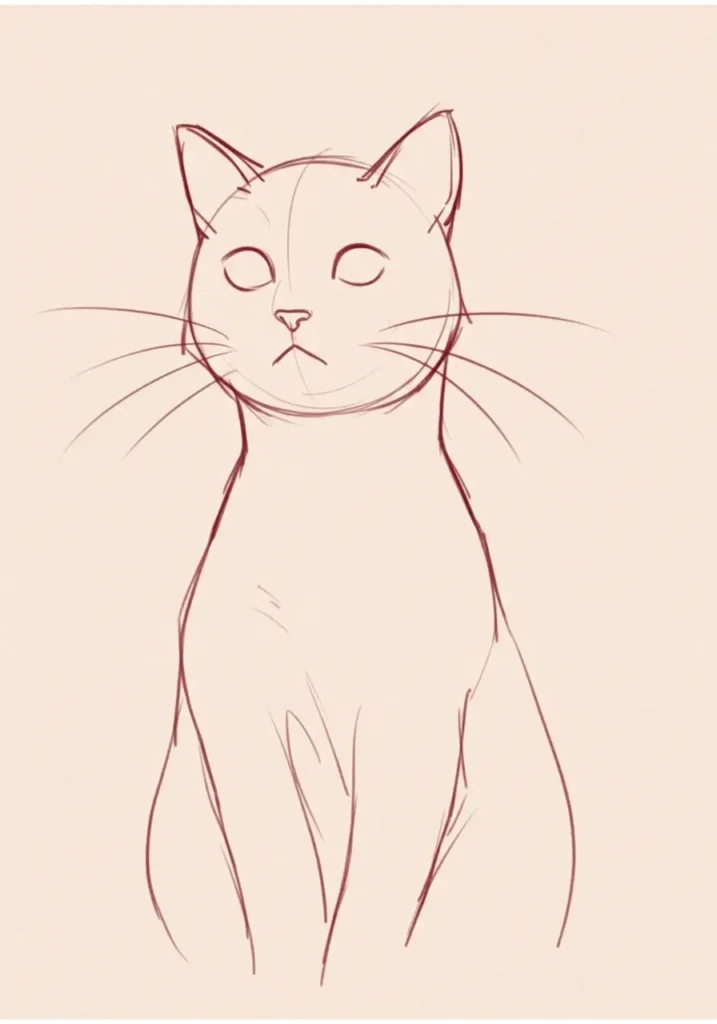
Use two short, gentle curves to connect the sides of the head to the upper body. These lines form the neck and shoulders. Avoid making the neck too narrow, especially if you are drawing a fluffy or broad-chested cat.
Next, imagine a line flowing from the top of the head, along the back, and toward the base of the tail. Thinking about this directional line helps the pose feel unified instead of looking like separate shapes placed together.
Step 3: Add the Legs, Paws, and Tail
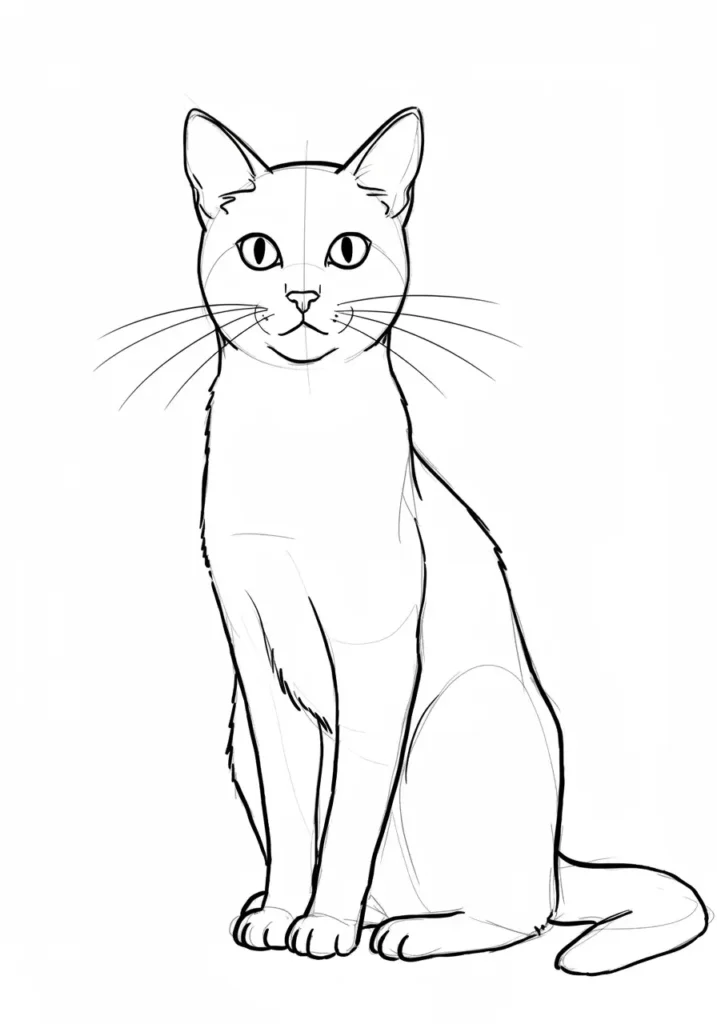
For a front-facing sitting cat, draw two long, narrow forms descending from the chest. These will become the front legs. Add small rounded shapes at the bottom for the paws.
Place a larger curved oval on each side of the lower body to represent the folded hind legs. The hindquarters should generally feel heavier than the front legs. Draw the tail as two parallel curves that taper toward the tip. An S-shaped or gently curled tail often looks more natural than a rigid straight one.
At this stage, check the balance of the pose. The paws should appear to rest on the same surface, and the body should look supported rather than suspended above them.
Step 4: Add Facial Guidelines and Ears
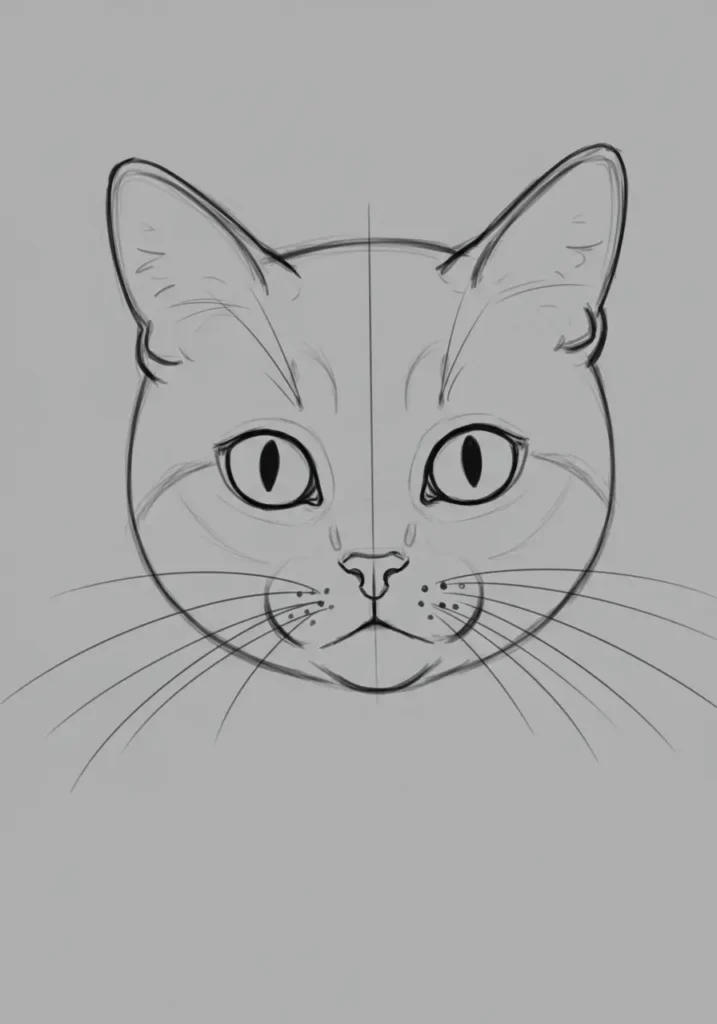
Draw a light vertical line through the center of the head. Then add a horizontal guideline for the eyes. If the head is turned, curve these guidelines around the form rather than drawing them as flat, straight lines.
Add two triangular ear shapes at the top of the head. Cats’ ears usually emerge from the upper sides of the skull rather than sitting close together at the center. Varying their angle can change the cat’s expression: forward-facing ears can suggest attention, while ears rotated slightly outward can create a relaxed appearance.
If you enjoy step-by-step drawing lessons, you can also practice constructing natural forms with this complete guide to drawing a flower.
How to Draw a Cat’s Face
The face gives the drawing its personality. Work slowly and compare the features with one another instead of completing one eye in isolation. Small differences are natural, but the guidelines will help the face remain balanced.
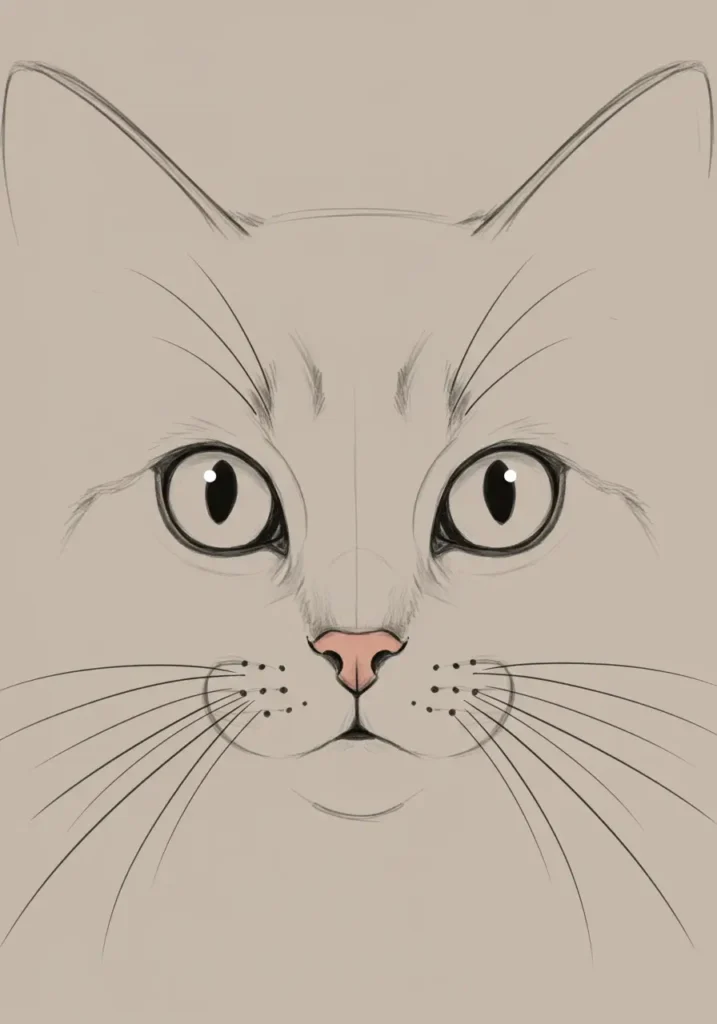
Draw the Eyes
Place two almond-shaped eyes along the horizontal guideline. Leave approximately one eye-width of space between them, adjusting the spacing to match your reference.
Inside each eye, draw the iris and pupil. A cat’s pupil may appear narrow in bright conditions and wider in dim light, so use your reference rather than assuming it must always be a vertical slit. Leave a small highlight within each eye. Keeping the highlights on the same side helps establish a consistent light source.
Darken the upper eyelid slightly more than the lower one. This simple contrast can make the eyes feel more dimensional without requiring heavy outlines around every edge.
Add the Nose and Muzzle
Place a small, softly rounded triangle below the eyes on the vertical guideline. Draw a short line descending from the nose. From its lower end, add two shallow curves to form the mouth.
Sketch the muzzle as two subtle rounded areas on either side of the nose. Do not outline them too heavily. Light shading and a few whisker dots usually suggest the structure more naturally than bold circles.
Refine the Ears and Add Whiskers
Draw a smaller triangular form inside each ear, leaving a border around it. Shade the interior gently, making the deepest area darker near the base. A few carefully placed strokes can suggest ear hair without filling the entire space.
Mark several small whisker follicles on the muzzle. Draw the whiskers with long, confident curves that become lighter and thinner toward their ends. Vary their length and direction slightly. Short, hesitant strokes tend to make whiskers look stiff or hairy.
Refine the Body and Paws
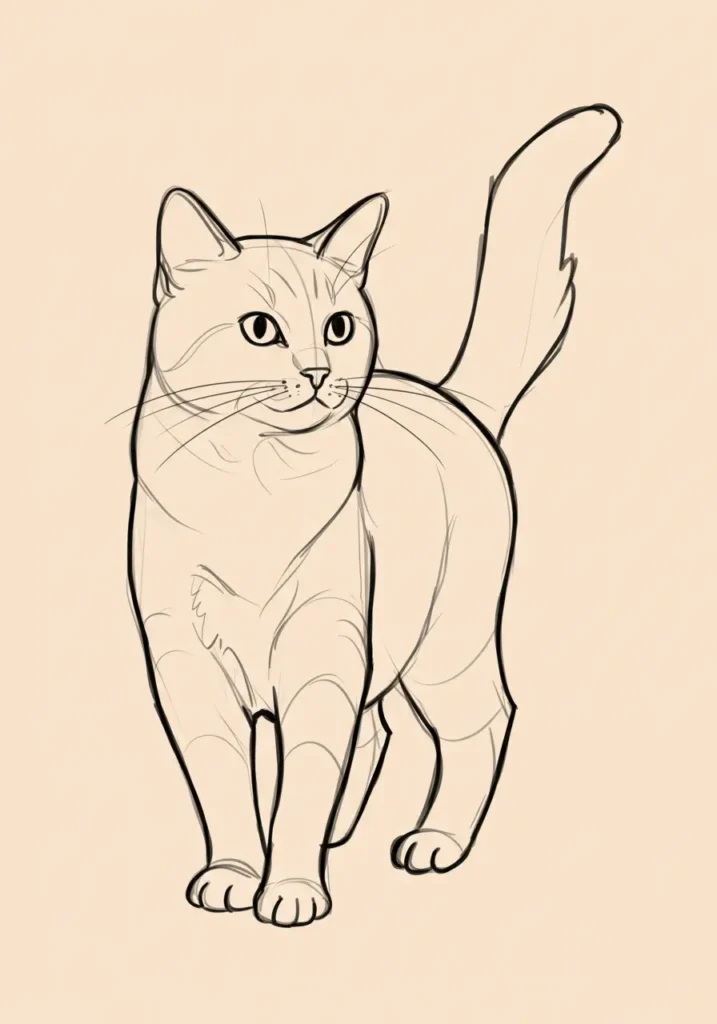
Use the construction shapes as a guide while drawing a cleaner outer contour. Follow the curves of the shoulders, chest, hips, and tail rather than tracing every circle and oval exactly.
Add a slight change in direction where a joint or muscle affects the silhouette. The front legs may narrow toward the paws, while the hind legs form broader curves on either side of the body. Separate the toes with two or three short marks instead of outlining each toe completely.
Once the overall silhouette looks balanced, erase the unnecessary guidelines. Leave any useful lines that indicate the chest, folded hind legs, or overlapping tail.
How to Check the Proportions
If the drawing looks wrong but you cannot identify why, examine one relationship at a time:
- Is the head centered over the chest?
- Are the eyes positioned at a similar height?
- Do the front legs begin beneath the chest rather than at the outer edges of the body?
- Are the hind legs large enough to support the sitting pose?
- Does the tail connect naturally to the rear of the body?
- Do both front paws appear to touch the same ground line?
You can also view the drawing in a mirror or take a photo and flip it horizontally. A fresh viewpoint often makes proportion problems easier to notice.
How to Draw Realistic Cat Fur
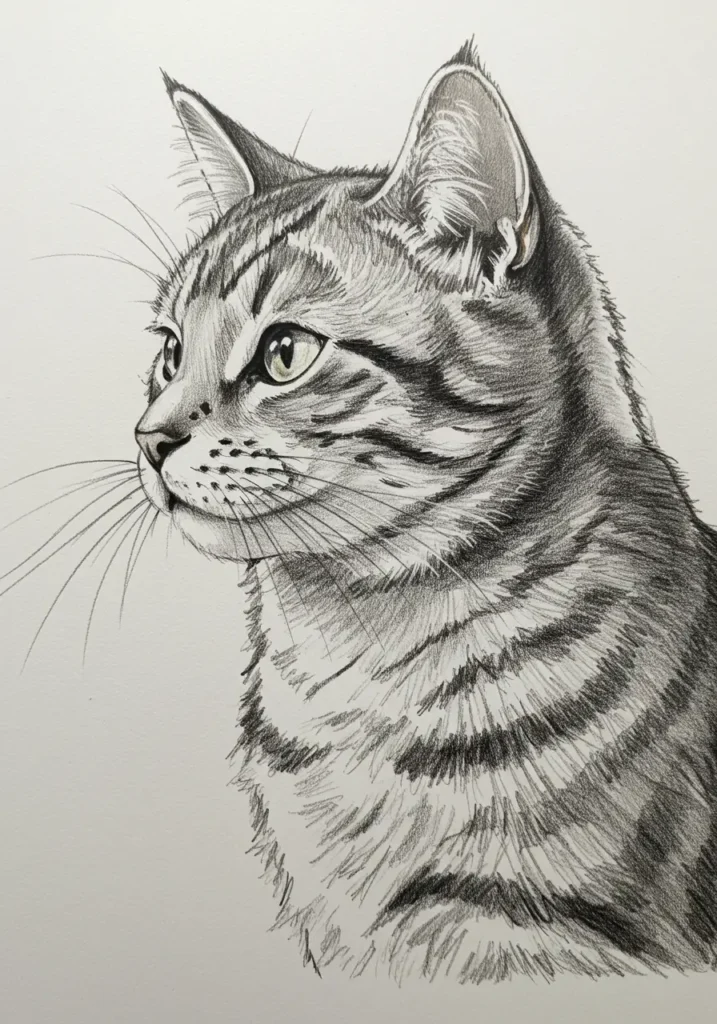
Realistic fur is created through value, direction, and selected texture—not by drawing every hair. Begin by deciding where the light comes from. Shade the large dark areas first, such as beneath the chin, between the legs, under the body, and on the side facing away from the light.
After establishing the main shadows, add clusters of tapered strokes that follow the form of the cat:
- Direct forehead fur upward and slightly outward.
- Angle cheek fur away from the nose.
- Let chest fur descend and spread toward the shoulders.
- Follow the curve of the torso rather than filling it with straight vertical marks.
- Use shorter strokes for sleek fur and longer, softer clusters for a fluffy coat.
Leave some edges smooth and allow others to break into small fur shapes. Too many equally dark strokes can flatten the drawing and create a scratchy texture. Reserve the strongest contrast for focal areas such as the eyes, nose, and cast shadows.
Add Coat Patterns Without Flattening the Form
If the cat has stripes, patches, or points, sketch the pattern lightly before darkening it. Coat markings should follow the direction and curvature of the body. For example, a stripe across a rounded leg should bend around that leg rather than appearing as a flat horizontal band.
Build dark markings gradually. Even black fur usually contains visible changes in value, especially where light strikes the forehead, shoulders, or back.
Cartoon and Realistic Cat Drawing Styles
The same construction process can support many styles. The difference lies in which features you simplify, exaggerate, or describe in detail.
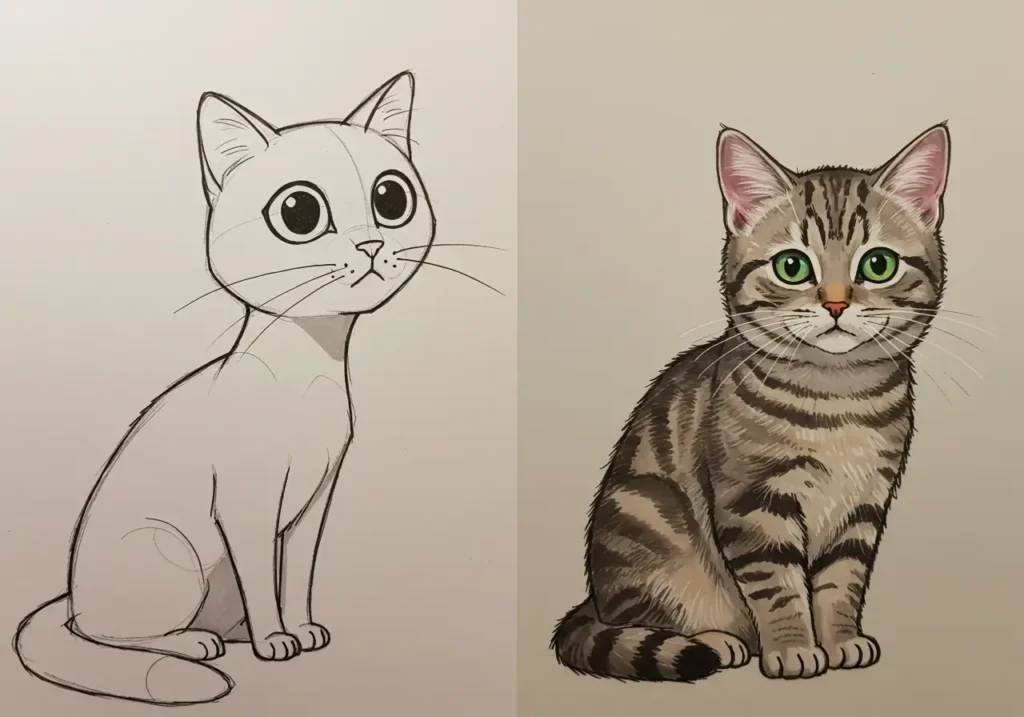
| Feature | Cartoon cat | Realistic cat |
|---|---|---|
| Head | Often larger and rounder | Based closely on the reference and skull structure |
| Eyes | Large, simplified, and highly expressive | Carefully shaped with controlled highlights and shadows |
| Body | Reduced to clean shapes and an exaggerated pose | Built with attention to weight, joints, and proportion |
| Fur | Suggested with a few tufts or markings | Developed through value changes and directional strokes |
| Line work | Clean, bold, and consistent | Varied, with some edges softened or lost in shadow |
For a cartoon cat, enlarge the eyes, simplify the paws, and use a clear silhouette. For a realistic drawing, spend more time observing the reference, measuring relationships, and building values gradually. Free cat photographs from Pexels can provide useful references for poses, lighting, coat types, and expressions.
How to Draw Different Cat Breeds
Begin with the same basic construction, then adjust the proportions and coat characteristics visible in your reference. Avoid relying on fur patterns alone; the shape of the head, ears, body, and muzzle often contributes more strongly to a breed’s appearance.
- Siamese-type cat: Use a slender body, wedge-shaped head, relatively large ears, and darker points on the face, ears, paws, and tail.
- Persian-type cat: Draw a rounder head, smaller ears, compact body, short muzzle, and long, dense coat.
- Maine Coon-type cat: Emphasize a large frame, substantial muzzle, tall ears, shaggy coat, and long tail.
- Short-haired domestic cat: Keep the body contours clear and use short, restrained fur strokes.
- Long-haired domestic cat: Expand the silhouette around the cheeks, chest, belly, and tail before adding longer fur clusters.
Individual cats vary, even within a breed. A clear photograph of the specific animal will be more useful than drawing from a generic description.
Common Cat-Drawing Problems and How to Fix Them
| Problem | Likely cause | Practical correction |
|---|---|---|
| The head appears to float | The neck and shoulders are missing or too narrow. | Connect the head to the torso with two soft curves and add a slight chest shadow. |
| The face looks uneven | The features were drawn without guidelines. | Recheck the center line and compare the distance from each eye to the nose. |
| The eyes look surprised | They are too round or surrounded by a heavy outline. | Soften the lower lids and allow the upper lids to overlap the irises slightly. |
| The tail looks stiff | It was drawn as a straight tube. | Redraw it with a flowing curve, a thicker base, and a tapered tip. |
| The fur looks spiky | Every hair has the same length, darkness, and direction. | Group strokes into varied clusters and develop large shadows before texture. |
| The cat looks flat | There is not enough separation between light and shadow. | Choose one light direction and deepen the shadows beneath overlapping forms. |
| The paws look like blocks | They were outlined too strongly. | Round the outer shape and indicate toes with only a few short lines. |
A Simple Practice Routine
You do not need to finish a detailed portrait every time you practice. Short, focused exercises often make it easier to improve a specific skill.
- Draw five head shapes: Practice front, profile, and three-quarter views using only circles and guidelines.
- Sketch three silhouettes: Use reference photos of a sitting, standing, and curled-up cat. Ignore facial details.
- Study one feature: Fill a page with eyes, ears, paws, or tails.
- Create a value study: Reduce a reference to three tones—light, medium, and dark.
- Complete one layered drawing: Combine construction, clean contours, shading, and selected fur texture.
Date your sketches rather than discarding the imperfect ones. Comparing drawings made several weeks apart can reveal improvements that are difficult to notice from one session to the next.
Frequently Asked Questions
What is the easiest cat pose for a beginner to draw?
A sitting cat shown from the front or side is a practical starting point. Its weight is stable, the torso can be simplified into a large oval, and the legs do not require complicated foreshortening.
How can I make a cat drawing look three-dimensional?
Choose a light source and shade the forms that turn away from it. Darken areas beneath the chin, behind the front legs, under the belly, and where the tail overlaps the body. Gradual transitions describe rounded forms, while sharper contrasts help separate overlapping parts.
What paper is best for a pencil cat drawing?
Smooth or medium-textured drawing paper is suitable for most beginners. Choose paper sturdy enough to handle erasing and several layers of graphite. Very rough paper creates a grainier appearance, while smoother paper makes small facial details easier to control.
Should I outline the entire cat?
Not necessarily. A uniform dark outline can make a realistic drawing appear flat. Vary the line weight, darkening areas where forms overlap and softening edges exposed to light. A bold, consistent outline may be appropriate for a cartoon or graphic style.
Can I use these steps for digital drawing?
Yes. Place the initial shapes and guidelines on a separate sketch layer with reduced opacity. Add clean line work above it, then use additional layers for local color, shadows, highlights, and fur texture. The principles of construction, proportion, light, and edge control remain the same.
Learning how to draw a cat becomes much easier when you separate the process into manageable decisions. Establish the pose with simple shapes, check the proportions, refine the face and silhouette, and add shading before individual fur strokes. With repeated observation and a willingness to adjust your early lines, each new sketch will become more confident and expressive.