Raised beds can turn compacted clay, rocky ground, poor drainage, or a hard-to-reach plot into a productive garden. They give you control over the growing mix, create clear paths, and make routine jobs such as planting and weeding more comfortable. However, they are not automatically easier in every respect: they cost more to establish than an in-ground bed, need a substantial volume of soil, and may dry out faster in hot or windy weather.
The best raised bed is not necessarily the tallest or most expensive one. It is the bed that suits your plants, your reach, your climate, and the surface beneath it. This guide explains how to choose the dimensions and materials, prepare the site, calculate the soil you need, and keep the bed productive without relying on one supposedly perfect recipe.
Are raised beds right for your garden?

Raised beds are especially useful when the existing ground is contaminated, severely compacted, waterlogged, full of stones, or difficult to cultivate. They also work well where you want a neat kitchen garden, need a higher working surface, or plan to add hoops and crop covers. If your native soil is healthy and drains well, an in-ground bed may be cheaper and less thirsty, so compare both options before building.
Better control over the root zone

A raised bed lets you create a loose, workable root zone without excavating an entire plot. This is valuable over heavy clay or construction fill, but the bed still needs a suitable base and an outlet for excess water. Raising soil does not correct every drainage problem around a house or on a frequently flooded site.

You can select a mix suited to vegetables, flowers, or herbs and improve it gradually with compost. Avoid treating the bed like a giant pot filled with a very light seed-starting or container mix. A durable raised-bed soil normally needs a mineral component as well as stable organic matter.
Earlier spring growth—with limits

Elevated soil can warm earlier in spring, particularly in a sunny bed with well-drained soil. That may help cool-season crops get started, but warm soil does not protect leaves from frost. Check the forecast and use a breathable row cover or a properly vented cold-frame top when cold nights threaten.
Improved drainage

Because the root zone sits above grade, surplus water has more opportunity to move downward and outward. This can make gardening possible on dense or slow-draining soil. Never seal the bottom with plastic, and do not assume a bed placed on concrete will drain by itself. Water needs a clear route away from the frame and nearby buildings.
More comfortable access

A higher bed reduces how far you bend, while a broad, stable cap can provide a perch. For wheelchair access, the details matter more than the label “raised bed.” Plan firm, level paths, adequate turning space, knee clearance where needed, and a width that the gardener can reach without twisting. Test the intended height and reach at a table before committing to construction.
Defined paths also keep feet out of the growing area. That protects the soil structure because you can plant, weed, and harvest without stepping on the bed.
Simpler weed and pest control—not a pest-proof garden

Starting with clean soil and separating the bed from lawn can reduce perennial weeds. Airborne seeds will still arrive, and roots from nearby trees or aggressive plants may eventually enter. Pull weeds while they are small and use mulch rather than expecting the frame to do all the work.
Elevation alone rarely stops slugs, snails, insects, or rodents. If voles or gophers are common locally, fasten galvanized hardware cloth across the base before filling. Choose a mesh opening suitable for the pest, overlap joints, and cover sharp edges. Crop covers can exclude some flying pests, but they must be installed before pests arrive and removed or opened when pollination is needed.
An easy structure for crop protection

The frame makes it easy to anchor hoops, insect mesh, shade cloth, or frost protection. Match the cover to the problem: insect mesh for pests, shade cloth for excessive heat, and horticultural fleece or row cover for light frost. Clear plastic can overheat plants quickly in sun, so a mini-greenhouse needs ventilation and regular temperature checks.
Cleaner garden organization

Raised beds establish permanent growing zones and paths, which helps with crop planning and irrigation. The frame can complement a modern, cottage, or rustic landscape, but leave enough room between beds for a wheelbarrow, mobility aid, hose, and comfortable harvesting.
Plan the location before buying materials
Measure actual sunlight

Most fruiting vegetables perform best with at least six hours of direct sun, and often benefit from more. Leafy greens and some herbs tolerate less. Observe the proposed spot several times on a clear day during the growing season; winter shadows do not show what a deciduous tree or a high summer sun will do later.
Position tall trellises where they will not shade shorter crops. In the Northern Hemisphere, that often means placing them toward the north side of a bed; reverse the principle in the Southern Hemisphere.
Keep water convenient

A nearby tap makes consistent watering much easier. Before building, decide whether you will use a hose, soaker line, or drip tubing and where the supply line will cross the path. If several beds share a system, use separate valves or zones when their crops or sun exposure differ.
Start with a stable, level base

A level frame looks better, distributes water more evenly, and places less stress on joints. On a slope, terrace each bed rather than following the incline. Do not pile loose soil against the downhill wall and expect a lightweight frame to retain it safely.
Watch for roots and site hazards

Tree roots are attracted to irrigated, fertile soil and can fill a raised bed. Site beds beyond the dense root zone when practical; repeatedly cutting major roots can destabilize or damage a tree. Also check for buried utilities before staking, digging, or driving rebar, and avoid blocking drainage grates, access panels, or property easements.
If you suspect lead or another contaminant in the soil, arrange appropriate testing and follow local public-health advice. A raised bed can reduce contact with native soil, but contaminated dust and splashed soil around the bed still require management.
Choose dimensions you can actually use

Width
A bed accessed from both long sides is commonly no wider than 4 feet (1.2 metres). That is a starting point, not a rule: shorter gardeners, children, and people with limited reach may prefer 3 feet (0.9 metre) or less. Against a wall or fence, keep the entire bed within comfortable one-sided reach—often about 2 to 2.5 feet (0.6 to 0.75 metre). You should never need to step into it.
Length
Choose a length that fits both the site and the material. Four-by-eight-foot beds are popular because standard boards make them simple to build, but shorter beds are easier to walk around. Long wooden or composite sides need stakes, posts, or cross-bracing to resist outward pressure. Include a route across the garden so you are not forced to walk around a very long bed every time.
Soil depth and overall height
Distinguish usable soil depth from the total height of the frame. If the bed is open to healthy, loosened ground, roots can continue below it. A shallow frame may therefore grow more than its board height suggests. Over concrete, heavily compacted subsoil, or a root barrier, plants depend almost entirely on the soil held inside the frame.
- 6 to 8 inches (15 to 20 cm): suitable for many shallow-rooted greens when the soil below is usable, but it dries quickly and leaves little margin for settling.
- 10 to 12 inches (25 to 30 cm): a practical general-purpose depth for many vegetables, herbs, and annual flowers.
- 18 to 24 inches (45 to 60 cm): offers more root volume over a hard surface and can make long-rooted crops easier, but greatly increases soil cost and pressure on the frame.
- Waist-high beds: reduce bending, yet require strong construction, deliberate drainage, and an economical plan for filling the non-rooting portion.
Compare raised-bed materials

| Material | Strengths | Points to check |
|---|---|---|
| Untreated wood | Natural appearance; easy to cut and repair | Rot rate varies by species, board thickness, soil contact, and climate |
| Modern treated lumber | Longer service life; widely available | Confirm the treatment and intended use on the end tag; avoid reclaimed wood of unknown origin |
| Galvanized or coated metal | Thin, durable walls; modular kits | Protect cut edges, tighten fasteners, and consider surface heat in very hot climates |
| Stone, brick, or concrete block | Stable and long-lasting; useful as a seat when properly capped | Heavy, space-consuming, and harder to level or relocate |
| Composite or recycled plastic | Resists rot; low maintenance | Cost, heat movement, and bowing vary widely; follow the maker’s support spacing |
Wood safety and durability
Cedar, redwood, and other locally available decay-resistant species are popular, but price and responsible sourcing vary. Less-resistant lumber can still be useful when cost matters and future board replacement is acceptable. Keep wood from sitting in standing water and use corrosion-resistant fasteners compatible with the lumber treatment.
Chromated copper arsenate, or CCA, is no longer used for most residential consumer applications in the United States, but older reclaimed timbers may predate that change. Do not use railroad ties, utility poles, or mystery salvage around food crops; such materials may contain creosote or other treatments unsuitable for this use. When buying treated lumber, read the label rather than assuming every product uses the same preservative. If you add an interior liner, keep it off the bottom so drainage remains open.
Metal, masonry, and composite beds
Metal walls do not automatically “cook” an entire bed, but sun-exposed edges can become hot. In a very hot climate, select a light finish, provide mulch, irrigate consistently, and avoid pressing sensitive roots against the wall. Folded or capped edges reduce injury risk.
Masonry is durable but demands a firm base. Dry-stacked walls must be stable, especially if children may climb or sit on them. Concrete products can influence the soil immediately beside them, so test the soil rather than adding acidifying amendments pre-emptively.
Composite boards differ substantially in stiffness and expansion. Use the manufacturer’s specified spans and bracing. Thin boards installed across a long unsupported run can bow once the bed is wet and full.
Also Read: Essential Garden Hand Tools
How to build a raised bed
1. Prepare the footprint

Mark the corners and measure the diagonals; equal diagonals indicate a square rectangle. Remove woody weeds, stones that prevent the frame from sitting flat, and sod around the edges. Mow ordinary lawn very short if you plan to smother it. Level the contact points, not necessarily the entire interior.
Over clean soil, loosen compaction with a garden fork without inverting the layers. Over paving, protect the surface if staining matters and make sure discharged water cannot collect against a wall. A freestanding, bottomless frame is not suitable for a balcony or roof unless a qualified professional has checked structural load, waterproofing, drainage, and local rules; saturated soil is extremely heavy.
2. Assemble and brace the frame

For wood, pre-drill near board ends to reduce splitting and use exterior-rated screws. Anchor corners to stout posts and add mid-span supports where long boards flex. For a kit, follow its sequence and install every brace supplied; the frame may feel rigid while empty but behave differently under wet soil pressure.
Check the top edge for sharp corners, exposed screws, splinters, and unstable caps. If the edge will be used as seating, design it to carry a person’s weight rather than simply adding a decorative board.
3. Add only the barriers the site needs

Use plain, non-glossy cardboard in overlapping sheets to suppress lawn, removing plastic tape and labels first. Wet it so it stays in place while filling. Cardboard decomposes; it is not a permanent defense against bindweed, tree roots, or burrowing animals.
Hardware cloth is appropriate where burrowing rodents are a documented problem. Landscape fabric is not required under a bed on soil and may impede root access or become difficult to remove. Never put an impermeable sheet across the bottom. If lining wooden sides, leave gaps or an open base for drainage and avoid trapping water against the boards.
Fill the bed without wasting money

Calculate the volume first
Multiply inside length by inside width by intended soil depth. A bed measuring 8 feet by 4 feet with 1 foot of soil needs about 32 cubic feet before allowing for settling. Divide cubic feet by 27 to convert to cubic yards. In metric units, multiply length, width, and depth in metres to get cubic metres.
Measure the interior, not the outside of thick masonry walls. Order a little extra if the mix is fluffy, but avoid a large surplus by checking whether the supplier quotes loose, screened, or compacted volume.
Choose a dependable blend, not a universal formula
There is no single ratio that works for every local product. Start with clean, screened loam or a reputable raised-bed blend, then incorporate finished compost. The result should hold together lightly when squeezed but crumble when touched; it should not be sticky clay, pure sand, or mostly undecomposed wood.
Compost is an amendment, not a complete long-term soil by itself. Excessive compost can supply more phosphorus or salts than plants need. If buying in bulk, ask what the blend contains and whether a current analysis is available. If the native soil is safe and reasonably textured, incorporating some of it can add useful mineral content and reduce cost.
Avoid “drainage layers” of gravel beneath soil. Water does not move through sharply different textures as simply as that idea suggests, and gravel consumes valuable root volume. A consistent, well-structured mix over an open base is usually more effective.
Fill deep beds strategically
For a very tall bed, you can reserve high-quality growing mix for the upper root zone and use stable, clean mineral soil below. Large quantities of fresh logs, wood chips, grass clippings, or unfinished manure can settle dramatically, temporarily tie up nitrogen, or generate heat. If you use woody material to reduce volume, expect subsidence and keep it well below the planting layer; never use treated, painted, diseased, or allelopathic wood.
Fill in lifts, water gently to settle air pockets, and stop a few inches below the rim to leave space for mulch. Do not compact the mix by walking on it.
Plant for airflow, access, and a longer harvest

Raised beds eliminate walking rows inside the growing area, so you can use the space efficiently. Dense planting still has limits. Check each crop’s mature spread, maintain airflow in humid climates, and provide access for harvesting. Crowded plants compete for light and moisture and can make leaf diseases harder to manage.
Use vertical supports for peas, pole beans, cucumbers, and compact trained tomatoes. Install trellises before roots fill the bed, anchor them against wind, and consider the shadow they cast. Place sprawling squash where vines can trail over an edge without blocking the path.
Succession planting keeps a small bed productive: follow spring radishes or lettuce with warm-season beans, then sow an autumn green when conditions permit. Timing depends on your local first and last frost dates, summer heat, and day length—not simply the calendar date in a generic plan.
Water raised beds by checking the soil

Raised-bed soil often loses moisture faster because more of it is exposed to sun and air. Check below the surface rather than watering on a fixed daily schedule. Push a finger or small trowel into the root zone; water when it is becoming dry at that depth. Seedlings and newly transplanted crops need shallower, more frequent attention than established deep-rooted plants.
Apply water slowly enough to soak in without running over the edge. Drip tubing and soaker hoses reduce splashing and can be automated, but emitters still need inspection for leaks and clogs. Periodically check moisture at several points because the head and tail of a line may not deliver equally.
Add 2 to 3 inches (5 to 7.5 cm) of clean organic mulch once seedlings are established, keeping it away from stems. Mulch moderates evaporation and soil temperature. In a cool, wet spring, delay a heavy layer if the soil needs to warm and dry.
Feed the soil according to evidence

Each year, replace settled volume with a modest layer of finished compost or a compatible soil blend. More is not always better. A soil test can reveal pH, soluble salts, and nutrient levels and help prevent unnecessary fertilizer use. Follow a regional laboratory’s sampling instructions and recommendations for the crops you grow.
Choose fertilizer based on the test and crop, then follow the label. Nitrogen needs can change through the season; phosphorus and potassium can accumulate in a contained bed. Never add lime, wood ash, sulfur, or Epsom salt simply as a yearly habit.
Rotate crops and manage problems realistically

Rotation can help reduce repeated pressure from pests and diseases that favor one plant family, but a tiny garden may not provide enough distance or years for rotation to solve a persistent problem. Remove diseased debris, select resistant varieties when available, clean supports, and avoid moving contaminated soil between beds. If you have multiple beds, keep a simple yearly map so tomatoes, peppers, eggplants, and potatoes—or cabbages and their relatives—do not automatically return to the same location.
Companion planting is most reliable when it means combining compatible heights, rooting patterns, harvest times, and water needs. Do not expect a strongly scented herb to replace monitoring, barriers, or evidence-based pest control.
Year-round raised-bed maintenance
Refresh settled soil

Organic matter decomposes and soil settles, so a falling level is normal. Top up before planting and preserve a small gap below the rim for mulch and watering. If the level drops suddenly or unevenly, check for erosion through frame gaps, rodent tunnels, decaying filler, or a failed base.
Inspect the structure
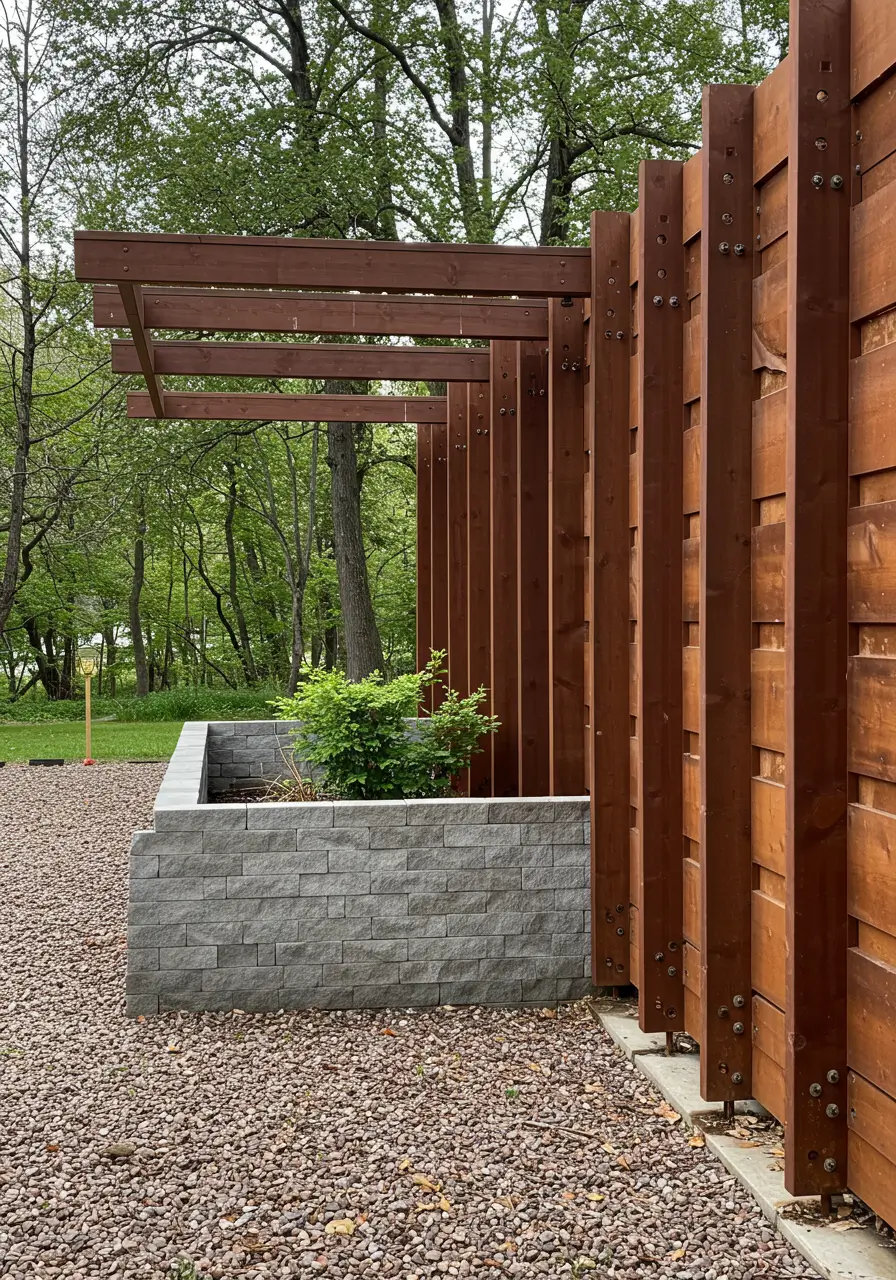
At least once a season, tighten loose fasteners, replace split boards, stabilize shifted blocks, and correct bowing before it worsens. Pay special attention after freeze-thaw cycles or heavy rain. Remove exposed sharp wire and address rot at corners or ground contact. If a tall masonry wall moves or cracks, unload the area and obtain appropriate construction advice.
Control weeds early

Pull or hoe weeds before they flower and seed. Replenish mulch as it decomposes, but inspect beneath it for slugs and moisture problems. Keep the outer perimeter free of grasses that creep under the frame, and avoid cultivating so deeply that you bring a new bank of weed seeds to the surface.
Protect soil through winter

Remove plants badly affected by disease and dispose of them according to local guidance. Healthy residues can be composted. Cover bare soil with shredded leaves, clean straw, or a climate-appropriate cover crop to reduce erosion and surface crusting. Secure lightweight mulch in windy locations.
Drain and store irrigation components that freezing could damage. Covers left on empty beds need secure anchoring and ventilation; loose plastic can tear in storms and trap excessive moisture against wood.
Common raised-bed mistakes to avoid
- Making the bed too wide: if you cannot reach the center comfortably, the soil will eventually be stepped on.
- Buying soil without checking its contents: “topsoil” and “garden mix” are not standardized descriptions everywhere.
- Filling the bed with compost alone: concentrated nutrients and rapid settling can create long-term problems.
- Sealing the base: impermeable plastic can create a waterlogged container.
- Under-bracing long walls: wet soil exerts substantial outward pressure.
- Ignoring the paths: narrow, muddy, or uneven access cancels much of the ergonomic benefit.
- Planting too densely: lush early growth can become a tangled, disease-prone canopy later.
- Using unidentified reclaimed materials: old treatments, coatings, or contamination may be unsuitable around food crops.
Raised-bed gardening questions
Do you have to remove grass first?
Not always. For ordinary lawn without aggressive perennial weeds, mow closely and cover it with overlapping plain cardboard before filling. Remove tape and glossy labels. Digging out the sod gives a cleaner edge and may be preferable for a shallow bed or when you intend to plant immediately into the native soil below.
Can a raised bed sit on concrete?
Yes, provided it has sufficient soil depth and a deliberate drainage route. Protect surfaces that could stain, keep runoff away from buildings, and understand that roots cannot reach cooler native soil below. Containers or beds on balconies and roofs require a structural load assessment because saturated growing media, water, and masonry can weigh far more than expected.
Should you line a raised bed?
Line only for a defined purpose. Hardware cloth can deter burrowing rodents; cardboard can suppress lawn; and a side liner can separate soil from a material when appropriate. Do not cover the bottom with solid plastic. A liner is not a substitute for safe construction material or adequate drainage.
How often should raised-bed soil be replaced?
Healthy soil does not need routine wholesale replacement. Add compost or compatible soil to restore settled volume, test periodically, and correct specific issues. Replacement may be necessary after confirmed contamination, severe salt buildup, or a persistent soilborne problem when other controls are inadequate.
What can you grow in a raised bed?
Most annual vegetables, herbs, strawberries, and compact flowers grow well when the bed provides the required sun, depth, drainage, and fertility. Match large perennial plants to the bed’s long-term root space. Mint, bamboo, and other vigorous spreaders may still escape through an open bottom, while large shrubs can overwhelm a small frame.
Build for the way you garden
Raised beds work best when they solve a real site or access problem. Start with one manageable bed, place it where sun and water are dependable, keep every point within reach, and spend your budget on a stable frame and trustworthy soil. Once you see how quickly the bed dries, how far you comfortably reach, and which crops you actually enjoy growing, you can expand with far fewer costly mistakes.
This Post Contains Affiliate Links