How to Draw Stairs: A Step-by-Step Guide to Perspective and Spacing
A convincing stairs drawing starts with a simple structure: equal rises, consistent tread depths, and edges that follow the same perspective. Draw the overall shape first, work out the step positions, and add railings and shadows once the stairs read clearly.
The key distinction is between actual size and drawn size. Steps can be equal in real life while looking progressively smaller as they move away from you. Measuring every visible step the same size on the page can make a perspective drawing look flat or distorted.
You need only a pencil, eraser, ruler, and paper. Graph paper helps with side views; a separate guide layer serves the same purpose when drawing digitally. Start with a short flight so you can understand the construction before drawing a full staircase.
Understand the parts you are drawing
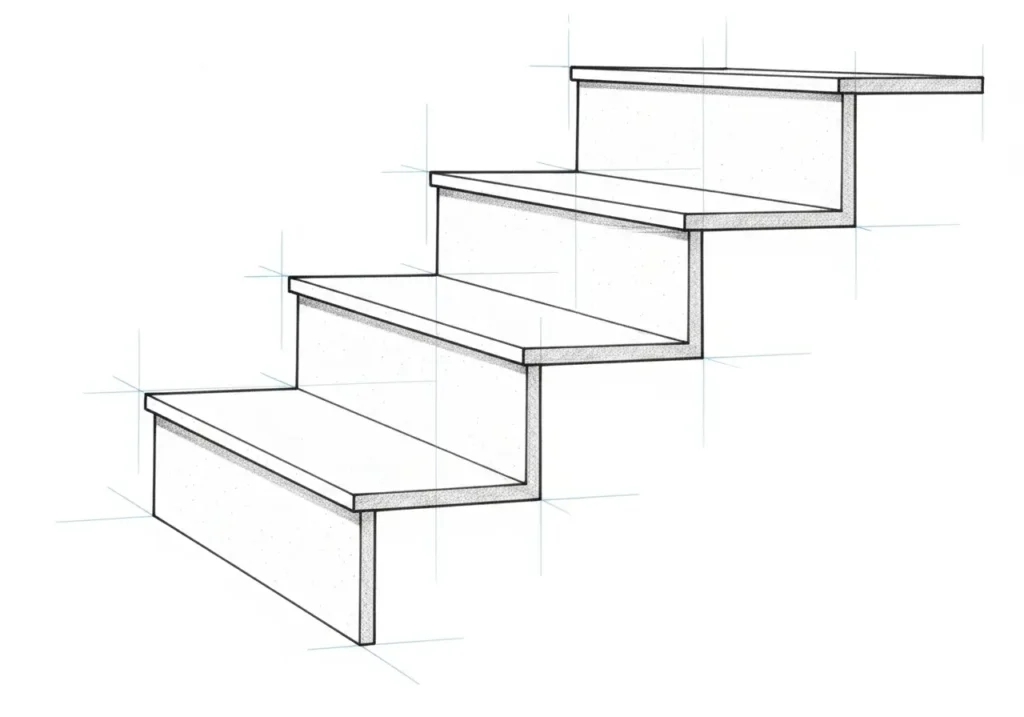
A staircase repeats a horizontal surface and a vertical rise. Knowing which is which makes both drawing and troubleshooting easier.
- Tread: the surface you step on.
- Riser: the upright face between successive tread levels. Open stairs may have no solid riser face.
- Rise: the vertical distance from one step level to the next.
- Going: the horizontal distance between successive tread fronts. “Run” can describe this distance or the overall horizontal travel, so label it clearly.
- Nosing: the front edge of a tread, which may project beyond the riser.
- Landing: a level area at the end of a flight or between flights.
- Flight: an uninterrupted series of steps.
Count rises and treads separately. When an upper landing forms the final walking surface, a flight commonly has one fewer separate tread than risers. Labeling “four risers and three treads to the landing” is clearer than writing “four steps.”
Choose a view that suits your goal
| View | Useful for | Main drawing rule |
|---|---|---|
| Side elevation | Learning the step pattern and showing rise and going | Use horizontal treads and vertical risers without perspective shrinkage. |
| One-point perspective | Facing a flight of stairs | Depth edges aim toward one vanishing point; widths stay horizontal. |
| Two-point perspective | Looking at stairs from an angle | Width and depth edges use different vanishing points. |
| Isometric | Clear diagrams and illustrations | Parallel edges remain parallel instead of converging. |
| Plan view | Showing the footprint, turns, and landings | Draw the staircase from directly above. |
For perspective drawings, the horizon represents eye level. A vanishing point gives a shared destination to a family of parallel edges receding into the scene. The National Gallery’s explanation of perspective introduces how these lines create depth. :contentReference[oaicite:0]{index=0}
Keep the viewpoint consistent. If you position your eye level above a short staircase, its tread surfaces will be visible. From a low viewpoint, higher treads may disappear behind their front edges. Do not force every surface into view.
Start with a simple side-view exercise
Before adding perspective, draw a small staircase as a flat profile. This separates the step pattern from the challenge of depth.
- Draw a lower floor line and mark an upper level eight grid squares above it.
- From the lower floor, draw a riser two squares upward.
- Draw a tread three squares to the right.
- Repeat the rise-and-tread pattern until you have three treads.
- Add a fourth riser to reach the upper level, then extend a horizontal line for the landing.
You now have four equal rises and three equal goings leading to a landing. These grid proportions are for drawing practice, not construction dimensions. Keep this profile nearby as a reference when you build the same shape in perspective.
Draw stairs in one-point perspective
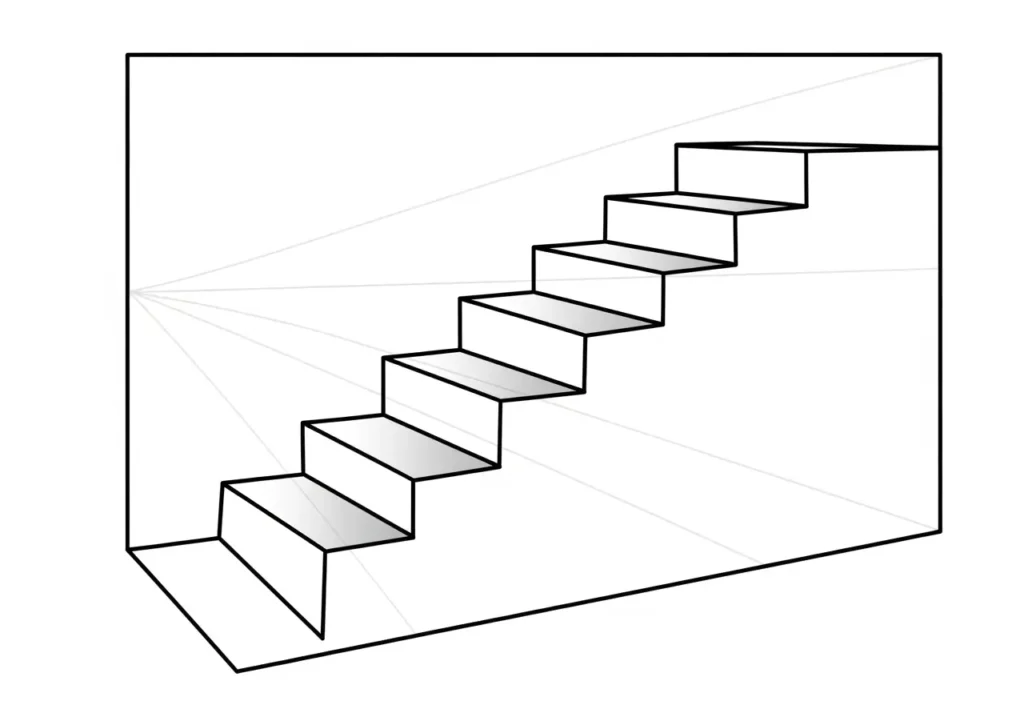
This exercise uses four risers, three intermediate treads, and an upper landing. Think of the stairs as a stepped shape cut from a transparent rectangular box.
1. Set the horizon and stair box
Draw a light horizon across the page and mark a vanishing point near its center. Below the horizon, draw a wide front rectangle. Its height represents the staircase’s total rise, not the first riser.
Connect all four corners to the vanishing point with faint lines. Choose where the box ends and close its back face with vertical and horizontal lines. Keep the whole box below the horizon for this first exercise so the top surfaces remain visible.
2. Establish four equal height levels
Divide each front vertical edge into four equal lengths. Join matching marks across the front, then project the marks back toward the vanishing point along the two side faces.
These guides represent evenly spaced heights throughout the box. Their apparent spacing becomes smaller farther away. Do not redraw them as equally spaced horizontal bands across the whole page.
3. Divide the depth without guessing
On one side face of the box, draw both corner-to-corner diagonals. Their intersection identifies the center of that rectangular face in perspective. Draw a vertical through it to split the depth into two equal real-world portions. Repeat within each half to create four depth sections.
Those sections should narrow as they recede. Repeat on the opposite side, using horizontal cross-checks to align corresponding boundaries. This diagonal method also appears in Oxford University Press’s illustrated perspective exercises. :contentReference[oaicite:1]{index=1}
4. Trace the staircase through the grid
On each side face, start at the lower front corner. Go up to the first height guide, follow that guide backward to the first depth division, then rise vertically to the second height guide.
Continue the pattern: back one depth section, up one height level. After the fourth rise, follow the box’s top edge through the final depth section. That last surface represents the beginning of the upper landing.
Join matching corners of the left and right profiles with horizontal lines. These connections form the tread fronts and the lower edges of the riser faces.
5. Keep only the visible edges
Lighten the box and grid. Remove lines hidden behind solid surfaces, then strengthen the visible stair outline. Extend the landing if the scene needs more floor space at the top.
Check three things before shading: the tread fronts are horizontal, the riser edges are vertical, and the tread depth edges point to the same vanishing point. Uneven-looking steps are often a projection problem, not a shading problem.
Draw stairs in two-point perspective
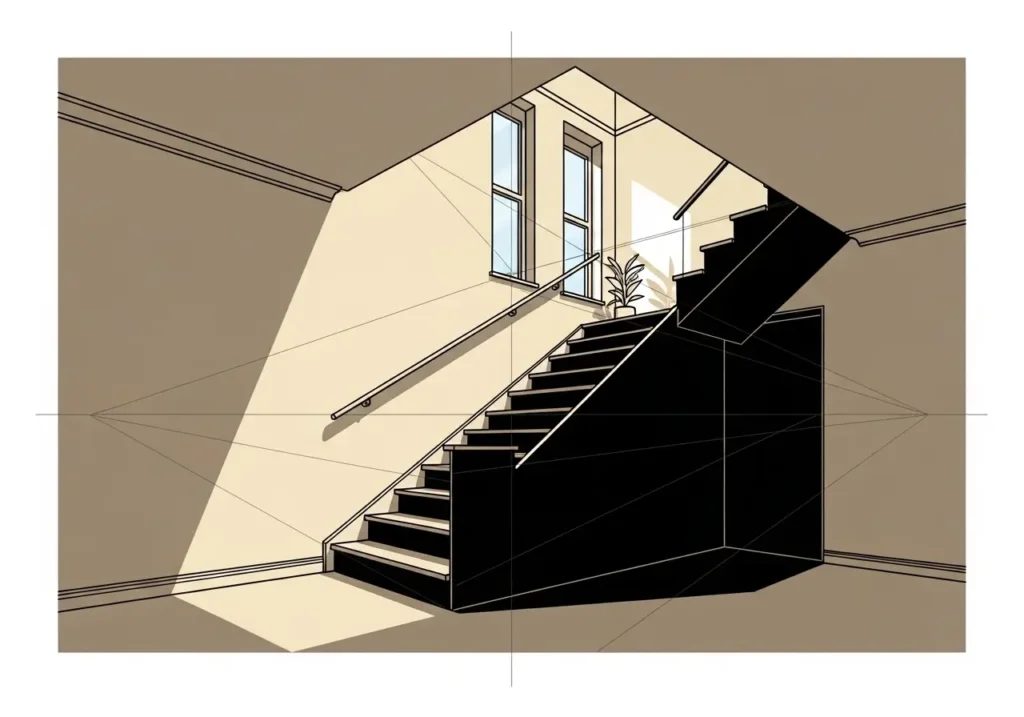
Use two-point perspective when you want to show the front and side of a staircase. In a standard level view, verticals remain upright while the two horizontal edge directions recede toward separate points on the horizon.
- Place two vanishing points. Give them plenty of space, even beyond the drawing area, to avoid an excessively pinched box.
- Construct the stair box. Start with the nearest vertical corner. Project its top and bottom toward both points, then close the box with the remaining edges.
- Choose the climbing direction. Label one point “depth” and the other “width” on your guide layer.
- Build the side grid. Divide the nearest vertical into equal rise intervals and project those marks toward the depth point. Use diagonal subdivision on the side face to locate equal depth sections.
- Draw the stepped profile. Alternate vertical rises with receding tread edges inside that grid.
- Transfer the profile across the width. Send each corner toward the width point until it meets the corresponding construction on the opposite side.
- Clean the drawing. Remove hidden edges and check the two families of receding lines separately.
A frequent mistake is drawing tread fronts horizontally after beginning a two-point drawing. In this view, those front edges recede toward the width point. Use the same guide system for nearby walls, doors, and landings that share the staircase’s orientation.
Draw isometric stairs for a clear diagram
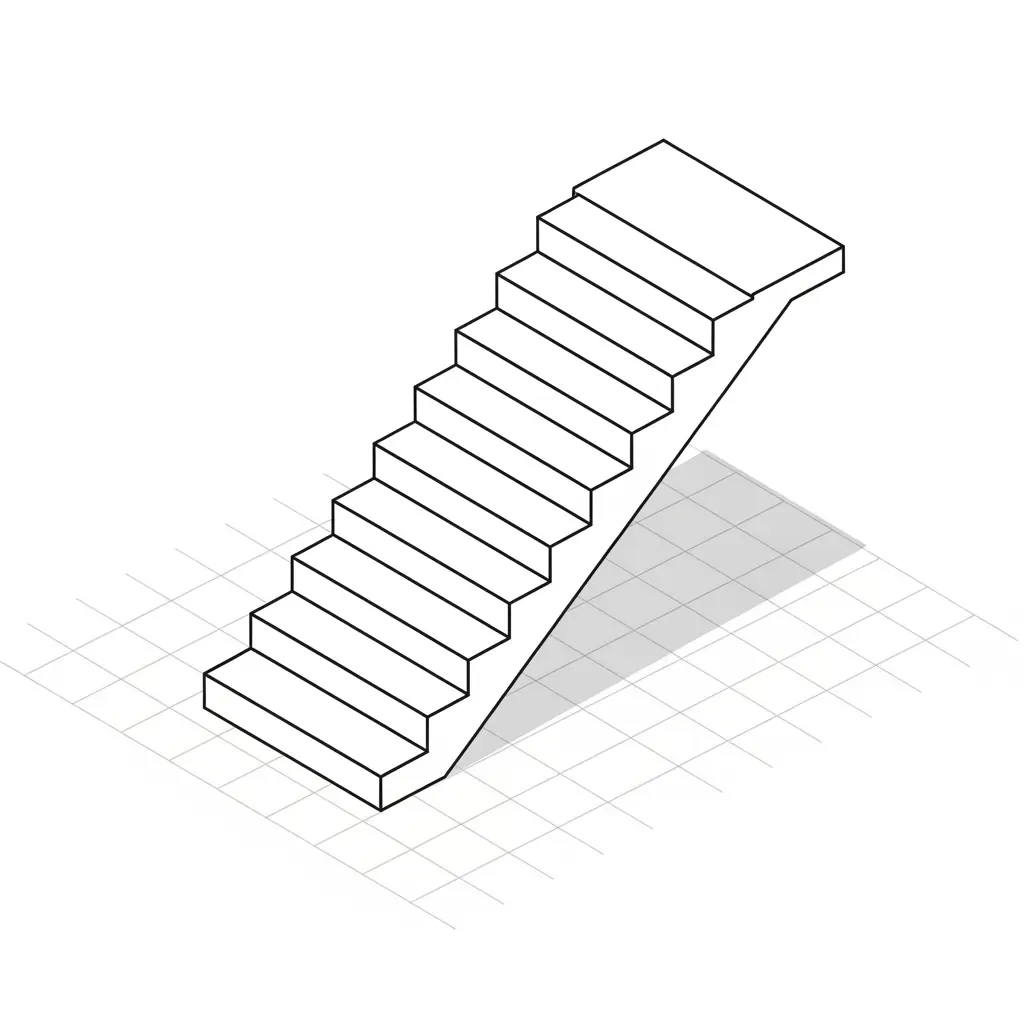
Isometric drawing removes perspective shrinkage. A standard isometric grid has a vertical direction and two directions angled 30 degrees above the horizontal, one to each side.
- Choose one sloping direction for the staircase’s length and the other for its width.
- Draw a side profile using equal vertical rises and equal tread lengths along the length direction.
- From every profile corner, draw the same width distance along the width direction.
- Connect the transferred points to complete the opposite profile.
- Erase hidden edges and add a light tone to one visible face.
Keep each family of edges parallel. Do not make distant treads smaller or aim them toward a vanishing point. For a scaled diagram, use a consistent scale along the three axes; do not measure arbitrary screen angles as though they were true lengths.
For another beginner exercise in building recognizable forms from simple shapes, try how to draw a cat step by step.
Use plan and side views to explain a layout
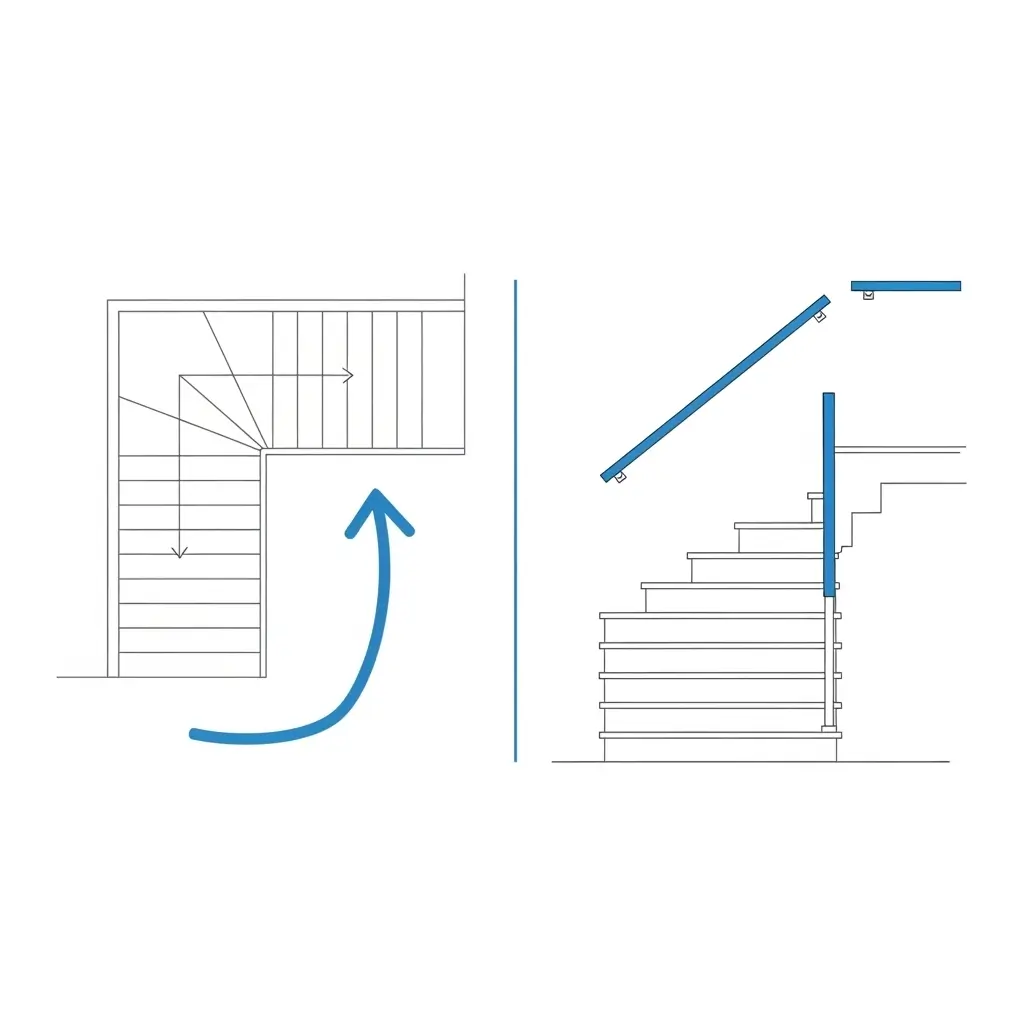
A plan shows where the staircase sits. A side elevation shows how it climbs. Used together, they communicate information that a perspective sketch can hide.
What to include in a plan view
Draw the stair footprint, then add tread-front lines across its width. Leave landings clear and mark the direction of travel with an arrow labeled “UP.” For a turning stair, show the second flight and label the destination floor.
If the plan shows only part of a flight because of a drawing cut, make the break explicit. A casual layout sketch can show the whole flight, but it should not be confused with a formal construction plan.
What to include in a side elevation
Show the finished lower and upper floor levels, the riser count, the going, and the landings. In an unforeshortened elevation, equal rises and goings are drawn equally.
Rise calculation: total finished floor-to-floor height divided by the number of risers equals the height of each riser. For a flight with uniform goings, its horizontal travel between the first and last riser lines equals the number of intervening treads multiplied by the going.
These relationships help organize a sketch. A staircase intended for building also needs its dimensions, headroom, structure, handrails, guards, and applicable local requirements checked by a qualified designer or builder. A convincing illustration alone does not establish a buildable design.
Add turns, landings, and exterior settings
L-shaped and U-shaped stairs
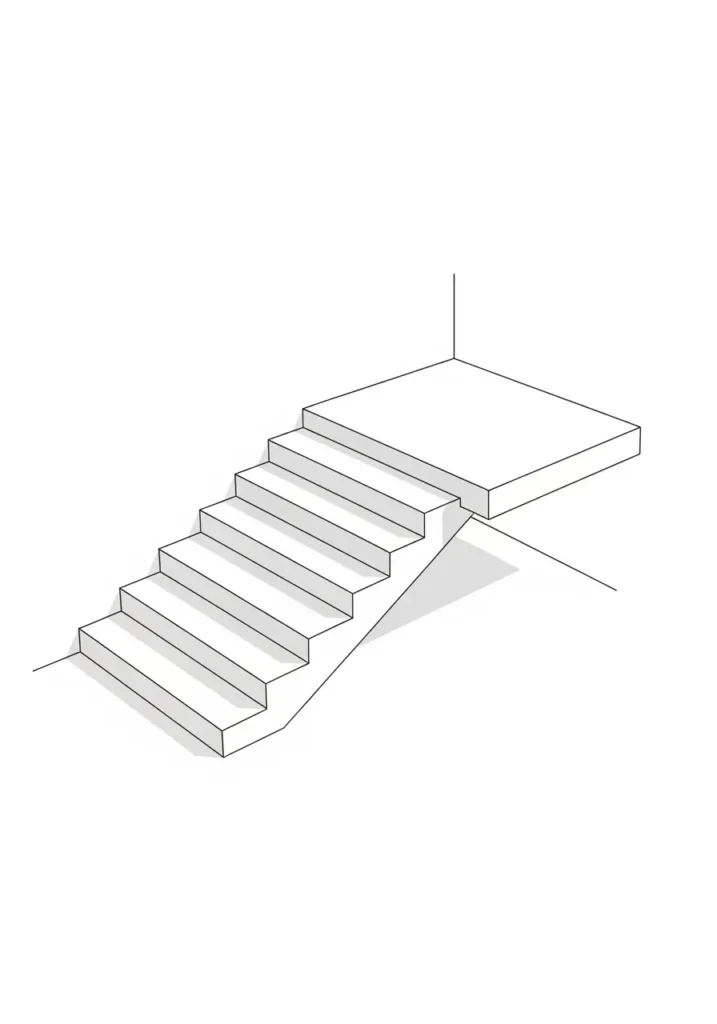
Draw the landing before the second flight. Its height must match the top of the first flight, and its edges must follow the scene’s perspective.
For an L-shaped stair, turn the second flight 90 degrees. In a two-point scene, this typically swaps the roles of the width and depth vanishing points. For a U-shaped stair, bring the second flight back alongside the first, with a gap or dividing wall if the layout calls for one.
Maintain the same actual rise between steps in both flights, while allowing perspective to change their visible size. Check the floor connections before adding railings.
Winders and spiral stairs
Winders turn a corner through tapered treads instead of a rectangular landing. Establish their shape in plan first, then transfer their corners to successive height levels. Simply drawing equally sized triangles can give a misleading result.
For a spiral illustration, sketch a center axis and an outer circular footprint. Mark angular positions in plan, then raise each successive tread by one consistent rise. In perspective, horizontal circular boundaries appear as ellipses; the elevated outer tread corners trace a helix rather than one flat ellipse.
Both forms are easier to study from a clear photograph or model after you can draw a straight flight reliably.
Porch, deck, and garden steps
Show where the bottom riser meets the ground and where the upper tread meets the porch or deck. Add the platform thickness and any visible side support so the flight feels connected to its surroundings.
A ground shadow, wall edge, or nearby doorway gives the viewer useful context. Draw the ground plane first if the setting slopes; otherwise, the lower steps can appear to float.
Make the stairs believable with railings, line weight, and light
Construct the handrail from the stairs
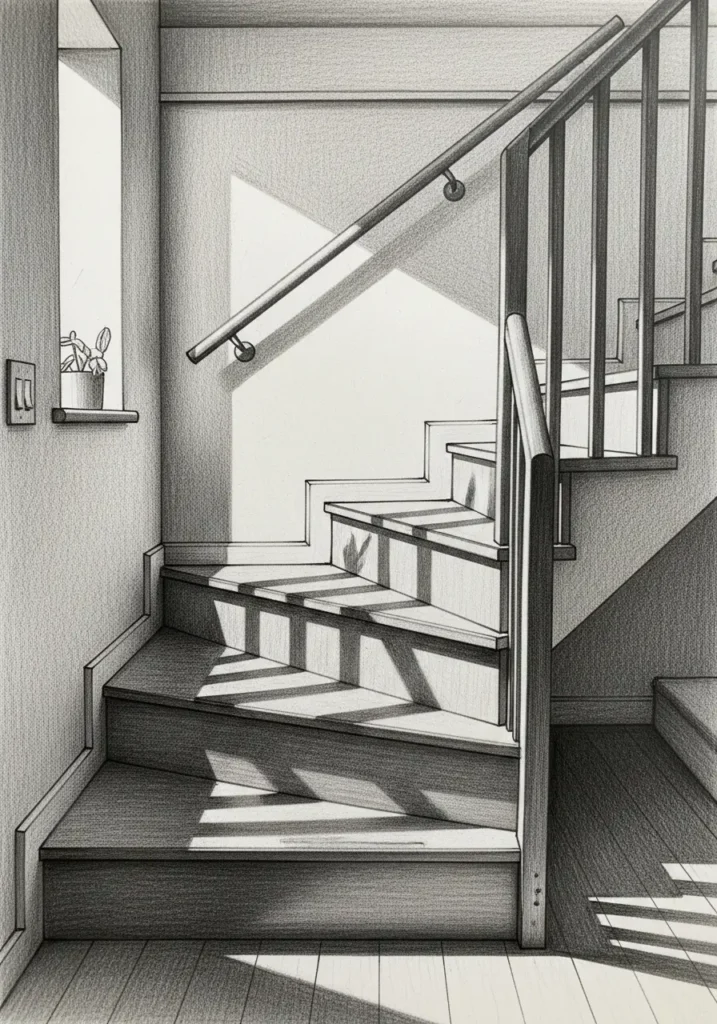
Block in the main posts before drawing small balusters. Establish a consistent vertical height above the tread nosings using your perspective guides, then connect the resulting points along the flight.
A sloping handrail does not generally aim at the horizon vanishing point used by horizontal tread-depth edges. Its direction is inclined. Building it from correctly positioned post tops avoids forcing it into the wrong perspective.
At a landing, show how the sloping rail meets the level section. Keep post spacing consistent in the stair’s actual layout, with spacing diminishing in perspective.
Use three line strengths
- Light: construction guides and subtle material marks.
- Medium: visible tread and riser boundaries.
- Dark: selected outer contours, overlaps, and deep contact shadows.
Darkening every edge equally can make the drawing busy. Preserve a clear silhouette and let the smaller details stay quieter.
Shade according to the light source
Choose a light direction before adding tone. With light from above, exposed treads may be lighter than upright risers. An overhanging nosing can cast a narrow shadow beneath its edge, but a flush tread should not receive an invented overhang shadow.
Keep surfaces with similar orientations broadly consistent under the same light. Add a cast shadow where the staircase blocks light from reaching the floor or wall. Check a reference if the lighting is complex.
Finish with a few material cues: grain following the tread surface for wood, restrained speckling for concrete, or softer transitions for carpet. Texture should sit on the established planes.
Fix the most common stairs drawing problems
| What looks wrong | What to check | How to fix it |
|---|---|---|
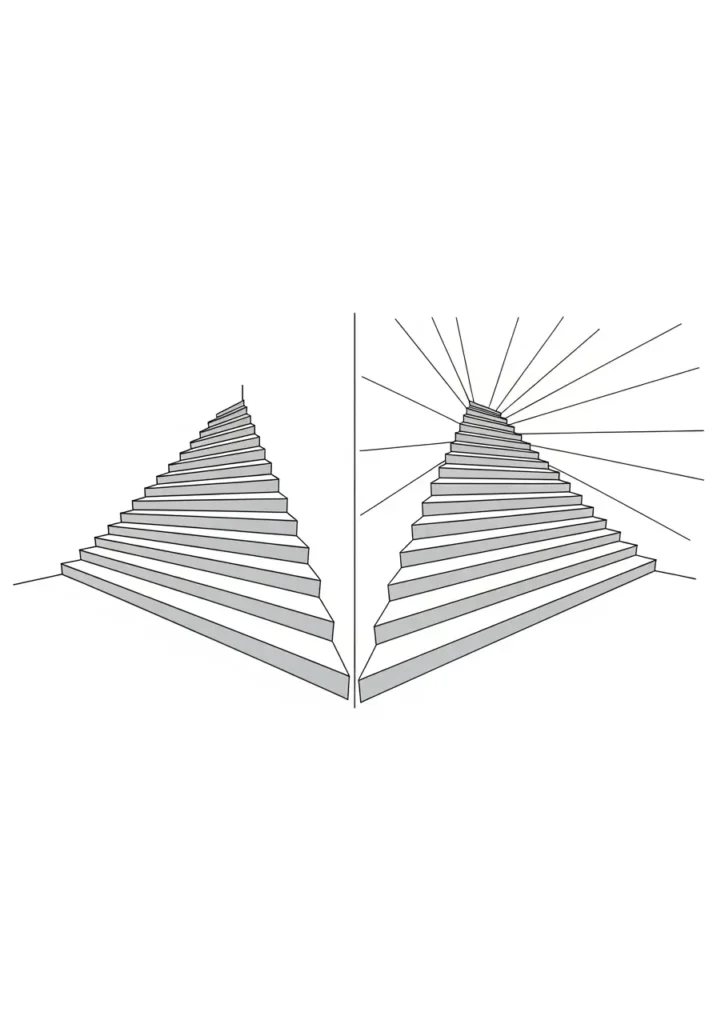
| The steps look uneven | Height guides and depth divisions | Rebuild the side grid; equal real-world intervals should shrink with distance. |
| The staircase twists | Receding edges use inconsistent directions | Extend a few suspect edges lightly and check their vanishing points. |
| The flight looks like a ramp | Riser faces are missing or barely visible | Clarify the vertical faces and overlaps; consider whether the viewpoint hides them. |
| The stairs look too steep | The side profile’s rise-to-going relationship | Recheck the overall height and horizontal travel. Adding a landing alone does not change a flight’s slope. |
| The rail seems detached | Post bases, post heights, and landing connections | Reconstruct the posts from the stair surfaces before connecting their tops. |
| The drawing feels flat | Visible planes have no clear separation | Improve overlaps, line weight, and light direction before adding texture. |
A short practice routine that builds accuracy
Draw the same four-riser staircase three times: once in side elevation, once in isometric, and once in one-point perspective. Keep its underlying proportions consistent so you can see what each drawing system changes.
On the perspective version, leave the guides visible until the step positions are settled. Then add one landing, one rail, and a simple light-and-shadow pattern. If the unshaded structure already reads as a solid staircase, you are ready to try a longer flight or a turn.