Have you ever stared at a blank page with a pencil in hand, wondering why your sketches don’t capture what you envision in your mind—and what if just a few simple techniques could bridge that gap?
Creating captivating pencil sketches doesn’t require innate talent – it’s a skill honed through practice and understanding fundamental techniques. Whether you’re a complete beginner or an experienced artist looking to refine your abilities, these 19 pencil drawing tips will guide you toward creating stunning artwork. This guide covers everything from selecting the right tools to mastering advanced shading techniques. Get ready to transform your pencil drawing.
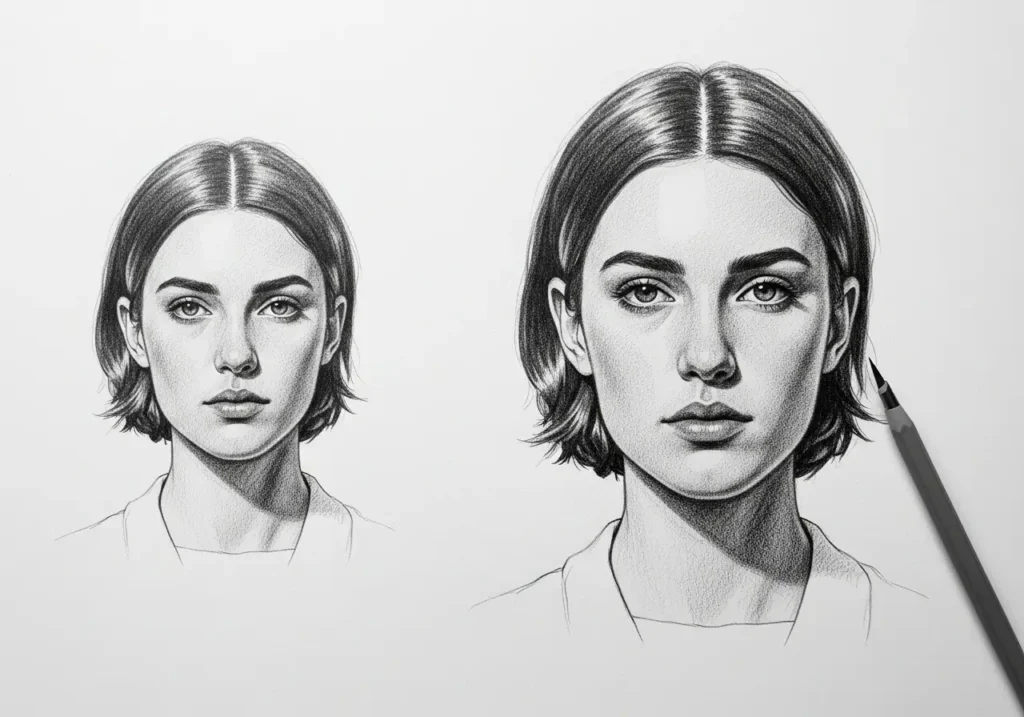
Why Pencil Drawing Matters: The Foundation of Artistic Expression
Pencil drawing stands as one of the most accessible and fundamental art forms. It requires minimal tools: a pencil, paper, and a willingness to explore. Yet, its simplicity belies its profound power. It serves as the bedrock for countless artistic disciplines, from painting and sculpture to digital art and design. Mastering the art of pencil drawing equips you with essential skills that translate across all creative endeavors, making it a crucial starting point for any visual artist.
The beauty of pencil drawing lies in its directness and immediacy. It allows artists to quickly capture ideas, explore forms, and refine compositions without the complexities of color or elaborate mediums. It fosters keen observation, trains the hand-eye coordination, and develops a nuanced understanding of light, shadow, and perspective. This foundational practice hones your ability to translate three-dimensional reality onto a two-dimensional surface. It teaches you to see the world with an artist’s eye, discerning underlying shapes, varying values, and intricate textures in everything around you.
Embracing the journey of pencil drawing cultivates patience, persistence, and a profound appreciation for detail. It is often a meditative process that allows for focused expression and a deep connection to your subject. Whether you aim to create hyper-realistic portraits, whimsical caricatures, precise technical illustrations, or abstract concepts, a strong foundation in pencil drawing provides the necessary tools and confidence to bring your vision to life. This guide offers essential tips to elevate your skills and produce truly stunning sketches.
Quick reflection: What’s the one aspect of pencil drawing you’ve always wanted to master but found most challenging?
Key Principles of Effective Pencil Drawing
Successful pencil drawing relies on understanding core artistic principles. These fundamentals guide your hand and eye, enabling you to create compelling and realistic artwork. Mastering these concepts forms the backbone of your pencil drawing journey and allows for consistent improvement.
Understanding Light and Shadow: The Illusion of Form
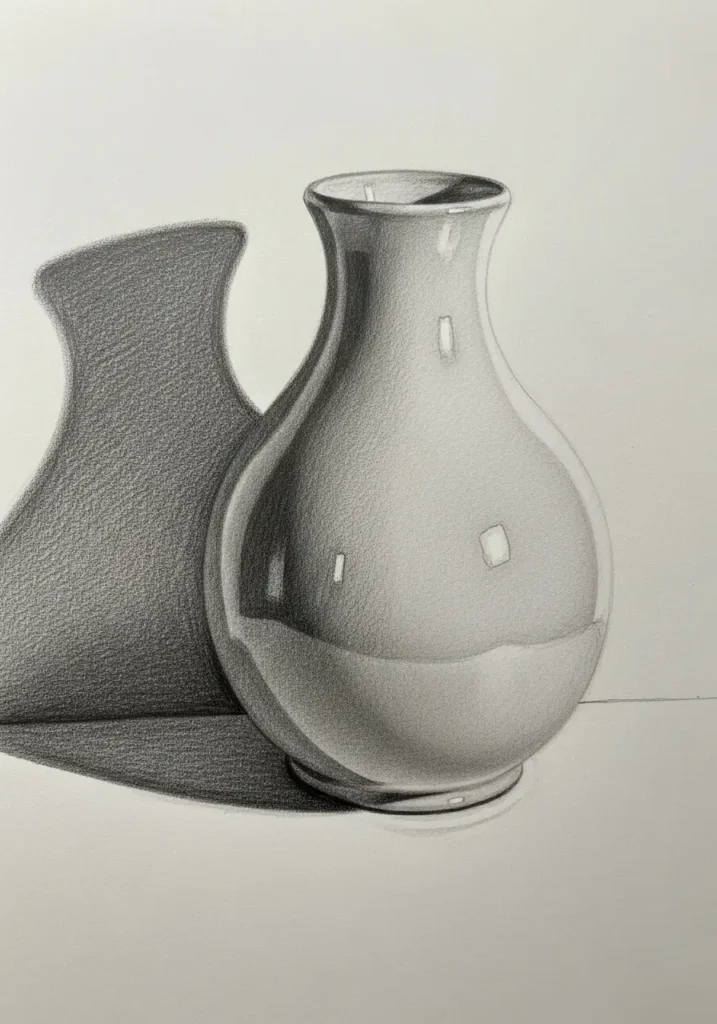
Light and shadow are absolutely fundamental to creating the illusion of three-dimensional form on a flat surface. Light reveals form by illuminating surfaces, while shadow conceals. Understanding how light hits an object allows you to identify highlights (where light hits directly), mid-tones (areas partially lit), and core shadows (areas where light is blocked). This intricate interplay of light and shadow defines volume, depth, and the very solidity of objects in your pencil drawing. Observe how light falls on objects in your daily life, noticing how shadows wrap around curves and define edges.
Accurate depiction of light and shadow transforms a flat shape into a believable, tangible form. It adds realism, emotional weight, and captivating visual interest to your sketches.
Mastering Line Quality: Expressing Emotion and Detail
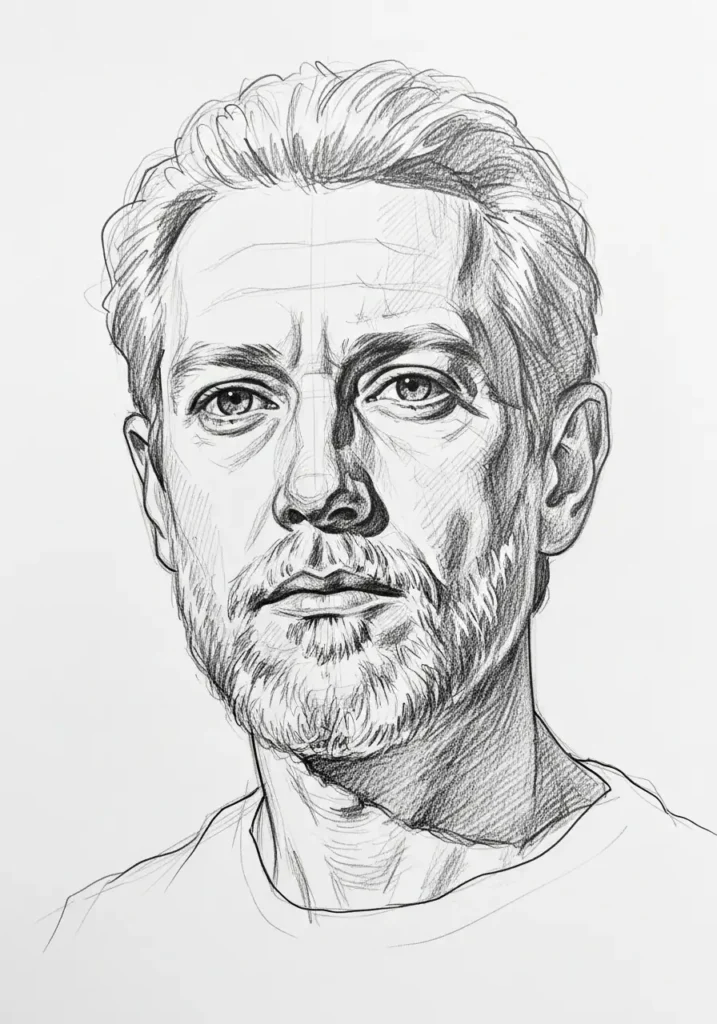
Line quality refers to the thickness, darkness, and overall character of your lines. Varying line quality adds immense expressiveness and crucial depth to your pencil drawing. Use lighter, delicate lines for initial sketches, intricate details, and areas that recede into the background. Employ darker, bolder lines for strong outlines, emphasizing forms, or defining areas in shadow that come forward. A confident, varied line tells a story, conveys emotion, and guides the viewer’s eye through your composition.
Experiment with different pressures you apply to your pencil and explore various pencil hardnesses. This helps you achieve a full range of line qualities, from a whisper-thin outline to a strong, defining stroke. Consistent practice develops remarkable control over your hand.
Perspective Basics: Creating Depth
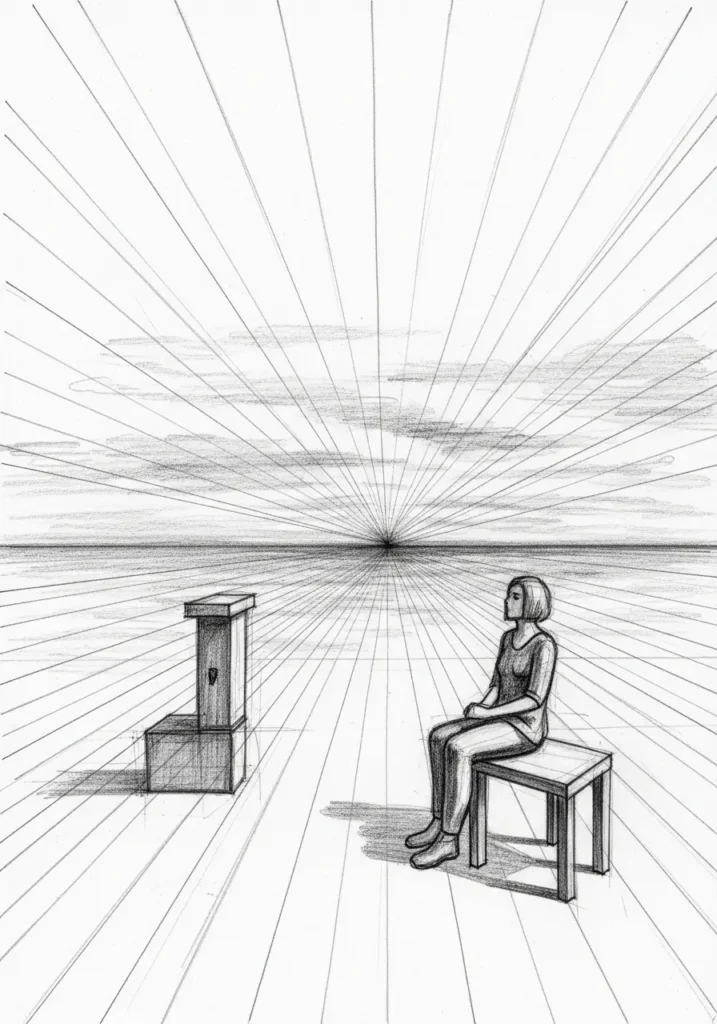
Perspective is the essential technique for creating the illusion of depth and distance on a two-dimensional surface. Understanding concepts like one-point, two-point, and atmospheric perspective helps you draw believable scenes and objects within space. Remember that objects generally appear smaller as they recede into the distance, and parallel lines seem to converge at a vanishing point on the horizon line. This fundamental knowledge allows you to accurately construct believable spaces and objects within them.
Accurate perspective adds realism and a sense of spatial awareness to your pencil drawing. It makes objects feel grounded within their environment, giving your sketches a profound sense of depth and three-dimensionality.
Patience and Practice: The Path to Mastery

Artistic skill is rarely an overnight phenomenon; it develops steadily over time through consistent and dedicated effort. Patience is absolutely essential. Do not expect perfection immediately. Instead, embrace the ongoing learning process and view each drawing, regardless of its immediate outcome, as a valuable step in your skill development. Practice regularly, even if it’s just for short periods each day. Persistent effort is the most powerful tool for continuous improvement in pencil drawing, unlocking your potential over time.
View mistakes as crucial learning opportunities rather than failures. Focus on consistent, gradual improvement rather than flawless results from the start. This growth mindset fuels long-term artistic development and helps you sustain your passion for pencil drawing.
19 Essential Pencil Drawing Tips for Stunning Sketches: A Written Tutorial
These practical tips offer actionable steps for artists of all levels. Incorporate them into your routine to enhance your pencil drawing skills and create more compelling and visually stunning sketches.
1. Choosing the Right Tools: Your Artistic Arsenal
The foundation of any great drawing lies in the quality and variety of your tools. Let’s explore the essential components of your pencil sketching kit.
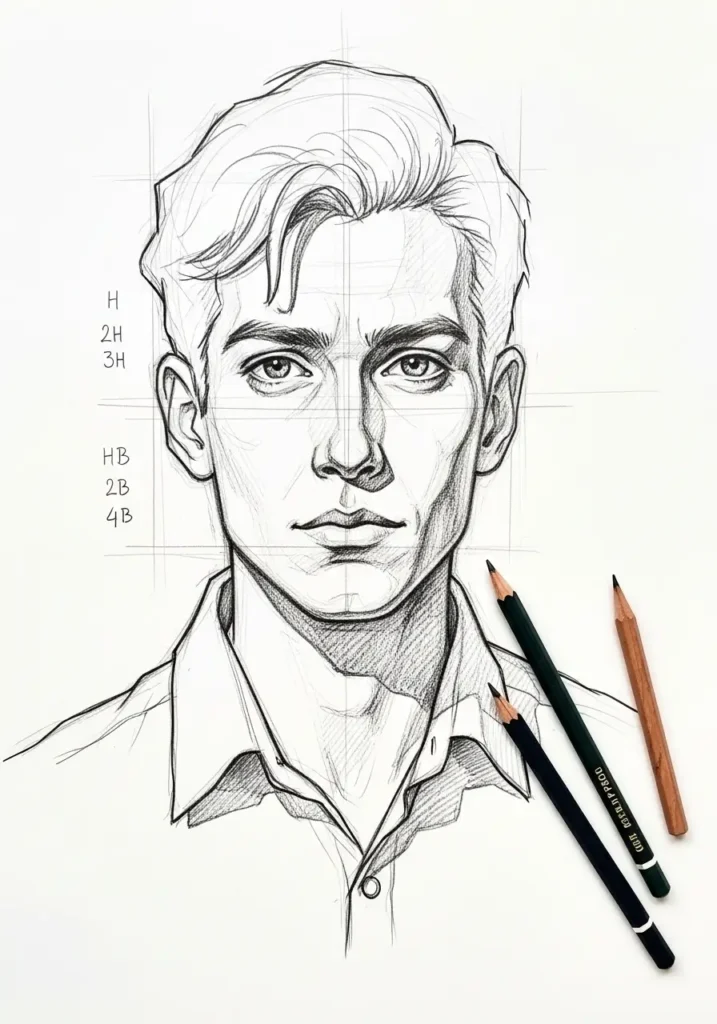
Pencils are graded on a scale from H (hard) to B (soft), with HB in the middle.
H Pencils (H, 2H, 3H, etc.): These are hard pencils that produce light, thin lines. They are ideal for technical drawings, architectural sketches, and creating light underdrawings or initial outlines for your sketches. Use them for adding faint guidelines to your pencil drawing.
HB Pencil: This is a versatile all-purpose pencil suitable for both writing and sketching. It provides a balanced medium between darkness and hardness, making it a great starting point for beginners.
B Pencils (B, 2B, 3B, etc.): These are soft pencils that create dark, thick lines. They are perfect for shading, rendering textures, and adding rich depth to your drawings. They are especially suitable for beginners delving into pencil drawing.
Graphite Pencils: These pencils create a wide range of values without the sharpness of traditional wood-cased pencils, often used for smooth shading.
Tip: Invest in a range of pencils, perhaps a small set like 2H, HB, 2B, 4B, and 6B, to achieve a full spectrum of values and tones in your sketches.
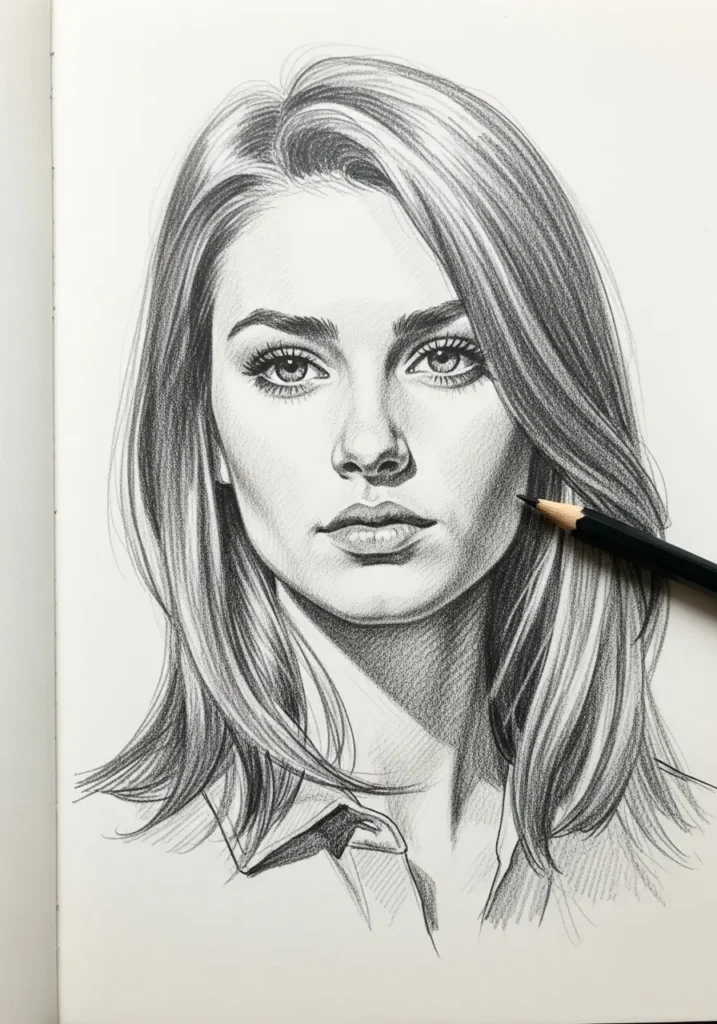
Selecting the Right Paper: The texture and weight of your paper significantly impact the final result of your drawings.
Smooth Paper (Hot-Pressed): This paper type is ideal for highly detailed drawings and precise linework. Its smooth surface allows for smooth, even shading and fine detail.
Textured Paper (Cold-Pressed): This paper offers more tooth, which is the subtle texture that effectively grabs the graphite. It is excellent for creating a variety of textures and adding tangible depth to your sketches.
Sketchbook Paper: This is typically a lighter weight paper suitable for practicing techniques, quick sketches, and daily artistic exercises.
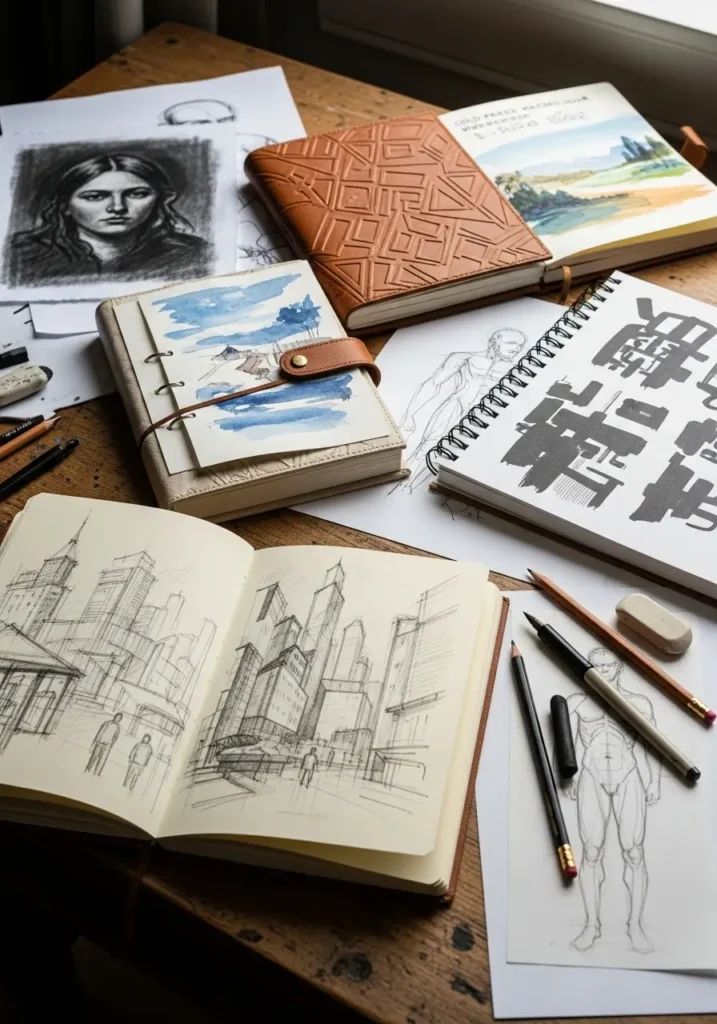
Tip: Experiment with different types of paper to find what genuinely suits your individual style and the specific type of sketches you are creating. A good quality sketchbook is an essential companion for consistent practice.
Essential Accessories:
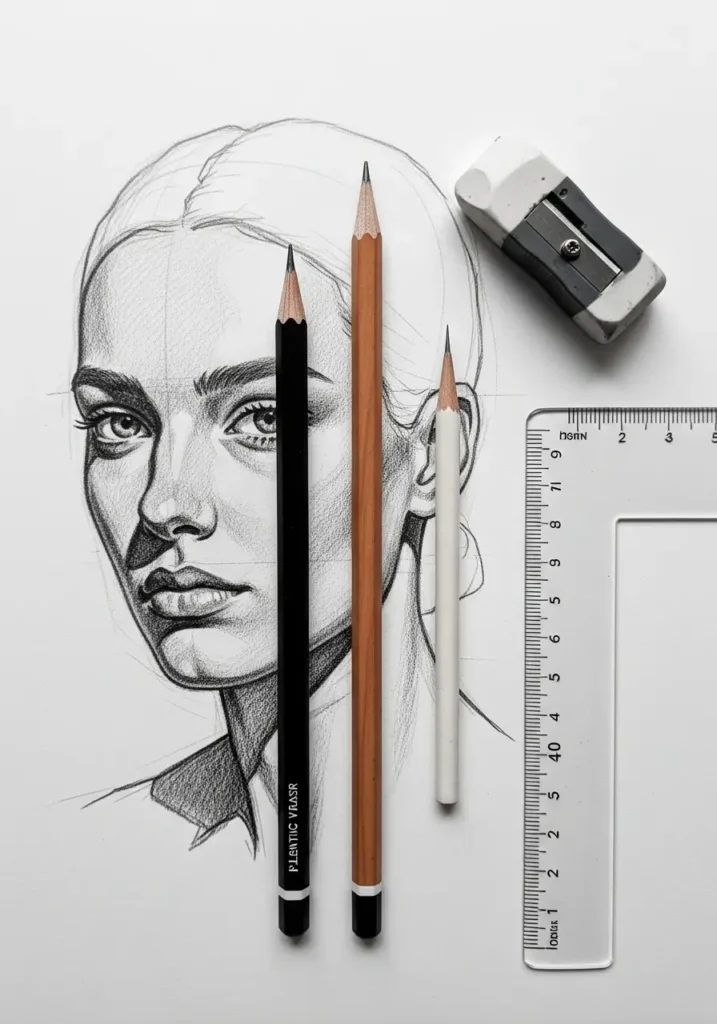
Erasers:
Kneaded Eraser: This is a moldable, putty-like eraser. It is ideal for gently lifting graphite, lightening areas, and creating subtle highlights without damaging the paper surface.
Plastic/Vinyl Eraser: This eraser provides clean, precise erasing, effectively removing darker lines and details without smudging.
Pencil Eraser: Often found at the end of a pencil or as a stick, it is useful for erasing smaller, more precise details.
Pencil Sharpener: Always keep your pencils sharp for precise linework, fine details, and consistent shading.
Blending Stumps/Tortillions: These are tightly rolled paper tools used for smoothly blending graphite and creating soft, seamless transitions in your shading.
Ruler/Straightedge: Use this for drawing accurate straight lines and precise geometric shapes, especially in foundational sketches.
Sandpaper Block/Pencil Pointer: This tool allows for sharpening pencil points to an exceptionally fine tip, which is perfect for very intricate details.
2. Mastering Basic Techniques: Building Blocks of Art
Before attempting complex drawings, focus on mastering these fundamental techniques. They form the building blocks for all your future artistic endeavors.
Line Weight Variation: Varying the thickness and darkness of your lines adds significant depth and visual interest to your sketches. Press harder for thicker, darker lines, and lighter for thinner, lighter lines. This technique effectively emphasizes forms, creates a sense of dimension, and guides the viewer’s eye through your pencil drawing.

Exercise: Practice drawing lines of varying thicknesses and darkness, focusing on precise, controlled pressure and smooth transitions.
Hatching and Cross-Hatching:
Hatching involves creating value and tone by drawing parallel lines.
Cross-hatching involves layering these parallel lines at different angles (e.g., perpendicular) to create darker values and richer textures. The closer and more numerous the lines, the darker the resulting tone.

Exercise: Practice creating different values using both hatching and cross-hatching techniques. Focus on controlling the spacing and angle of your lines to achieve smooth, even tones and varied textures.
Stippling: Stippling involves creating value and tone using a multitude of small dots. The closer and denser the dots, the darker the value appears. This technique is excellent for rendering textures like skin, sand, or fabrics.
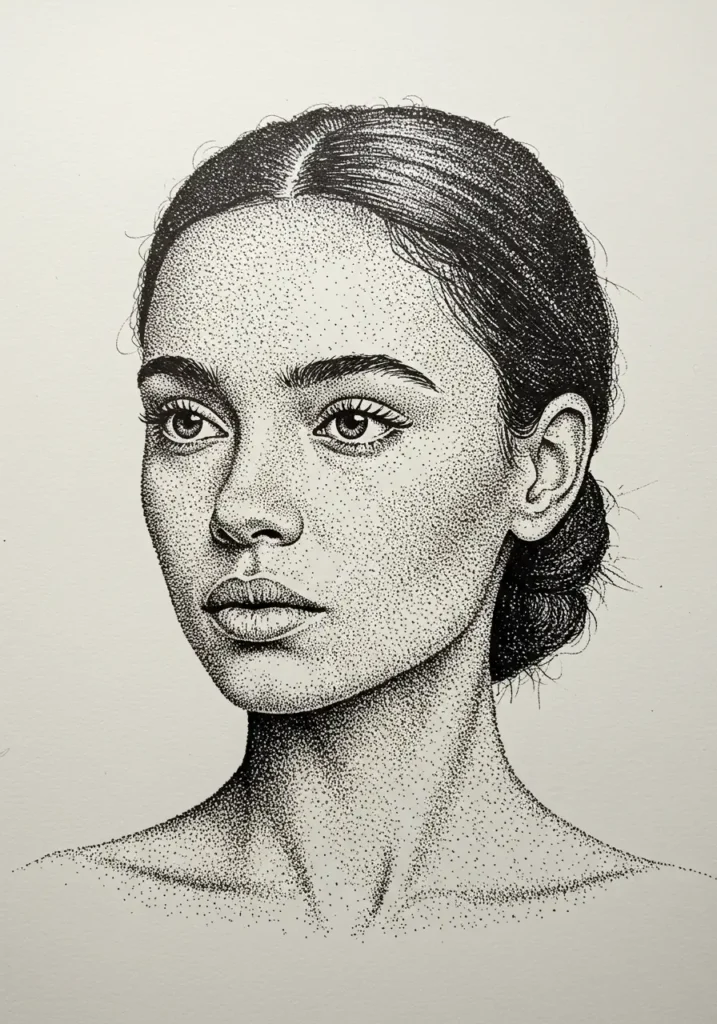
Exercise: Practice creating different values using stippling. Focus on meticulously controlling the density and consistency of your dots to achieve smooth tonal transitions.
Blending: Blending involves smoothly evening out graphite to create seamless transitions and soft, ethereal shadows.
Techniques:
Finger Blending: Use your finger to gently rub and blend the graphite. Be careful not to smudge the drawing excessively or transfer oils from your skin. This method can create a soft, natural look.
Blending Stump: This is a specialized paper tool, either a blending stump or a tortillion, designed for precisely blending graphite. It allows for more controlled and cleaner blending than a finger.
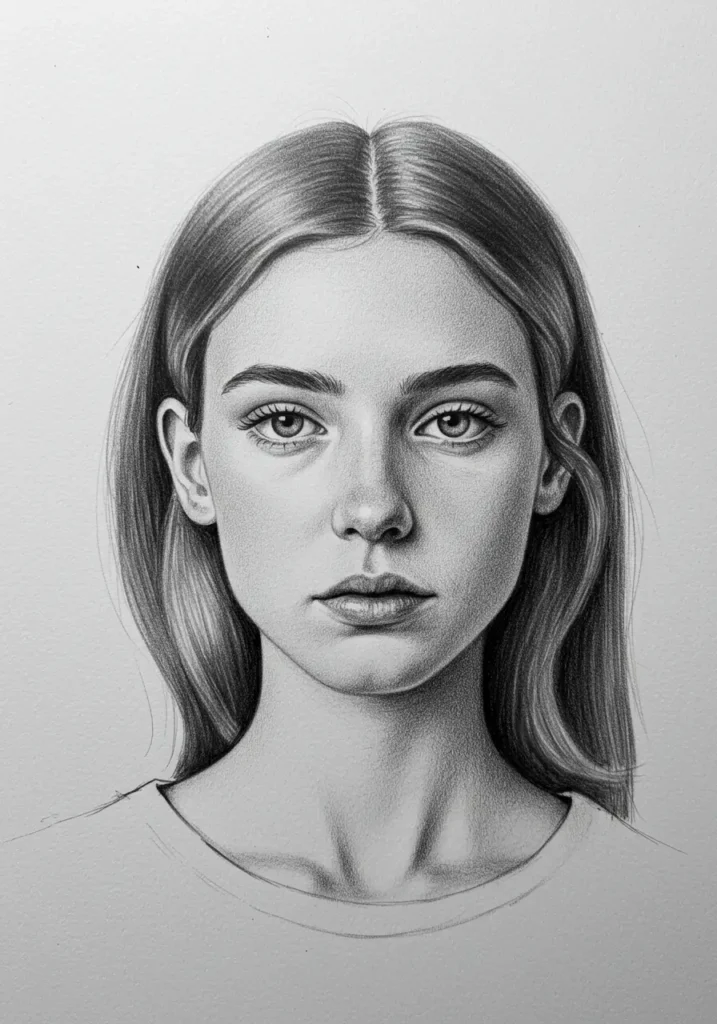
Exercise: Practice blending different values to create smooth, continuous gradients. Focus on achieving a seamless transition from light to dark tones without harsh lines.
Quick reflection: Which basic technique—hatching, stippling, or blending—do you find most satisfying to practice, and why?
3. Understanding Light and Shadow: Creating Depth and Realism
Light and shadow are absolutely crucial for creating the illusion of depth and three-dimensional form in your drawings. They define the volume and solidity of your subject.
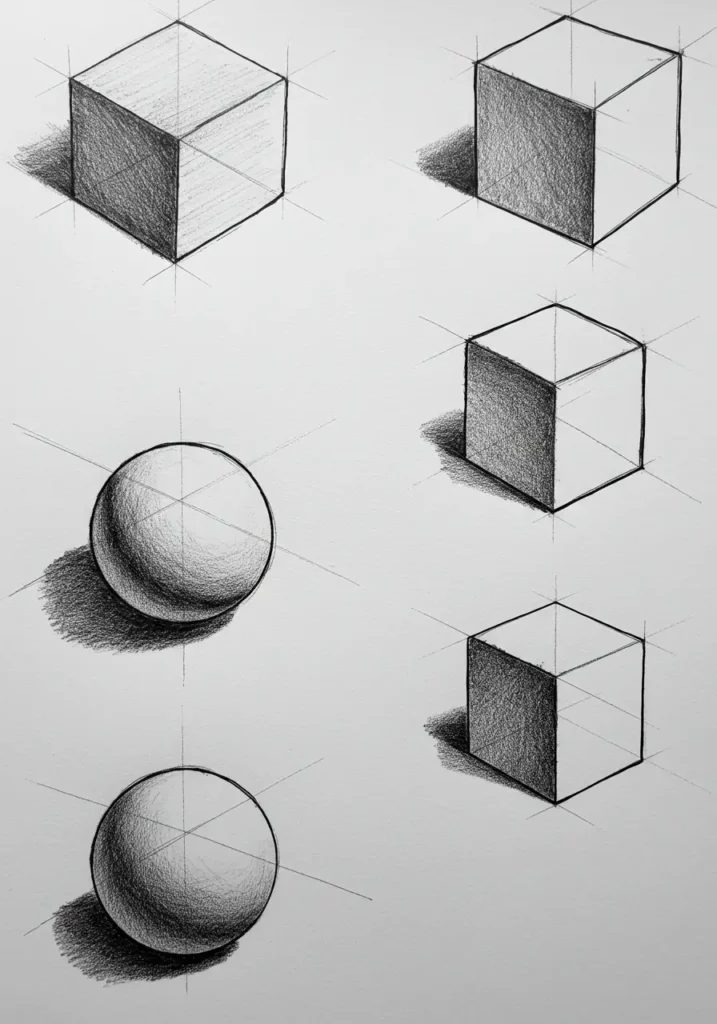
Identifying the Light Source: Always begin by determining the precise direction from which the light is coming. This fundamental decision will dictate exactly where the highlights and shadows fall on your subject, creating a consistent and believable illumination.
Rendering Highlights: Highlights are the brightest areas of your drawing, where the light directly hits the object’s surface. Leave these areas mostly untouched, or apply only very light shading to represent the intense illumination.
Rendering Shadows: Shadows are the darkest areas of your drawing, where the light is blocked by the object itself or by another object.
Cast Shadow: This is the shadow projected by the object onto the surrounding surface (e.g., the shadow a ball casts on a table). It often has a softer edge further from the object.
Form Shadow: This is the shadow that occurs on the object itself, indicating its three-dimensional shape and form (e.g., the shaded side of the ball).
Creating Gradients: Use smooth, gradual gradients to transition seamlessly between highlights, mid-tones, and shadows. This adds crucial depth and realism to your drawings, making forms appear rounded and solid.
Exercise: Draw a simple geometric shape, like a sphere or a cube, and practice meticulously rendering highlights, form shadows, cast shadows, and smooth tonal gradients across its surface.
4. Composition: Arranging Elements for Impact
Composition refers to the deliberate arrangement of elements within your drawing space. A well-composed drawing is not only visually appealing but also effectively conveys your message, guiding the viewer’s eye.
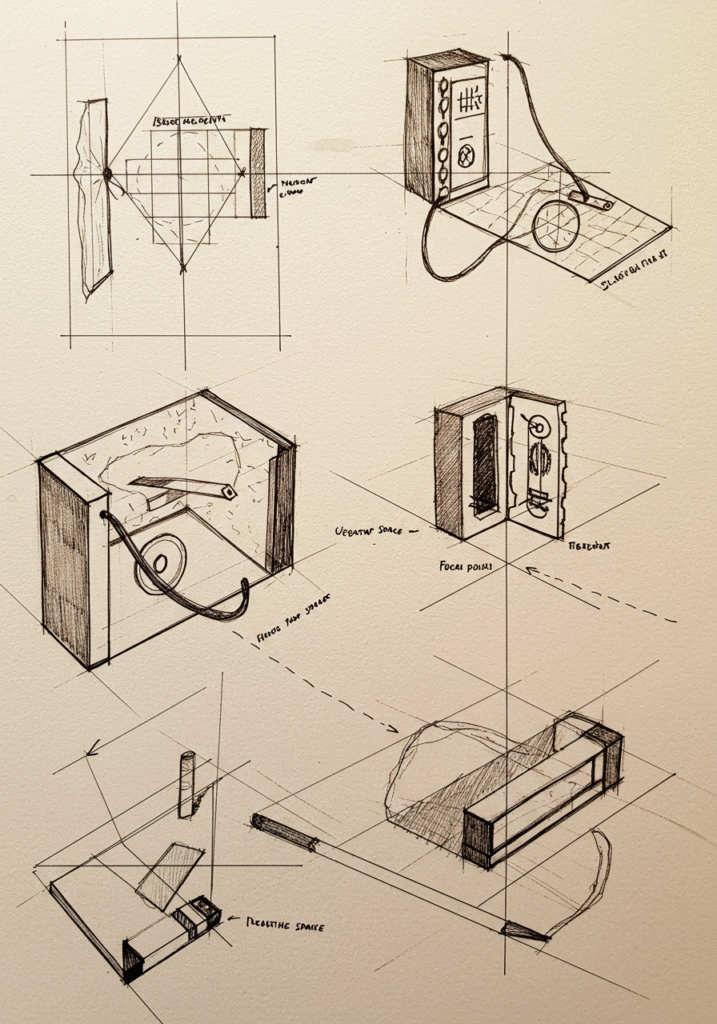
Rule of Thirds: Imagine dividing your drawing area into nine equal parts using two horizontal and two vertical lines. Place important elements or focal points along these lines or at their intersections. This creates a balanced, dynamic, and visually interesting composition, preventing a static, centered look.
Leading Lines: Use lines, whether actual or implied by the arrangement of objects, to subtly guide the viewer’s eye through your drawing. These lines can create a sense of movement or draw attention to the focal point.
Negative Space: This refers to the empty space surrounding and between objects in your drawing. Use negative space consciously to create balance, emphasize the subject, and help define its shape. Sometimes, accurately drawing the negative space makes it easier to get the positive form correct.
Focal Point: This is the main area of interest in your drawing, the element you want the viewer’s eye to go to first. Draw the viewer’s attention to this area through strategic placement, strong contrast in value, or intricate detail.
Exercise: Practice creating different compositions using the rule of thirds. Experiment with leading lines to direct the viewer’s eye and use negative space to balance your subjects.
5. Perspective: Creating the Illusion of Depth
Perspective is the essential technique of representing three-dimensional objects and spaces on a two-dimensional surface, creating a believable sense of depth and reality.
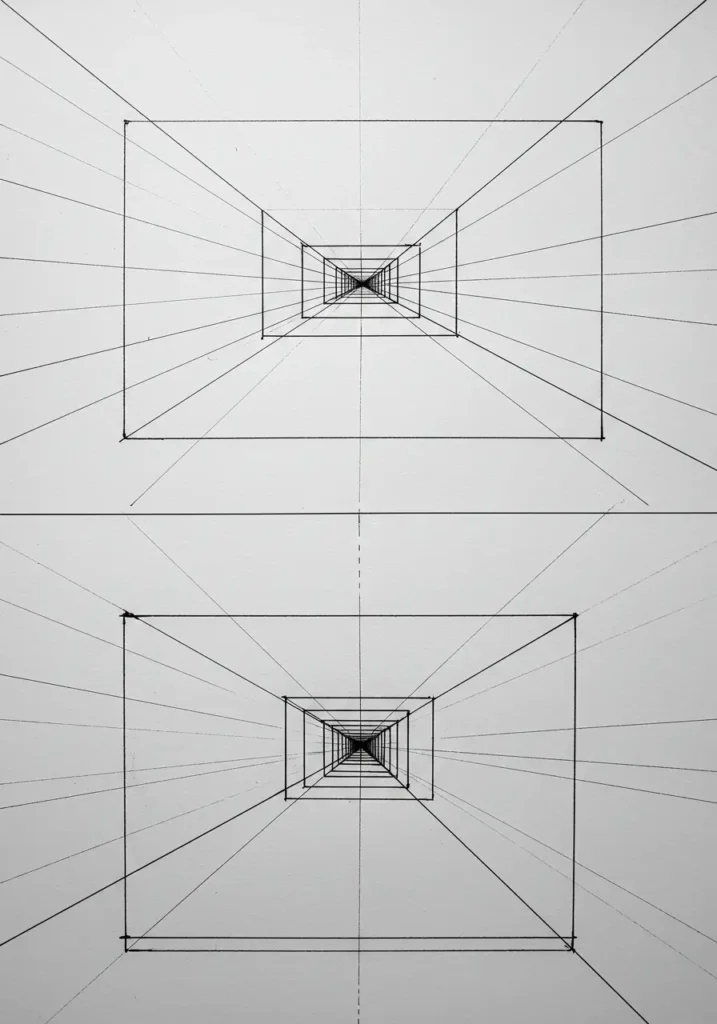
One-Point Perspective: In this technique, all parallel lines receding into the distance converge at a single vanishing point on the horizon line. Use this for drawing objects or scenes where you are facing them directly, like a straight road extending into the distance.
Two-Point Perspective: Lines converge at two distinct vanishing points on the horizon line. Use this for drawing objects viewed at an angle, such as the corner of a building, giving it more dynamic depth.
Three-Point Perspective: Lines converge at three vanishing points: two on the horizon line and a third either above or below. Use this for drawing objects viewed from a high (bird’s-eye) or low (worm’s-eye) angle, creating a dramatic sense of scale and distortion.
Exercise: Practice drawing simple geometric objects like cubes or buildings in one-point, two-point, and three-point perspective. Focus on accurately drawing the lines converging to their respective vanishing points.
6. Drawing from Observation: Seeing Like an Artist
Drawing from observation involves carefully studying your subject and meticulously translating what you see onto paper. This practice sharpens your visual acuity and improves accuracy in your pencil drawing.
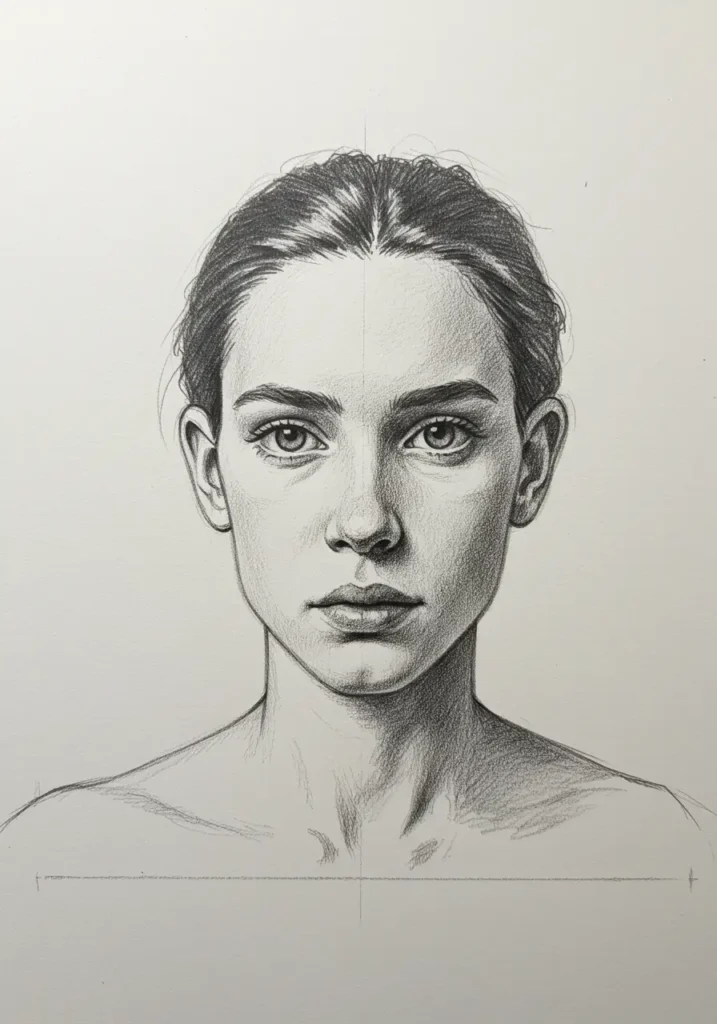
Measuring Proportions: Use your pencil as a measuring tool. Hold your pencil at arm’s length, extend your arm straight, and use your thumb to mark the relative sizes and relationships of different parts of your subject. This helps ensure accurate proportions.
Simplifying Shapes: Before drawing details, break down complex objects into their basic geometric shapes (e.g., a head as a sphere, a body as a cylinder). This simplifies the underlying structure and makes it easier to build accurate forms.
Focusing on Values: Pay close attention to the different values (lights and darks) in your subject. Identify the highlights, shadows, and mid-tones. This keen observation of values is crucial for creating convincing three-dimensional forms.
Exercise: Practice drawing simple everyday objects from direct observation. Focus on accurately capturing their proportions, simplifying them into basic shapes, and meticulously rendering their values.
7. Mastering Textures: Bringing Surfaces to Life
Adding textures to your drawings makes them significantly more realistic, visually engaging, and tactile. Textures communicate the feel and characteristic of surfaces.
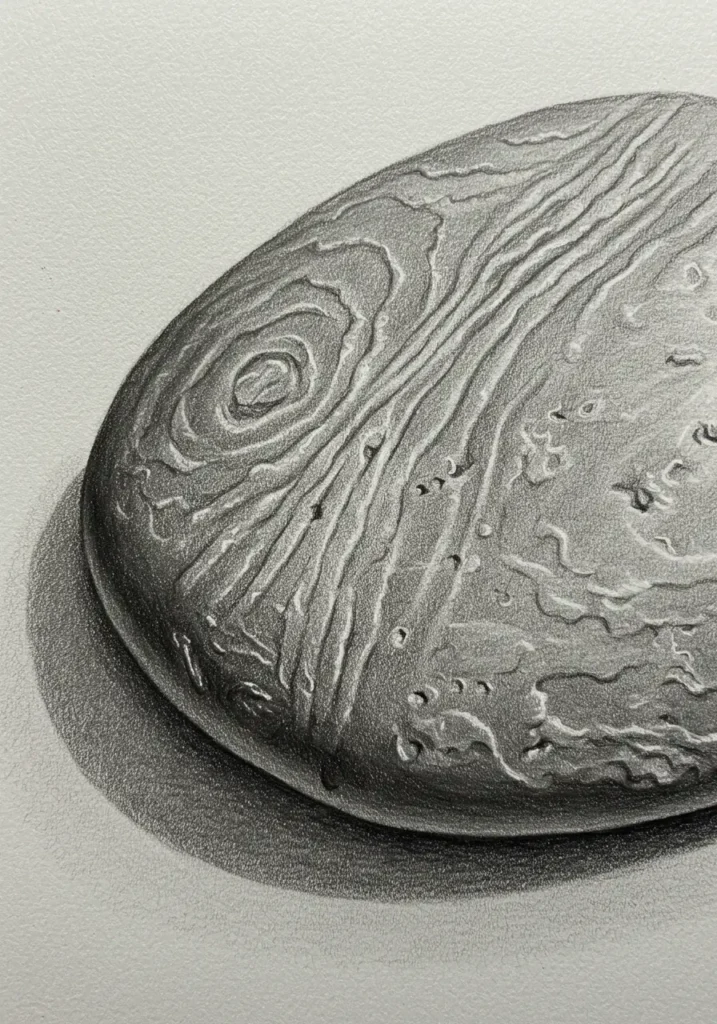
Observing Textures: Carefully observe the textures of different surfaces in your environment: wood grain, fabric weaves, metal reflections, rough stone, smooth skin. Note the patterns, irregularities, and minute details that define each texture.
Replicating Textures: Use different pencil drawing techniques to effectively replicate the textures you observe.
Rough Textures: Employ short, broken lines, varied pressure, and stippling to convey coarseness.
Smooth Textures: Use blending, soft, even shading, and subtle gradients to create a polished, slick surface.
Bumpy Textures: Combine hatching, cross-hatching, and stippling with varied dot density to depict irregular, raised surfaces.
Exercise: Practice drawing different textures from observation, such as the grain of wood, the folds of fabric, the sheen of metal, or the roughness of a stone.
8. Drawing Hair: Creating Realistic Strands and Volume
Drawing hair can be challenging due to its fluid and complex nature, but these tips will help you create realistic strands and overall volume.
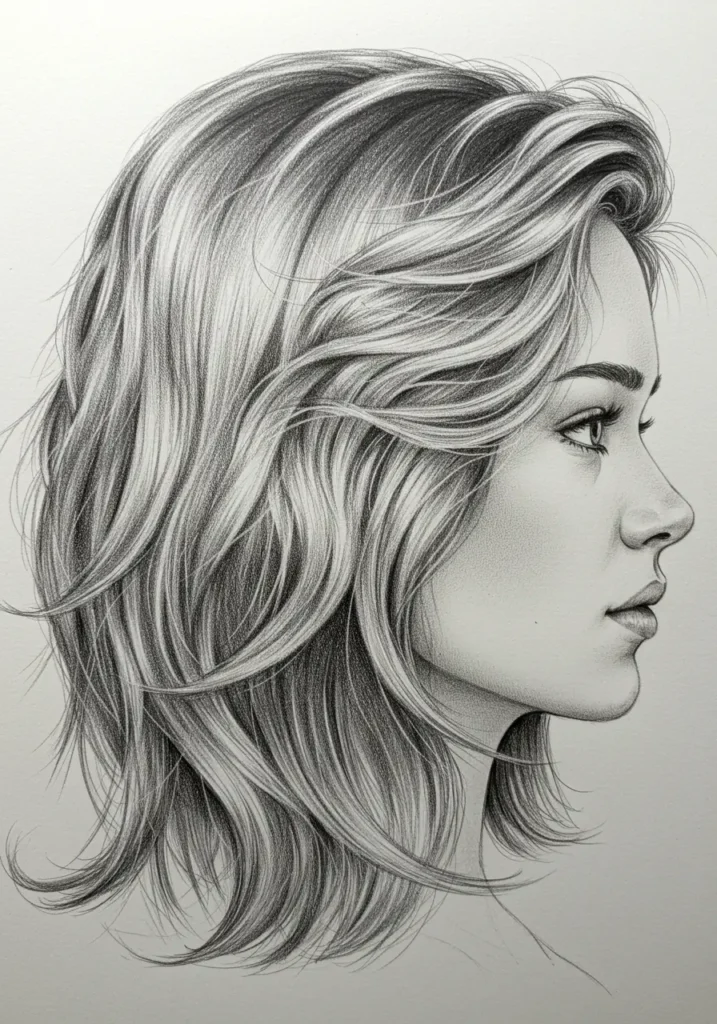
Understanding Hair Structure: Hair grows in clumps or sections, not as individual strands uniformly. It follows the natural contours and curves of the head. Observe how light interacts with the hair, creating highlights and shadows that define its form.
Drawing Hair Strands: Focus on drawing groups of hair strands, varying their thickness and direction. Avoid drawing every single hair. Instead, suggest texture and movement by using a combination of long, flowing lines and shorter, wispy strokes.
Adding Highlights and Shadows: Add highlights to the areas where the light directly hits the hair and shadows to the areas where the light is blocked or hair layers overlap. This defines the volume and shape of the hairstyle.
Exercise: Practice drawing different hairstyles from reference photos, focusing on understanding the hair’s underlying structure, suggesting individual strands, and accurately rendering highlights and shadows to create depth.
9. Drawing Eyes: Capturing Emotion and Expression
Eyes are often called the windows to the soul, and capturing their emotion and expression is paramount in portraiture. These tips will help you bring life to your drawings.
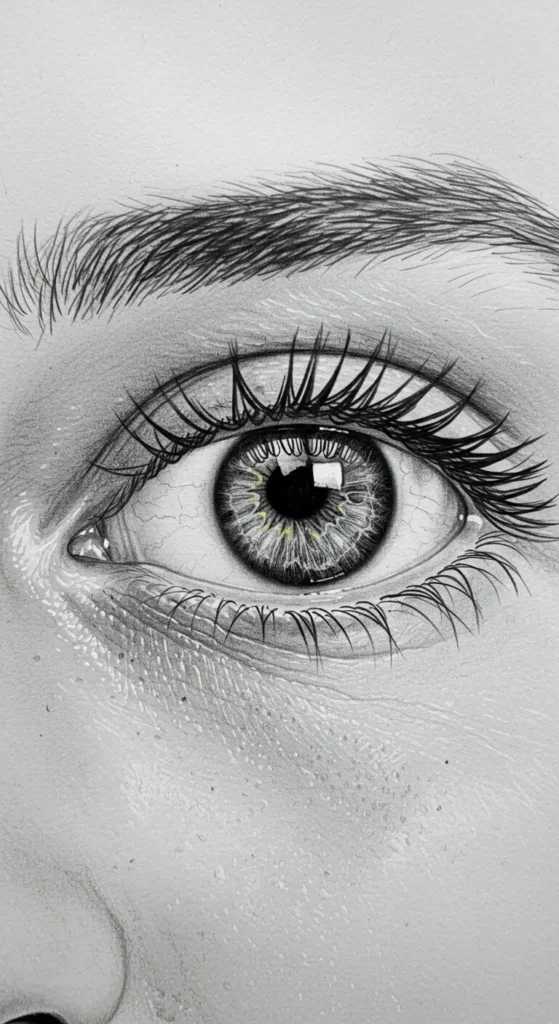
Understanding Eye Anatomy: The eye is a complex structure consisting of the eyeball (a sphere), eyelids, eyelashes, iris (the colored part), and pupil (the black center). Light reflections (catchlights) are also crucial.
Drawing the Eye Shape: Begin by drawing the basic shape of the eye, paying close attention to its proportions, the angle of the eyelids, and how it sits within the orbital bone.
Adding Details: Add crucial details such as the eyelashes (drawing them from the lid outward, curving naturally), the subtle texture of the iris, and the sharp, bright catchlights (reflections of light) in the pupil. The catchlights are vital for making eyes appear alive.
Capturing Expression: Use subtle changes in the eye shape, eyelid tension, and pupil size to effectively convey different emotions. A slight squint can show anger, wide eyes can show surprise.
Exercise: Practice drawing different eyes from reference photos, focusing on understanding the underlying anatomy, meticulously adding details, and subtly capturing various emotions through precise rendering.
10. Drawing Noses: Depicting Form and Character
Noses come in an incredible variety of shapes and sizes, making them unique features that define character. These tips will help you depict their form and individual character in your drawings.
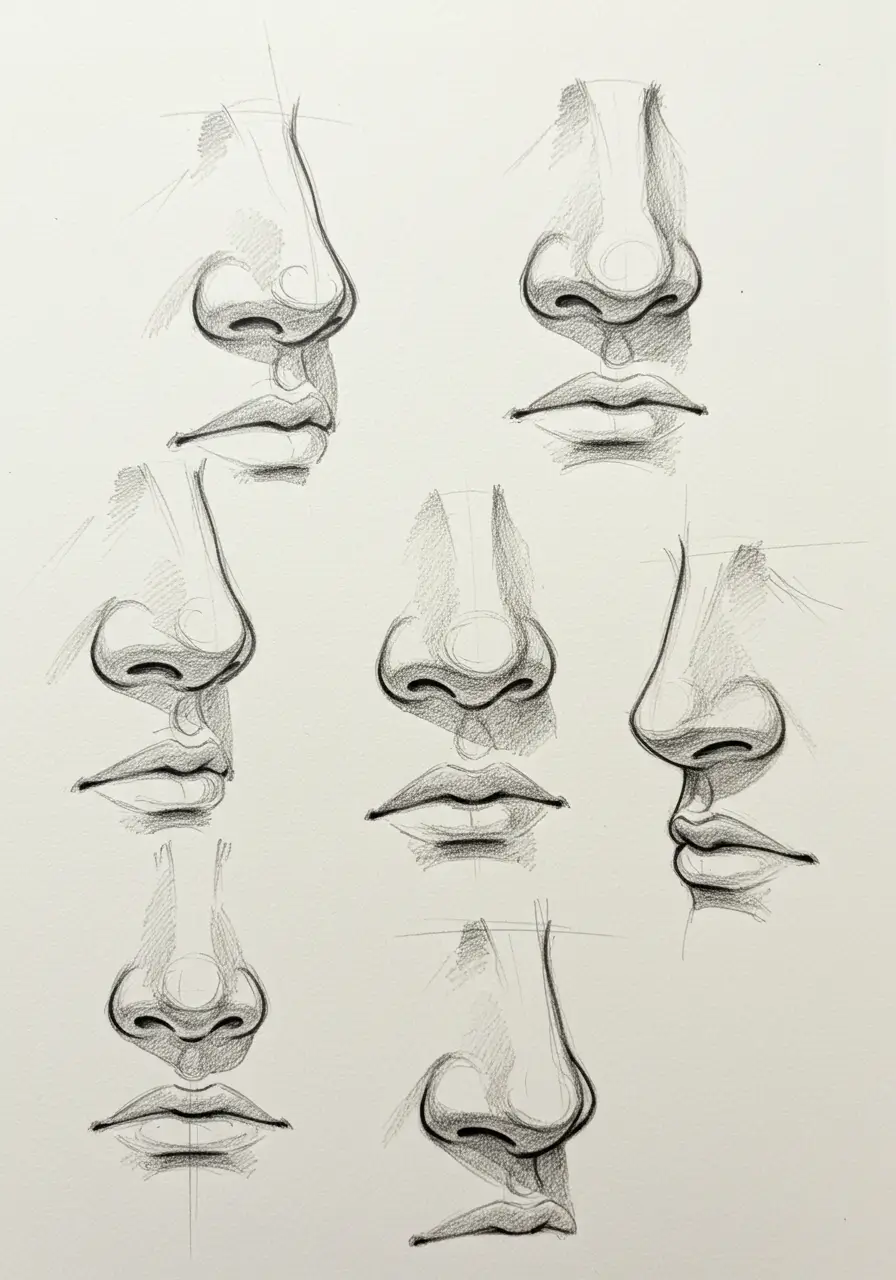
Understanding Nose Anatomy: The nose consists of the bridge (top part), tip, nostrils, and septum (the wall between nostrils). It is essentially a collection of cartilage and bone, often simplified into basic geometric planes.
Drawing the Basic Shape: Begin by drawing the basic underlying shape of the nose using simple planes and angles, paying attention to its overall proportions and how it connects to the face. Focus on light and shadow to define its three-dimensional form.
Adding Details: Add subtle details such as the distinct shape of the nostrils, the curve of the bridge, and the slight indentation of the philtrum (the vertical groove above the upper lip). Avoid drawing hard outlines around the entire nose; let values define it.
Depicting Character: Use subtle changes in the nose shape, its angle, and the way light hits it to effectively convey different characters and personalities. A strong bridge might suggest a different personality than a soft, rounded tip.
Exercise: Practice drawing different noses from various angles and from diverse reference photos, focusing on understanding the underlying anatomy, adding subtle details, and accurately depicting unique character through form and shading.
11. Drawing Lips: Conveying Emotion and Sensuality
Lips are incredibly expressive features that can convey a wide range of emotions and add a profound sense of sensuality to a portrait.

Understanding Lip Anatomy: The lips consist of the upper lip, the lower lip, and the philtrum (the vertical groove between the nose and upper lip). Observe the distinct curves of the cupid’s bow and the fuller lower lip.
Drawing the Basic Shape: Begin by drawing the basic shape of the lips, paying careful attention to their overall proportions, the angle of the mouth, and how they relate to the rest of the face. Remember that the lips follow the curve of the teeth beneath them.
Adding Details: Add subtle details such as the distinct lip line, the delicate texture of the lips (often very fine vertical lines), and the subtle reflections where light catches the moist surface. Avoid harsh outlines; use shading to define form.
Conveying Emotion: Use subtle changes in the lip shape, the tension around the corners of the mouth, and the degree of openness to effectively convey different emotions, from a gentle smile to a thoughtful frown.
Exercise: Practice drawing different lips from a variety of reference photos, focusing on understanding their complex anatomy, meticulously adding subtle details, and powerfully conveying various emotions through form and precise rendering.
12. Drawing Hands: Representing Action and Grace
Hands are notoriously complex and highly expressive features that can convey a wide range of actions, emotions, and subtle nuances with incredible grace.
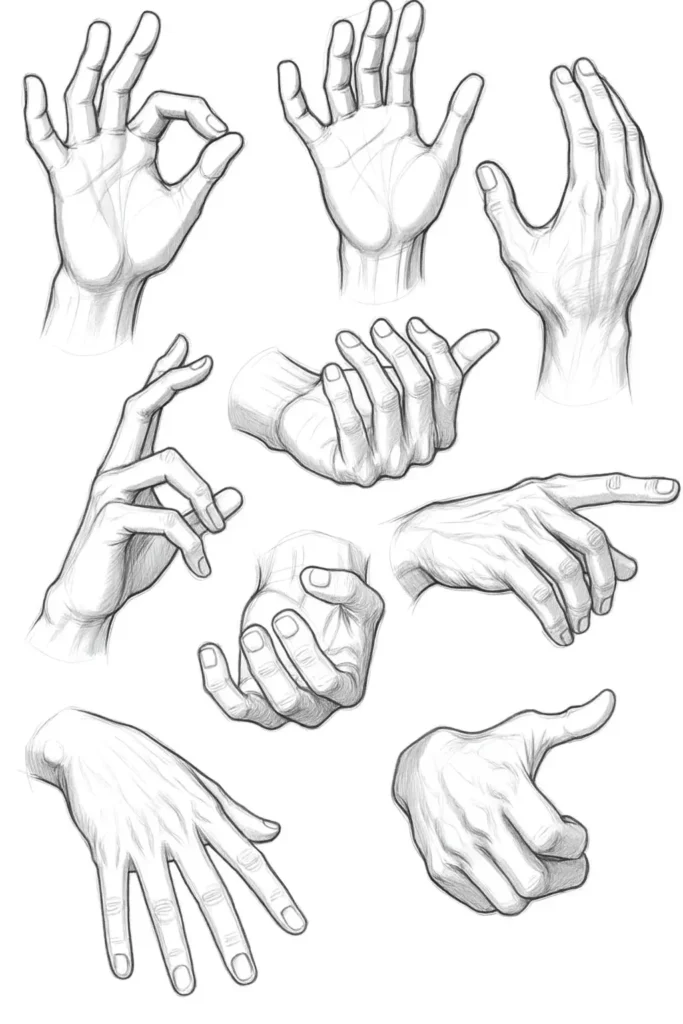
Understanding Hand Anatomy: The hand consists of the palm, individual fingers, and a versatile thumb. It has many bones and joints. Study the underlying bone structure and muscle groups to understand how hands move and bend.
Drawing the Basic Shape: Begin by drawing the basic shape of the hand, simplifying it into a few core masses (palm, thumb mass, finger block). Pay close attention to its overall proportions, the angles of the fingers, and how they relate to each other.
Adding Details: Add crucial details such as the prominent knuckles, the precise shape of the fingernails, and the unique wrinkles and creases that define the palm and joints. Observe how light falls on the hand’s many planes.
Representing Action: Use the hand’s position, the curve of the fingers, and the tension in the muscles to powerfully convey different actions and emotions. A clenched fist, an open palm, or delicate fingers each tell a story.
Exercise: Practice drawing different hands in various positions and actions from reference photos. Focus on understanding the complex anatomy, meticulously adding details, and effectively representing specific actions and emotions.
13. Drawing Feet: Depicting Support and Movement
Feet are often overlooked in drawing, but they play a crucial role in depicting support, balance, and the dynamics of movement.
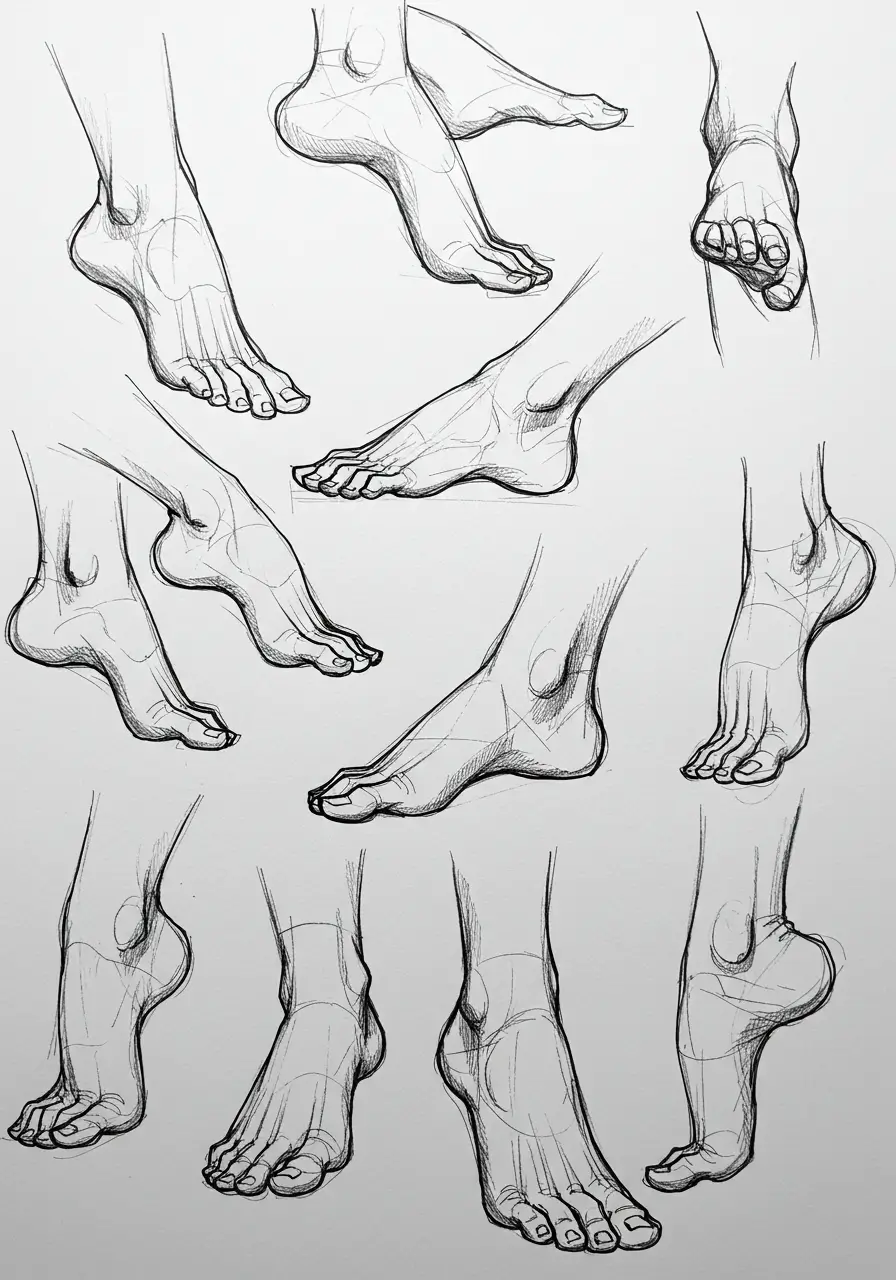
Understanding Foot Anatomy: The foot is a complex structure consisting of the heel, arch, individual toes, and ankle bones. It has many bones and tendons that allow for flexibility and weight bearing.
Drawing the Basic Shape: Begin by drawing the basic shape of the foot, simplifying it into a few main masses (heel, mid-foot, toe area). Pay close attention to its overall proportions, the curve of the arch, and the position of the ankle bones.
Adding Details: Add crucial details such as the shape of the individual toes, the distinct ankle bones, and the subtle wrinkles or creases that define the sole and joints.
Depicting Support and Movement: Use the foot’s position, the distribution of weight, and the tension in the muscles to effectively convey different movements and postures, such as standing, walking, or running.
Exercise: Practice drawing different feet from various angles and in diverse movements from reference photos. Focus on understanding the underlying anatomy, adding subtle details, and accurately depicting support and dynamism.
Quick reflection: Which facial feature or body part do you find most challenging to draw, and what specific aspect trips you up?
14. Sketching Animals: Capturing Movement and Character
Sketching animals requires careful observation of their unique anatomy, their fluid movements, and the subtle expressions that convey their character.
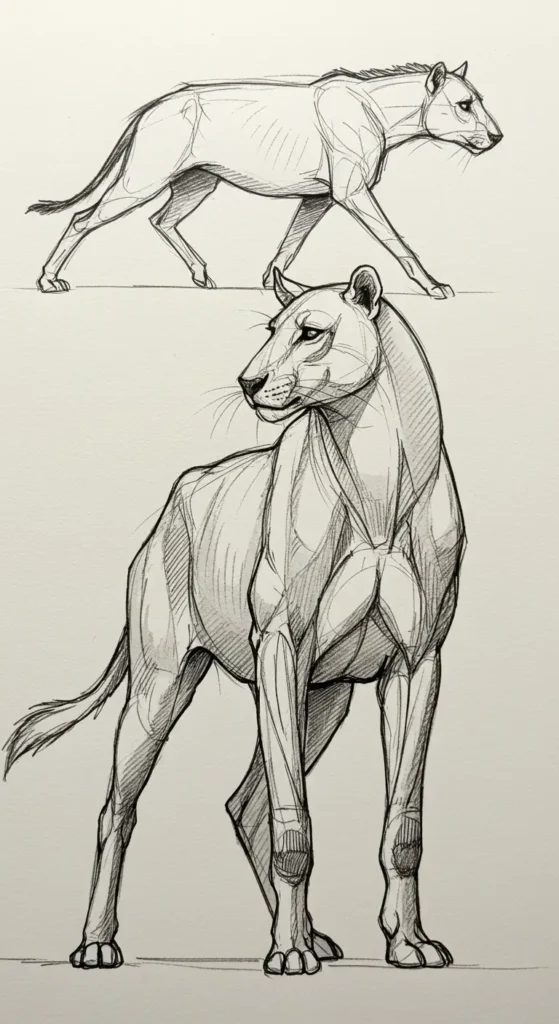
Understanding Animal Anatomy: Study the fundamental skeleton and muscle groups of different animals. Understand how their bodies are structured to support their unique movements and behaviors. This knowledge allows for more believable and dynamic poses.
Capturing Movement: Focus on capturing the animal’s movement and overall posture. Use quick, expressive gesture lines to convey the fluidity and energy of their form. Observe their characteristic gaits and resting positions.
Depicting Character: Use subtle details in the eyes, ears, and facial features to effectively convey the animal’s personality and individual character. A specific tilt of the head or expression in the eyes can reveal a lot.
Exercise: Practice sketching different animals from diverse reference photos or life, focusing on understanding their unique anatomy, capturing their characteristic movements, and subtly depicting their individual character through form and detail.
15. Drawing Landscapes: Creating Atmosphere and Perspective
Drawing landscapes involves creating a profound sense of atmosphere and accurate perspective to convey the vastness, depth, and unique mood of nature.

Establishing Perspective: Use the principles of perspective (one-point, two-point, or atmospheric) to create a compelling sense of depth and distance in your landscape. Objects recede into the background, appearing smaller and less detailed.
Creating Atmosphere: Use careful shading, blending, and variations in line quality to create a palpable sense of atmosphere and mood. Consider how light and shadow define different elements of the landscape. Indicate weather conditions through subtle rendering.
Adding Details: Add meticulous details such as the intricate textures of trees, the ruggedness of rocks, the softness of clouds, or the reflections on water to enhance the realism and visual interest of your landscape. Pay attention to how details diminish in the distance.
Exercise: Practice drawing different landscapes from reference photos or direct observation. Focus on accurately establishing perspective, creating a strong sense of atmosphere and mood through shading, and adding precise, selective details to enhance realism.
16. Drawing Still Life: Arranging Objects for Visual Harmony
Drawing still life involves carefully arranging inanimate objects in a visually harmonious and compelling way. It provides an excellent opportunity to practice composition, light, and shadow.
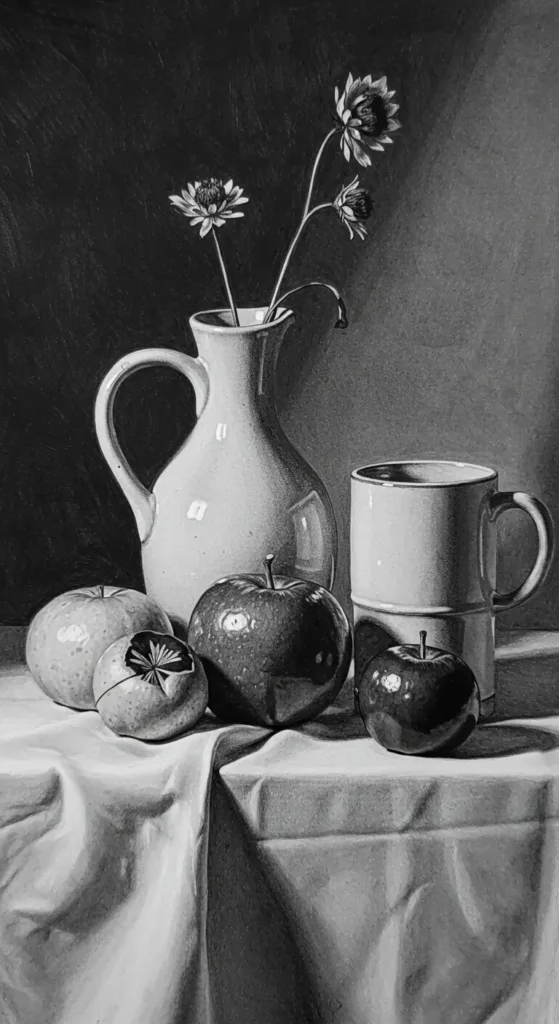
Arranging Objects: Choose objects that are visually interesting in terms of shape, texture, and size. Arrange them in a pleasing composition, paying attention to positive and negative space, and creating a clear focal point. Experiment with different groupings before drawing.
Establishing Lighting: Set up a clear, consistent light source to create distinct highlights and shadows. Observe how the light falls on and around each object, defining its form and creating interesting cast shadows. This intentional lighting is crucial for a compelling still life.
Capturing Form and Texture: Focus on meticulously capturing the three-dimensional form and unique texture of each individual object. Use shading and varied line quality to convey their volume and surface characteristics.
Exercise: Practice drawing different still life arrangements. Focus on carefully planning the composition, accurately establishing the lighting to create strong forms, and meticulously capturing the varied forms and textures of each object.
17. Using References: Learning from the Masters and the World
Using references is an invaluable tool for learning, improving your drawing skills, and gathering inspiration. It provides a source of real-world information.
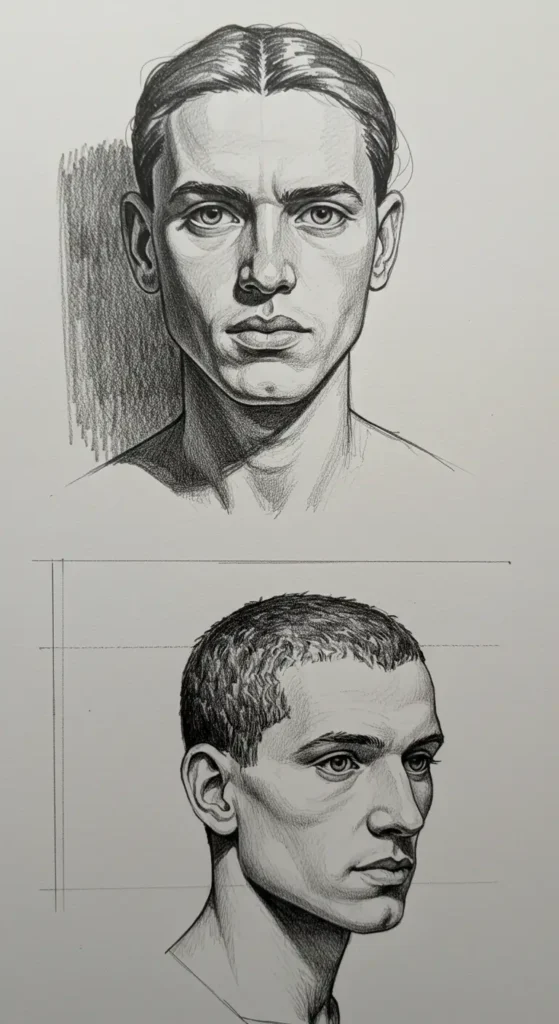
Studying Master Drawings: Actively study the drawings of master artists from various periods and styles. Observe how they handle light, shadow, line quality, perspective, and composition. Analyze their techniques to gain insights for your own work.
Using Photographs: Use photographs as references for drawing specific subjects, scenes, or complex anatomical structures. Photographs provide a static, detailed visual aid.
Avoiding Direct Tracing: Avoid directly tracing from references. Instead, use them as a guide for understanding underlying form, accurate proportions, and the interplay of light and shadow. The goal is to learn to see, not just copy.
Exercise: Practice drawing from various references. Focus on applying the techniques and principles you have learned, using the reference as a guide for observation and understanding rather than mere duplication.
18. Practice Regularly: The Key to Improvement and Mastery
Consistent practice is the single most important factor in improving your drawing skills. Artistic ability is honed through dedicated repetition and effort over time.

Setting Realistic Goals: Set realistic and achievable goals for your practice. Aim for consistency over perfection. Practice regularly, even if it is just for a few minutes each day. This builds momentum and prevents overwhelm.
Experimenting with Techniques: Actively experiment with different techniques, pencil grades, paper types, and styles to discover what genuinely works best for you and your artistic vision. Do not be afraid to try new approaches.
Seeking Feedback: Seek constructive feedback from other artists, trusted friends, or instructors. Be open to critique. Fresh eyes can spot areas for improvement that you might miss. Learning to give and receive feedback is vital for continuous artistic growth.
Exercise: Create a regular practice schedule and commit to it. Track your progress over time, noting your improvements and areas for continued development.
19. Developing Your Style: Finding Your Artistic Voice
Developing your own unique style is the ultimate goal of any artist. It is how your personal vision and interpretation come through in your pencil drawing.

Experimenting with Different Styles: Actively experiment with different artistic styles and techniques from various periods or movements. This helps you discover what genuinely resonates with you and influences your unique visual language.
Drawing from Inspiration, Not Copying: Draw profound inspiration from other artists, but consciously avoid trying to directly copy their style. Analyze what you admire, then interpret it through your own hand and perspective.
Expressing Your Unique Perspective: Use your art as a powerful vehicle to express your unique perspective, your individual vision, and your personal interpretation of the world around you. Let your personality shine through in your pencil drawing.
Exercise: Create a series of drawings that distinctly reflect your emerging personal style and core artistic interests. Focus on consistency in your approach, even as you refine your technique.
Also Read: Drawing Ideas Easy Doodles to Spark Your Creativity
Budgeting for Your Pencil Drawing Journey: Accessible Artistry
The beauty of pencil drawing lies in its remarkable affordability. You can begin your artistic journey with a minimal initial investment and gradually expand your tools as your skills and passion grow. This makes art accessible to everyone.
Affordable Starter Kits (Lower End)
For complete beginners, a basic pencil drawing starter kit is very affordable, typically costing under $20. This usually includes a small, curated range of essential graphite pencils (e.g., HB, 2B, 4B), a kneaded eraser, a vinyl eraser, and a simple pencil sharpener. You can find these readily available at any art supply store or online retailer. This minimal investment provides all the essentials needed to confidently begin your pencil drawing journey without financial burden.
Mid-Range Supplies (Mid-Tier)
A mid-range budget, typically ranging from $20-$50, allows for a more comprehensive set of graphite pencils (for example, a full range from 6H to 8B), a variety of paper types (such as various sketch pads, heavier drawing paper, or bristol board), blending stumps, and a workable fixative spray to protect your finished art. These higher-quality supplies enhance your ability to explore different techniques and achieve richer tones in your pencil drawing. This tier offers improved quality, versatility, and durability for consistent artistic practice.
Premium Tools and Resources (Higher End)
A larger budget, typically $50 and above, allows for investing in professional-grade art pencils renowned for their superior graphite quality and smooth application, high-quality archival paper that ensures longevity of your artwork, specialized erasers for intricate details, or even enrollment in online drawing courses taught by experienced and celebrated artists. This tier also includes comprehensive art books on specific advanced techniques or anatomy. These premium tools and resources actively support advanced skill development and provide deeper, more structured learning opportunities for your dedicated pencil drawing practice.
Quick reflection: What’s your current pencil drawing budget, and which tools or resources are you most excited to invest in next?
Caring for Your Pencil Drawing Tools and Art
Proper care ensures your pencil drawing tools remain in optimal condition, enhancing your creative flow, and that your finished artwork is meticulously preserved for years to come. Consistent habits protect your artistic investment and prolong the life of your creations.
Maintaining Your Pencils and Erasers
Always keep your pencils well-sharpened. Use a good quality sharpener to avoid frustrating lead breakage and ensure a clean point. Store your pencils neatly in a dedicated pencil case or a roll-up organizer to prevent breakage of tips and keep them protected from dust and damage. Keep your erasers clean by gently rubbing them on a clean, scrap piece of paper. For kneaded erasers, knead them regularly to absorb graphite effectively and maintain their pliability. Proper tool maintenance ensures smooth drawing and precise results.
Storing Your Artwork Properly
Graphite can smudge easily, potentially compromising your finished pencil drawing. To protect your artwork, consider spraying it with a workable fixative spray (always follow product instructions in a well-ventilated area) to create a protective barrier. Alternatively, store your drawings safely in a portfolio or art storage box, placing sheets of tracing paper or tissue paper meticulously between each drawing. This crucial step prevents smudging, protects against dust, and preserves the intricate details of your hard work.
Regular Practice and Skill Preservation
The single best way to care for and continually enhance your pencil drawing skills is through consistent, dedicated practice. Regular drawing sessions, even short ones, keep your hand-eye coordination sharp, reinforce learned techniques, and maintain your artistic momentum. It makes drawing a natural and effortless part of your routine. Consistent practice actively accelerates your progress, ensures skill preservation, and prevents your artistic abilities from diminishing over time.
Latest Innovations Influencing Pencil Drawing
The world of art and technology continually evolves, bringing exciting new tools and innovative approaches that enhance the possibilities for pencil drawing and broader artistic expression. These advancements complement traditional methods, pushing creative boundaries.
Digital Drawing Tablets and Software Integration
Digital drawing tablets (such as Wacom, iPad Pro with Apple Pencil) combined with sophisticated software (like Procreate, Adobe Photoshop, Clip Studio Paint) offer a modern alternative or a powerful complement to traditional pencil drawing. They provide a vast array of brushes that mimic real pencils, layers for non-destructive editing, and infinite undo options. This flexibility allows for unparalleled experimentation without material waste and simplifies corrections. This technology significantly enhances the creative workflow for digital artists.
Ergonomic Drawing Tools for Comfort
Manufacturers are continuously developing innovative ergonomic drawing tools specifically designed to reduce hand fatigue, minimize strain, and improve overall comfort during long drawing sessions. This includes specialized pencil grips that promote a more natural hold, ergonomically designed pencils that reduce pressure points, and adjustable drawing tables that support various postures. These innovations actively support artists in maintaining their practice for extended periods without discomfort, promoting better long-term artistic health.
Sustainable Art Supplies: Eco-Conscious Creations
The art supply industry increasingly focuses on sustainability and environmental responsibility. This includes the development of pencils made from recycled materials, plant-based binders, and eco-friendly pigments. Brands are also offering paper made from recycled content or sourced from sustainably managed forests. These conscious choices reduce environmental impact and provide artists with valuable eco-conscious options for their pencil drawing practice, aligning creativity with planetary well-being.
Making Your Final Decision: Embracing the Art of Pencil Drawing
Embracing pencil drawing is a profoundly rewarding journey that cultivates keen observation, patience, persistence, and genuine self-expression. Your consistent commitment to applying these practical tips can lead to the creation of truly stunning sketches and foster remarkable personal growth.
Prioritize understanding pencil hardness and always starting with a light hand for initial sketches. Master basic geometric shapes as they are the building blocks of all forms. Learn to shade effectively to create the illusion of three-dimensionality. These foundational techniques form the core of strong, compelling pencil drawing.
Consider making consistent practice a non-negotiable part of your routine. Even short daily sessions build incredible momentum and actively accelerate skill development over time. Embrace imperfection as a natural and necessary part of the learning process, viewing every drawing as an opportunity for growth.
Do not overlook the invaluable power of observation. Train your eye to pay close attention to light, shadow, perspective, and form in the world around you. This keen visual discernment is your most powerful tool as a pencil artist.
Remember, pencil drawing is akin to building a muscle; it strengthens with diligent use. When you commit to consistent effort and mindful practice, you will steadily unlock your artistic potential and create truly compelling and expressive artwork that reflects your unique vision.
Unleash Your Inner Artist: Mastering Pencil Drawing for Stunning Sketches
Pencil drawing offers a profound pathway to artistic expression. By applying essential tips and consistently practicing, you can enhance your skills and produce stunning sketches that truly capture your vision and emotional depth.
Take time to explore different pencil hardnesses and various shading techniques. Remember that patience, persistence, and a willingness to learn from every stroke are your greatest allies in this artistic journey.
As you embark on your pencil drawing practice, remain curious, observant, and open to experimentation. Every line, every shade, and every decision contributes to your mastery and helps define your unique artistic voice.
By embracing these insights and dedicating yourself to the craft, you empower yourself to create compelling artwork. You discover the profound joy of artistic expression. You hone your ability to beautifully translate the complexities of the world onto paper, one stunning sketch at a time, revealing the true power of pencil drawing.
Which of these 19 pencil drawing tips resonated most with you, and what subject will you tackle first in your next sketching session?
Share your thoughts and favorite drawing experiences in the comments below—I’d love to hear about your artistic journey!
Frequently Asked Questions About Pencil Drawing
What is the most important tip for beginners in Pencil Drawing?
The most important tip for beginners in Pencil Drawing is to start with a light hand and to practice drawing basic geometric shapes (spheres, cubes, cylinders). This foundational approach builds accuracy and allows for easier corrections as you develop your sketch.
What types of pencils are essential for Pencil Drawing?
Essential pencils for Pencil Drawing include a range of hardnesses: a harder pencil (like 2H or H) for light sketching and details, an HB for general use, and softer B pencils (like 2B or 4B) for shading and richer, darker tones. A basic set typically covers these grades.
How do I improve shading in my Pencil Drawing?
To improve shading in your Pencil Drawing, practice creating value scales (gradations from pure white to pure black), develop a consistent light source for your drawing, and experiment with techniques like cross-hatching and blending. Use different pencil hardnesses to achieve varied tones smoothly.
What type of paper is best for detailed Pencil Drawing?
Smooth (hot-pressed) paper is generally ideal for detailed Pencil Drawing as its fine texture allows for precise linework and very even shading. However, textured (cold-pressed) paper can be excellent for adding a tactile quality and creating specific textures in your sketches.
How often should I practice Pencil Drawing to see significant improvement?
Consistent practice is key. Even 15-30 minutes of dedicated Pencil Drawing each day can lead to significant and noticeable improvement over time. Regularity builds muscle memory, sharpens observational skills, and fosters continuous artistic growth more effectively than sporadic long sessions.
This Post Contains Affiliate Links


![19 Essential Pencil Drawing Tips for Stunning Sketches Crayola Inspiration Art Case Space Coloring Set (140pcs), Art Kit for Kids, Crayons, Markers, Pencils, Holiday for Boys & Girls, Ages 5, 6, 7 [Amazon Exclusive]](https://m.media-amazon.com/images/I/512fTojPeRL._AC_.jpg)


