From Roadside Wildflowers to Garden Showstoppers
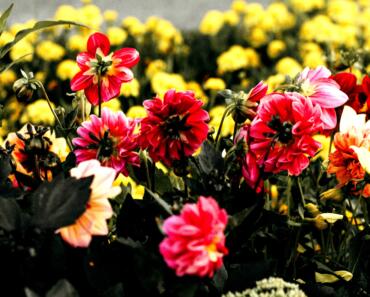
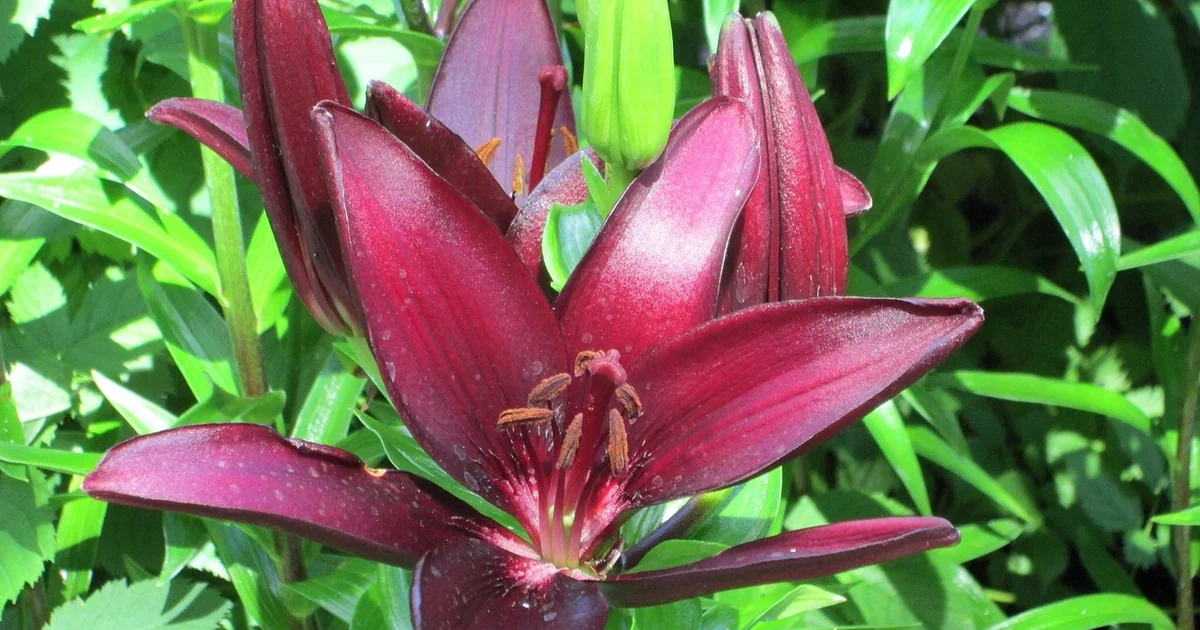
What started as a modest plant with basic yellow or red blossoms has transformed through decades of careful breeding into one of the most diverse perennials available today. Daylilies now appear in nearly every shade imaginable — warm oranges, deep purples, soft pinks, crisp whites, and peachy tones. The modern daylily bears little resemblance to its humble ancestors. Beyond the expanded color palette, plant breeders have also altered flower shapes, sizes, and growth habits. You can find spider-type daylilies with long, elegant petals that stretch outward like delicate spokes. Other varieties feature ruffled double flowers that resemble small peonies. Many daylilies carry a pleasant fragrance, especially those that open their blooms in the evening. Learning how to grow daylily successfully in your own garden opens the door to this remarkable diversity.
Step 1: Where to Grow Daylily for Best Results
Daylilies adapt to a wide range of settings, but they perform best when you give them thoughtful placement. The genus name Hemerocallis comes from Greek words meaning “beauty for a day,” since each individual flower lasts only twenty-four hours. Yet the plant itself returns year after year, making site selection an important long-term decision.
Sunlight Needs
Daylilies prefer full sun, which means at least six hours of direct sunlight each day. They tolerate partial sun as well, though bloom quantity may drop slightly in shadier spots. An interesting detail many gardeners overlook is that some of the showier, heavily bred daylily varieties can actually fade or wash out in intense, all-day sun. If you choose one of these dramatic cultivars, consider a location with light afternoon shade to preserve the richness of the petal colors.
Spacing and Visual Impact
Daylilies multiply quickly and form a thick mat of fleshy roots over time. Small and medium varieties need about eighteen inches of space between plants. Larger types require at least two feet of separation. This room allows each clump to expand without competing for nutrients. From a design perspective, daylilies shine in mass plantings, along fence lines, beside stone walls, or bordering a walkway. They also work beautifully on slopes where their root systems help control erosion.
To grow daylily in a way that maximizes visual payoff, think about staggering varieties with different bloom times. Some daylilies flower in early summer, others peak in midseason, and a few rebloom later in the fall. Combining types extends your garden’s color display for months rather than weeks.
Step 2: Prepare Soil That Helps Your Daylily Thrive
Daylilies are remarkably forgiving when it comes to soil. They grow along roadsides, in abandoned lots, and in places where other plants struggle. That said, giving them ideal conditions from the start leads to healthier plants and more abundant flowers.
Ideal Soil Composition
The best soil for daylilies drains well while retaining enough moisture to support their fleshy, tuberous roots. Heavy clay that stays soggy can cause root rot, a problem that has ended many promising daylily patches. Sandy soil that dries too quickly may leave plants stressed during hot spells. The sweet spot is loamy ground enriched with organic matter such as compost or well-rotted manure.
pH and Nutrient Balance
Daylilies prefer a slightly acidic pH between 6.0 and 6.5. A simple soil test from your local extension office or a home kit will tell you where your ground stands. If your pH runs too high, adding elemental sulfur or peat moss can lower it gradually. If it is too acidic, a light application of garden lime will bring it up. About 37 percent of home gardens have soil pH outside the optimal range for daylilies, according to cooperative extension data, so testing is worth the small effort.
Mix two to three inches of organic matter into the top eight to ten inches of soil before planting. This step improves drainage in heavy soils and boosts water retention in sandy ones. It also introduces beneficial microorganisms that help roots access nutrients.
Step 3: When to Plant for a Strong Start
Timing matters more than most beginners realize. The best window for planting daylilies is early fall, roughly four to six weeks before the first expected frost. Autumn planting gives the roots time to establish themselves in warm soil while the air cools, reducing transplant shock. The plant focuses on root development rather than top growth, which sets it up for a vigorous spring.
Early spring is the second-best option. If you plant bare-root daylilies as soon as the ground thaws, they will have the entire growing season to settle in. Potted daylilies from nurseries can go into the ground throughout summer and into early fall, though they will need more attentive watering during hot weather.
One piece of information many gardeners miss: daylilies planted too late in autumn, when the ground has already cooled significantly, may not develop enough roots before winter. Their survival rate drops noticeably. If you find yourself planting late, apply a thick layer of mulch around the base to insulate the crown and buy the roots extra time to anchor.
Step 4: How to Plant Bare-Root and Potted Daylilies
The actual planting technique is straightforward, but small details make a measurable difference in how well the plants perform. Whether you work with bare-root divisions or container-grown specimens, the core steps remain the same.
Digging the Hole
Dig a hole that is twice as wide and about as deep as the root system. For bare-root daylilies, form a small mound of soil in the center of the hole. Spread the roots out over this mound so they fan downward and outward rather than clumping together in a tight ball. This fanning action encourages roots to explore the surrounding soil from the start.
Crown Depth Is Critical
The crown — the point where the roots meet the stems — must sit just above the soil level. This is the single most common planting mistake people make. If you bury the crown too deeply, the plant may rot or fail to bloom. If you leave too much root exposed, the plant may dry out. Aim for the crown to be at or barely above the soil surface after you backfill and gently firm the ground around it.
Watering In
After planting, water deeply and slowly. A long, gentle soak encourages water to reach the full depth of the root zone rather than running off the surface. During the first growing season, keep the soil consistently moist but not waterlogged. Newly planted daylilies that dry out completely during their establishment phase often produce smaller flowers or skip blooming altogether in their first year.
Step 5: Water and Mulch to Support New Growth
Once your daylilies settle in, their watering needs change. Mature plants are notably drought tolerant thanks to those thick, fleshy roots that store moisture. But young plants and actively blooming clumps appreciate regular drinks.
Watering Schedule
During the first season, water about once a week if rainfall is scarce. Give each plant enough water to moisten the soil to a depth of six to eight inches. During bloom time, increase frequency slightly. Daylilies that wilt from dryness during flowering may drop buds before they open. After the first year, you can ease back. Established daylilies can handle dry spells of two to three weeks without complaint, though they bloom more abundantly with occasional supplemental water.
The Role of Mulch
A two-to-three-inch layer of organic mulch around your daylilies serves several purposes. It keeps the soil temperature more stable, reduces evaporation, and suppresses weeds that compete for nutrients. Shredded bark, leaf mold, or straw all work well. Keep the mulch a few inches away from the crown itself to prevent moisture from collecting against the stems and inviting rot.
You may also enjoy reading: 7 Organic Materials to Fill a Raised Garden Bed.
Good drainage remains essential throughout the plant’s life. Daylilies sitting in soggy ground for extended periods develop root rot, which starts as yellowing lower leaves and progresses to plant collapse. If you notice standing water after rain, consider moving the plants to a raised bed or amending the soil with more organic matter to improve percolation.
Step 6: Pruning and Fertilizing for Abundant Blooms
Daylilies earn their reputation as low-maintenance plants, but a few targeted interventions each season dramatically improve their performance. The difference between a so-so display and a jaw-dropping one often comes down to two simple practices.
Fertilizer Strategy
If you started with fertile soil enriched with organic matter, your daylilies need only one annual feeding. Apply a slow-release, balanced fertilizer with lower nitrogen content in early spring, just as new growth emerges. A formula such as 5-10-10 or 10-10-10 works well. High-nitrogen fertilizers push excessive leaf growth at the expense of flowers, so avoid lawn fertilizers or anything with nitrogen as the dominant number. Sprinkle the granules around the base of the plants according to package rates and water them in.
For gardeners who want an extra boost, a second light feeding after the first wave of blooms finishes can encourage reblooming varieties to produce a second flush. Do not fertilize after late summer, though. Late feeding stimulates tender new growth that may not harden off before frost.
Pruning Throughout the Season
During the growing season, remove yellow or dead leaves as you notice them. This keeps the clump looking tidy and reduces hiding spots for pests. More importantly, after a flower stalk finishes blooming, cut it back to about four inches above the ground. Do not pull the stalk out by hand; cutting prevents damage to the crown and emerging side buds. This pruning redirects the plant’s energy from seed production into building root reserves for winter survival and next year’s growth.
One rule many gardeners forget: do not remove the foliage until after the first frost. The leaves continue photosynthesizing and sending energy to the roots even after blooming ends. Cutting them back prematurely weakens the plant. Once frost kills the leaves, you can trim them to the ground or simply let them decompose naturally.
Step 7: How to Grow Daylily in Containers and Protect Through Winter
Daylilies adapt well to container life, which makes them accessible to gardeners with limited space or poor soil. Growing daylilies in pots requires a slightly different approach than in-ground planting, but the results can be just as satisfying.
Choosing the Right Container
Select a pot with drainage holes that is at least four inches wider in diameter than the plant’s root ball. Daylilies have vigorous root systems, so a cramped container restricts growth and bloom production. Terra cotta, glazed ceramic, or heavy plastic all work, though lighter materials may need extra weight at the bottom to prevent tipping in wind.
Planting Depth in Pots
When planting in a container, position the root ball so the top sits between half an inch and one inch below the rim of the pot. This leaves enough space for watering without overflow. Use a high-quality potting mix rather than garden soil, which compacts too tightly in containers. Mix in a handful of compost or slow-release fertilizer at planting time.
Container Care Demands
Potted daylilies need more frequent watering than in-ground plants. Check the soil every two to three days during warm weather, and water when the top inch feels dry. Apply a light liquid fertilizer monthly during the growing season or use a slow-release granular formula at the beginning of spring.
By the second year, the roots will likely fill the container. Repot into a pot four inches larger with fresh potting mix. If you see roots circling the inside of the pot or emerging from drainage holes, it is time. Divide the clump during repotting if you want to propagate new plants.
Winter Protection for Container Daylilies
Daylilies are winter-hardy in USDA zones 3 through 10, meaning they tolerate subzero temperatures when planted in the ground. In containers, however, the roots are more exposed to freezing air. In cold climates, move pots to an unheated garage or basement before hard frost. Water sparingly through winter — just enough to keep the soil from drying completely. Alternatively, you can sink the pot into the ground in fall and mulch heavily, then lift it out in spring.
A Garden Staple With Surprising Versatility
Daylilies have come an astonishing distance from their roadside origins. Modern breeding has produced flowers in nearly every color, shapes ranging from spider legs to ruffled pom-poms, and scents that perfume evening gardens. Yet the plant remains as tough as ever — drought tolerant, pest resistant, and adaptable to a wide range of climates. Whether you plant them in borders, mass along a fence, or cluster in containers on a patio, daylilies reward minimal effort with weeks of color. The seven steps outlined here cover everything from site selection through container management. Follow them, and your daylilies will thrive for years with very little fuss.