Your Seven-Step Action Plan
1. Secure the Perfect Location and Real Estate
Delphiniums are true sun worshippers. They require a minimum of six to eight hours of direct sunlight daily to build those strong, straight stems. Without it, they stretch awkwardly and tend to flop under their own weight. However, there is a delicate balance. These plants genuinely abhor intense, scorching heat. In climates where summer temperatures regularly exceed the mid-70s Fahrenheit, the bloom period shortens dramatically and the risk of disease skyrockets.
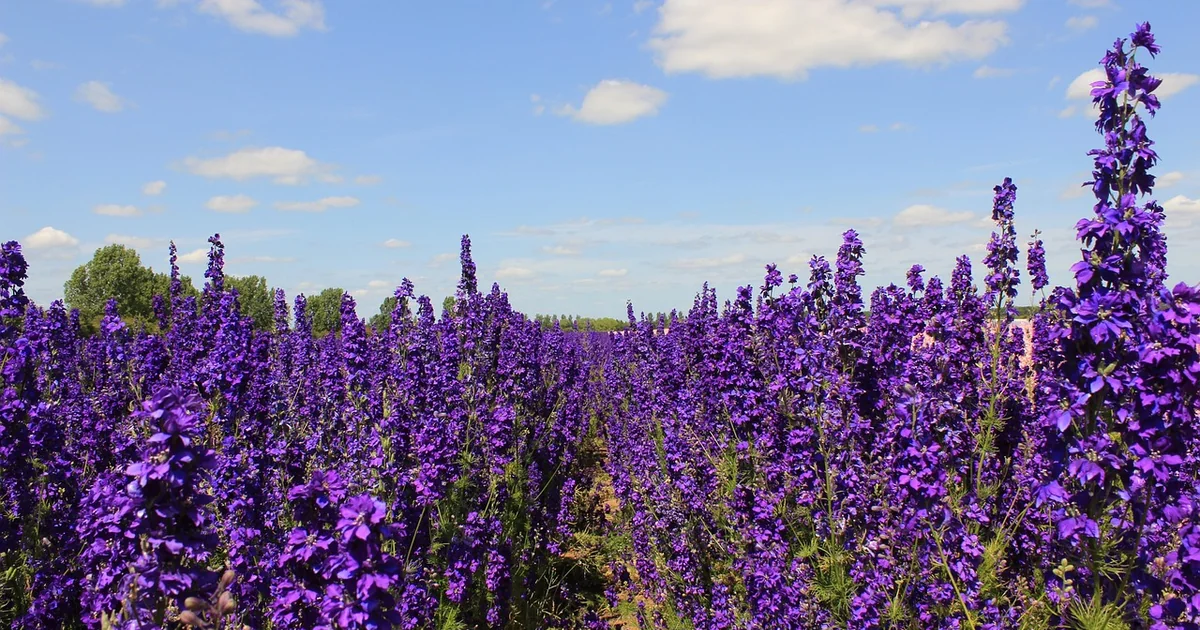
The ideal real estate offers morning sun paired with light afternoon shade. This protects the plants from the harshest rays while giving them the energy they need to thrive. Wind is another factor you must consider. Tall varieties, which can easily reach six or seven feet, have hollow stems that snap instantly in a strong gust. Plant them in a sheltered spot—against a south-facing wall, behind a low hedge, or in the center of a protected island bed. This natural buffer prevents mechanical damage and keeps your display looking pristine.
For gardeners in the United States, knowing your hardiness zone is absolutely key. These plants are true perennials in Zones 3 through 7. In Zone 8 and above, they often melt in the summer heat and are best treated as annuals or replaced each year. If you live in a warmer region, seek out heat-tolerant strains like ”Summer Skies” or the ”Belladonna” group, which are far more forgiving than others. The classic ”Pacific Giant” hybrids produce stunning seven-foot spires but demand the cool, damp summers of the Pacific Northwest or the United Kingdom to truly reach their potential. Matching your variety to your specific climate is half the battle won.
Safety first here too. Every single part of the delphinium plant contains toxic alkaloids. Choose a spot well away from curious pets and young children to avoid any accidental ingestion.
2. Build a Rich, Well-Draining Bed
Successful growing delphiniums starts long before you ever dig a hole. It begins with the soil beneath your feet. These plants are exceptionally heavy feeders that demand rich, loamy earth packed to the brim with organic matter. They also insist on a soil pH that is close to neutral—ideally around the 7.0 mark. A simple soil test from your local garden center can reveal whether you need to add lime to raise the pH or sulfur to lower it.
Drainage is non-negotiable here. Delphiniums absolutely hate wet feet. Standing water around the crown is a direct invitation to crown rot, a nasty fungal disease that turns the base of the plant into mush. If you are working with heavy clay soil, amend it generously with coarse sand, well-rotted manure, and plenty of compost. Raising the planting bed is another excellent solution. A six-inch tall raised bed provides the perfect drainage solution for heavy soils.
Conducting a simple drainage test is easy. Dig a hole about one foot deep and one foot wide. Fill it with water and let it drain completely. Fill it a second time. If the water level drops by about one inch per hour, you have perfect drainage. If it drains much faster, your soil is sandy and will need extra organic matter to hold moisture. If it drains much slower, you have a clay problem that requires raised beds or significant amendment.
Before planting, dig a wide hole and mix a full bucketful of compost into the backfill. This slow-release organic buffet gives your delphiniums the very best possible start in life.
3. Time Your Planting for Maximum Success
Spring is the textbook season for planting delphiniums. Wait until the danger of frost has completely passed and the soil has warmed to at least 60 degrees Fahrenheit. You can also plant in early autumn, giving the roots a solid chance to establish themselves before the winter freeze sets in. Autumn planting often leads to stronger, far more robust plants the following summer.
When positioning the plant, pay close attention to the depth. The crown—the specific area where the roots meet the stems—must sit exactly at the soil surface. Burying it too deep is the fastest way to induce rot. Space smaller varieties about two feet apart and larger types a full three feet apart. This generous spacing ensures adequate air circulation, which is your primary defense against fungal diseases like powdery mildew and botrytis.
The debate between planting nursery-grown delphiniums versus starting them from seed is a common one. Nursery plants offer instant gratification and are generally more predictable in terms of color and habit. Starting seeds, however, is far more economical and allows you to access a much wider range of rare cultivars. If you start seeds indoors, they require a period of cold stratification—placing them in the refrigerator for about three to four weeks—to properly break their dormancy. Even then, germination can be spotty. Water the plants thoroughly after setting them in to settle the soil around the roots and eliminate air pockets.
4. Master the Art of Watering
Delphiniums have a Goldilocks complex when it comes to water. They absolutely dislike drought, but they simply cannot tolerate soggy conditions either. The secret lies in deep, infrequent watering. Aim to provide roughly one inch of water per week through rainfall or irrigation. Always check the soil moisture by inserting your finger a full inch deep. If it feels dry at that depth, it is time to water.
Water exclusively at the base of the plant. Use a soaker hose or a gentle trickle from a garden wand. Avoid overhead sprinklers at all costs. Wet foliage, especially in the cool of the evening, creates a perfect breeding ground for mildew spores. A study from the Royal Horticultural Society noted that overhead watering increases the incidence of foliar diseases in delphiniums by nearly 40 percent compared to drip irrigation methods.
Signs of trouble are easy to spot if you know what to look for. Underwatered delphiniums develop yellow, crispy leaf edges and drooping stems. Overwatered plants often have yellowing lower leaves and a general look of malaise. If you catch crown rot early, you can sometimes save the plant by digging it up, cutting away the rotted tissue, and replanting it in drier conditions. But prevention is so much easier. A simple drip irrigation system on a timer removes the guesswork entirely. It delivers water slowly and directly to the root zone, keeping the leaves bone dry. During heat waves, a layer of organic mulch around the base helps conserve soil moisture and keeps the roots cool.
5. Fuel for Flowers, Not Just Leaves
One of the most counterintuitive aspects of growing delphiniums is their specific relationship with fertilizer. They are indeed heavy feeders, but the type of food you provide matters immensely. In early spring, as the first shoots begin to appear, apply a balanced, slow-release granular fertilizer like a 10-10-10 blend. This provides a steady supply of nitrogen, phosphorus, and potassium.
You may also enjoy reading: 7 Ways to Create a Beautiful Wabi-Sabi Garden.
As the flower stalks begin to form, switch to a liquid feed that is higher in phosphorus and potassium, or use compost tea every two to three weeks. This shift is absolutely crucial. Too much nitrogen encourages an explosion of green leaves at the direct expense of blooms. You will end up with a lush, bushy plant that produces few, if any, flowers.
The term ”balanced fertilizer” can be a bit misleading. A 10-10-10 formula is balanced in NPK, but delphiniums specifically crave phosphorus for root development and flower production. If your soil test indicates low phosphorus, use a formula like 5-10-5 instead. Foliar feeding with a diluted liquid seaweed solution every two weeks during the growing season provides a quick boost of trace minerals. This is especially useful if you notice the new leaves looking pale or chlorotic, which indicates an iron or manganese deficiency. A handful of bone meal added to the soil at planting time provides a slow-release source of calcium and phosphorus. Stop feeding entirely in late summer to allow the plant to slow down and properly prepare for its winter dormancy.
6. Support and Snip for Longevity and Form
Tall delphiniums are incredibly top-heavy. A sudden rainstorm or a strong gust of wind can ruin months of careful cultivation in mere seconds. Staking is simply not optional for the tall varieties. Insert sturdy bamboo canes or metal stakes around the clump early in the season, ideally when the stems are just a foot tall. Use soft garden twine to secure the stems loosely, adding new ties every 12 inches as they grow taller.
Pruning is equally vital for a long and productive life. Once the main spire has finished blooming, cut the stalk right back to a set of leaves or a visible side shoot. This process, known as deadheading, tricks the plant into thinking it still needs to reproduce. It often responds by sending up a secondary flush of smaller but delightful spires in late summer or early fall. Some dedicated gardeners can coax three separate flushes of blooms from a single plant in a really good year.
For cut flower enthusiasts, harvest the main spire when about half of the delicate florets have opened. The remaining buds will continue to open indoors, extending the beauty into your home. Do not be afraid to be ruthless with your pruning shears. In the autumn, cut the entire plant back to a low rosette of leaves, about six inches from the ground. This tidy stump protects the crown and clearly marks the spot so you do not accidentally dig into it during spring planting.
7. Protect Your Plants Through Winter and Disease
The final step addresses the two biggest threats to your delphiniums: pests and winter weather. The most common diseases are powdery mildew, botrytis, and crown rot. Prevention is unequivocally the best cure. Space your plants correctly, water strictly at the base, and ensure they receive full sun. These basic practices keep the foliage dry and significantly reduce the humidity around the plants.
Powdery mildew appears as a white, dusty film on the leaves. Remove affected leaves immediately to stop the spread. Crown rot is far more serious. If a plant collapses suddenly and without warning, remove it entirely and do not replant delphiniums in that specific spot for several years. Slugs and snails are also the bane of young delphinium shoots. They can decimate a fresh planting overnight. Use iron phosphate slug pellets, which are safe for pets and wildlife, diatomaceous earth, or simple beer traps to protect your plants in the spring.
In regions colder than Zone 7, apply a thick layer of mulch—straw, shredded bark, or evergreen boughs—over the crown after the ground freezes solid. This precious layer prevents the damaging freeze-thaw cycle from heaving the plant out of the earth. Growing delphiniums is undoubtedly a labor of love. They demand attention, ideal conditions, and a little bit of luck. But when those majestic spires finally burst into color, reaching for the sky in shades of sapphire, violet, and pure white, you will understand why gardeners have been chasing this dream for centuries.
Follow these seven steps, stay patient, and you will be rewarded with a display that truly defines the summer garden.