

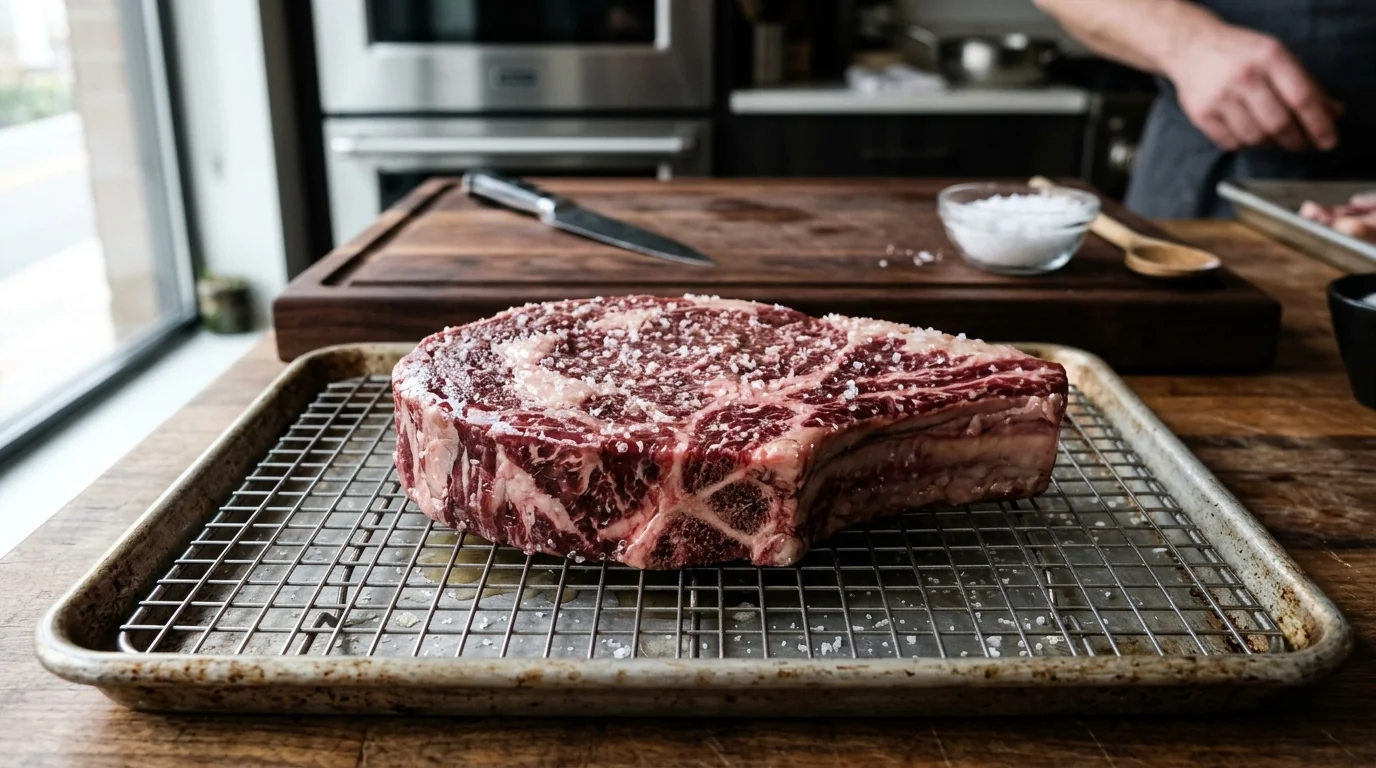
You unwrap a magnificent, two-inch-thick USDA Prime bone-in ribeye steak from the butcher paper. The marbling is exquisite—fine, dendritic webs of white intramuscular fat woven across deep ruby muscle fibers. You place a heavy cast-iron skillet on the burner and turn the flame to high. Just as the pan begins to smoke, you grab a box of table salt, shower the steak generously on both sides, and slap the beef directly into the sizzling oil.
You anticipate a restaurant-quality, mahogany-crusted masterpiece. But when you flip the steak five minutes later, your heart sinks: instead of a deep, crackling, glass-like brown crust, the surface is a dull, grayish-tan. Thin, watery gray steam billows from the edges of the pan, and the oil pops violently across your stovetop. When you slice into the finished steak, a puddle of clear juices floods your cutting board, leaving the interior meat disappointingly tough and chewy.
What went wrong? You used an expensive, premium cut of beef and cooked it in seasoned cast iron. The failure was not the heat, the pan, or the meat quality; it was a profound misunderstanding of biochemical osmosis, protein denaturation kinetics, and surface moisture thermodynamics.
Salting meat immediately before it hits the skillet is the single most common culinary blunder in domestic kitchens. By mastering the science of dry-brining 12 to 24 hours in advance, you harness fundamental physical laws to draw deep seasoning into the core of the muscle, restructure protein filaments to retain 40% more natural moisture, and create a dry, tacky surface pellicle that browns with blistering speed.
The Last-Minute Salting Blunder: The Moisture-Puddle Trap
To understand why last-minute salting ruins a sear, you must examine the millisecond-by-millisecond osmotic activity that occurs the moment salt crystals touch raw meat.
Raw animal muscle tissue is approximately 75% water, 20% protein, and 5% fat and minerals. That water is locked inside intracellular muscle fibers (myofibrils) bounded by semi-permeable cell membranes. When you sprinkle sodium chloride (NaCl) onto the surface of cold raw meat, you create an instantaneous, extreme concentration gradient.
According to the fundamental laws of chemical osmosis, water molecules naturally migrate across a semi-permeable membrane from an area of low solute concentration (inside the muscle cells) to an area of high solute concentration (the dry salt crystals on the surface):
- At 0 to 3 Minutes: Dry salt crystals sit on the surface, dissolving into microscopic droplets of water drawn from the uppermost cell layers.
- At 5 to 15 Minutes (The Danger Zone): Osmotic pressure peaks. The salt draws out substantial intracellular water, creating a glistening, wet puddle of concentrated liquid brine over the entire exterior of the steak.
If you drop a steak into a searing-hot pan during this 5-to-15-minute window, disaster strikes. Before the meat can reach the 280°F to 330°F (138°C to 165°C) threshold required for the Maillard browning reaction, all of that surface water must first be evaporated.
Water has an extraordinarily high latent heat of vaporization (2,260 Joules per gram). The intense thermal energy of your hot skillet is consumed by converting liquid water into 212°F steam, rather than browning the beef proteins. Instead of searing at 350°F, your expensive steak is literally boiled in its own purged juices.
“If you salt your steak ten minutes before cooking, you are not seasoning meat; you are creating a watery barrier that boils away your crust and steals your heat.”
The Two-Phase Miracle of Dry-Brining: Osmosis and Diffusion
What happens if you don’t panic, but instead leave that salted steak alone inside your refrigerator for 12 to 24 hours? A miraculous, two-phase biochemical transformation takes place:
Phase 1: Osmotic Extraction and Brine Dissolution (Hours 0 to 1)
As described above, surface moisture is pulled out of the muscle cells to fully dissolve the granular salt crystals. At the end of the first hour, the surface of the meat looks slick, wet, and watery. Most novice cooks assume the meat is drying out and ruining; in reality, this is merely the catalyst.
Phase 2: Inward Hypertonic Diffusion (Hours 2 to 24)
Now, the concentration gradient reverses. The liquid sitting on the surface is a hypertonic salt solution with a vastly higher chemical concentration than the fluids deep within the interior muscle tissue. By the laws of Fickian diffusion, dissolved sodium (Na+) and chloride (Cl−) ions migrate inward through the protein matrix, traveling deep into the interior core of the steak at a rate of approximately 1 millimeter per hour.
As the salt ions diffuse inward, they pull the extracted water molecules back with them. By hour four, the surface wetness has vanished. By hour twelve, the meat has completely reabsorbed its own juices, now carrying dissolved sodium chloride deep into the center of the cut.
Myosin Denaturation: Trapping 40% More Moisture
Deep seasoning is only the first benefit of dry-brining. The true culinary magic lies in how salt fundamentally restructures muscle protein architecture.
Muscle fibers consist of tightly bundled filaments of two primary contractile proteins: actin and myosin. In raw, unsalted meat, these proteins are wrapped in tight, rigid helical bundles. When meat is exposed to cooking heat above 120°F (49°C), these protein helices denature and violently contract, like wringing out a wet sponge. The contracting muscle bundles squeeze intracellular water out into the pan and onto your plate.
When salt ions diffuse into the muscle during dry-brining, they alter the electrical charges on the protein chains. Negatively charged chloride ions bind to the protein filaments, creating electrostatic repulsion between adjacent strands:
- The tight myosin protein bundles uncoil and loosen.
- The loosened filaments dissolve slightly and form a loose, hydrophilic gel-like matrix inside the cell walls.
- This protein gel traps water molecules like a mesh sponge. When the meat is subsequently cooked, the denatured myosin cannot contract as violently.
Rigorous food science laboratory trials demonstrate that dry-brined steaks and poultry lose 30% to 40% less moisture during cooking compared to unbrined cuts, resulting in an exponentially juicier, more tender mouthfeel.
Amazon US Verified
Heavy-Duty Stainless Wire Rack & Sheet Pan Kit
Oven-safe 304 stainless steel elevated wire grid with half-sheet aluminum pan. Provides essential 360-degree convective airflow under meat for perfect refrigerated pellicle drying.
The Uncovered Refrigerator Pellicle: Mastering Crust Chemistry
The final, decisive advantage of dry-brining is the creation of a dehydrated protein pellicle.
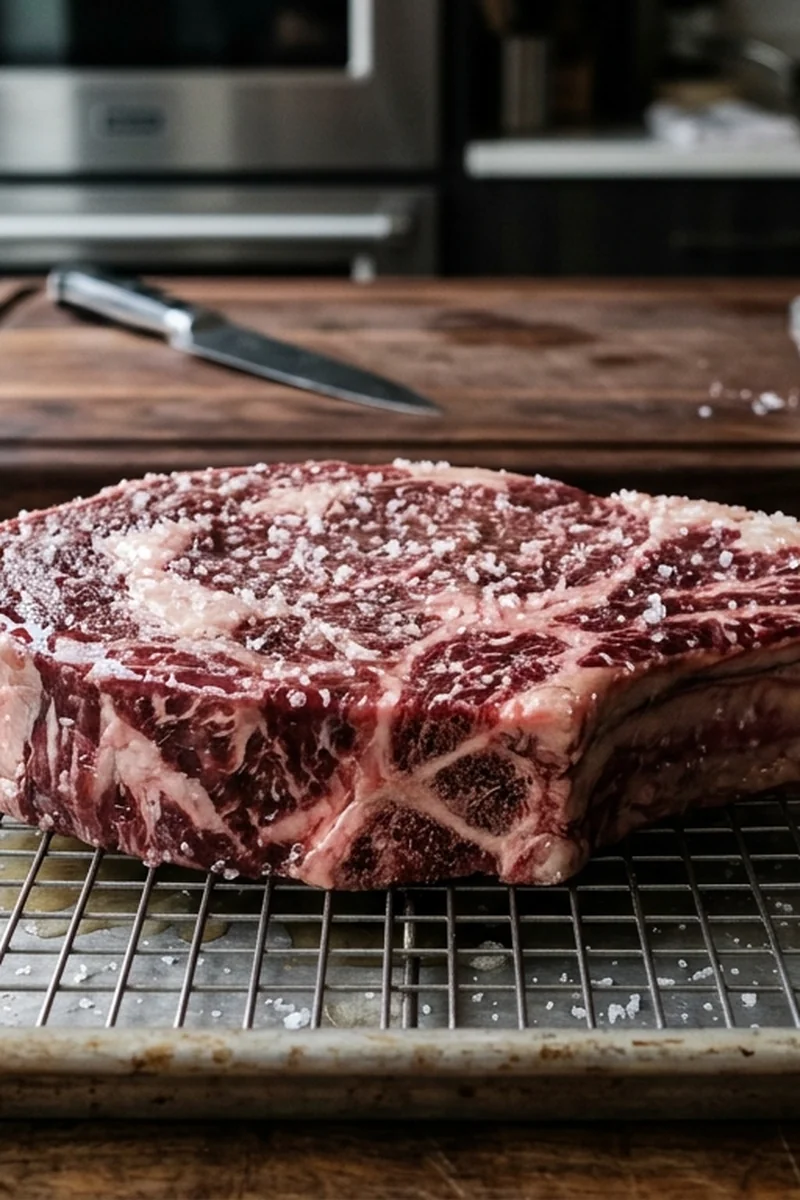
When you place salted meat on an elevated wire rack inside a modern frost-free refrigerator without covering it, the cold, dry air (typically 30% to 40% relative humidity at 36°F) continuously sweeps over the surface. The moisture in the uppermost millimeter of the meat evaporates completely, transforming the exterior into a taut, slightly glossy, deep-mahogany glaze known as a pellicle.
Because there is zero surface moisture to boil away when the cold meat contacts screaming-hot fat, thermal energy transfers instantaneously into the dry surface proteins. The Maillard reaction triggers in seconds. You achieve an intensely flavorful, shatteringly crisp crust with minimal time in the pan—preventing the dreaded thick gray band of overcooked meat beneath the surface.
📥 Free Download: Dry-Brining Meat & Osmotic Protein Matrix Field Guide
Salt concentration calculations, meat thickness diffusion timelines, poultry skin crisping secrets, and high-heat searing protocols.
The Step-by-Step Culinary Dry-Brining Execution Protocol
To master dry-brining across any thick-cut protein (steaks, pork chops, roasts, or whole poultry), follow this chef-calibrated protocol:
1. Choose the Right Salt Crystal Geometry
Never use dense table salt; its tiny, cubic crystals make it dangerously easy to over-salt meat. Use coarse Kosher salt (Diamond Crystal is the culinary standard). Its hollow, pyramid-shaped flakes adhere smoothly to meat surfaces without dissolving prematurely. The golden ratio is 1.0% to 1.2% salt by total meat weight (approximately 1 level teaspoon of Diamond Crystal Kosher salt per pound of meat).
2. Vigorously Blot the Surface
Before applying salt, press heavy-duty paper towels firmly across every square inch of the meat to remove all surface purging liquids and packaging fluid.
3. Shower Evenly from High Elevation
Hold your hand 12 to 14 inches above the meat and sprinkle the salt in a broad, gentle shower. This ensures uniform distribution across all sides, including the fatty edges, rather than heavy localized clumps.
4. Elevate on a Stainless Steel Wire Cooling Rack
Never place salted meat flat on a plate or cutting board. As moisture initially purges, meat resting on a flat surface will sit in its own puddle, preventing underside airflow. Place an elevated wire cooling rack inside a rimmed baking sheet. This ensures 360-degree convective air circulation around the entire cut.
5. Dwell Uncovered in the Coldest Zone of the Refrigerator
Place the baking sheet on the bottom shelf toward the back of your refrigerator (35°F–38°F / 2°C–3°C). Observe these calibrated dwell times:
- Thin Steaks & Pork Chops (1 to 1.25 inches): 8 to 12 hours.
- Thick-Cut Steaks & Roasts (1.5 to 2.5 inches): 18 to 24 hours.
- Whole Chickens & Bone-In Turkeys: 24 to 48 hours (tuck salt under the breast skin for maximum tenderness).
6. Sear Straight from the Refrigerator
Disregard the outdated kitchen myth that meat must sit at room temperature for an hour before searing. A bone-dry, cold steak straight from the fridge sears instantly while protecting the interior from overcooking. Transfer directly to high heat, achieve a rapid crackling crust, rest for five minutes, and savor the juiciest, most tender steak of your life.
As an Amazon Associate, azuloz.com earns from qualifying purchases.