To draw faces with believable proportions, start with the whole head, mark the direction it faces, and place the features lightly before adding detail. Check the distances against your reference, then build shading from broad areas of light and dark.
The most useful principle is simple: proportion guides are starting points, not rules every face must obey. A convincing portrait comes from noticing how one person’s features differ from an average diagram. This guide begins with a front-facing adult head, then explains how to adjust for turns, expressions, and individual features.
Choose a Clear Reference and Simple Drawing Tools
For your first study, choose a photograph taken near eye level, with the whole head visible and a relaxed expression. Light from a window on one side can make the shapes easier to read. Avoid starting with a heavily filtered image, a very close selfie, or dramatic lighting that hides half the features.
An ordinary pencil, eraser, and sheet of paper are enough for practice. If you have more supplies, an HB pencil works well for construction, a 2B or 4B can deepen shadows, and a kneaded eraser lets you lift small areas of graphite. Blending tools are optional.
Make a few light lines and a strip of tones from pale gray to dark before beginning. Keep your pressure gentle enough that you can change a line without leaving a groove. These pencil drawing tips offer more practice with pressure and mark-making.
Understand the Head Before Placing the Features
Use a Rounded Mass and a Jaw as a Construction Guide
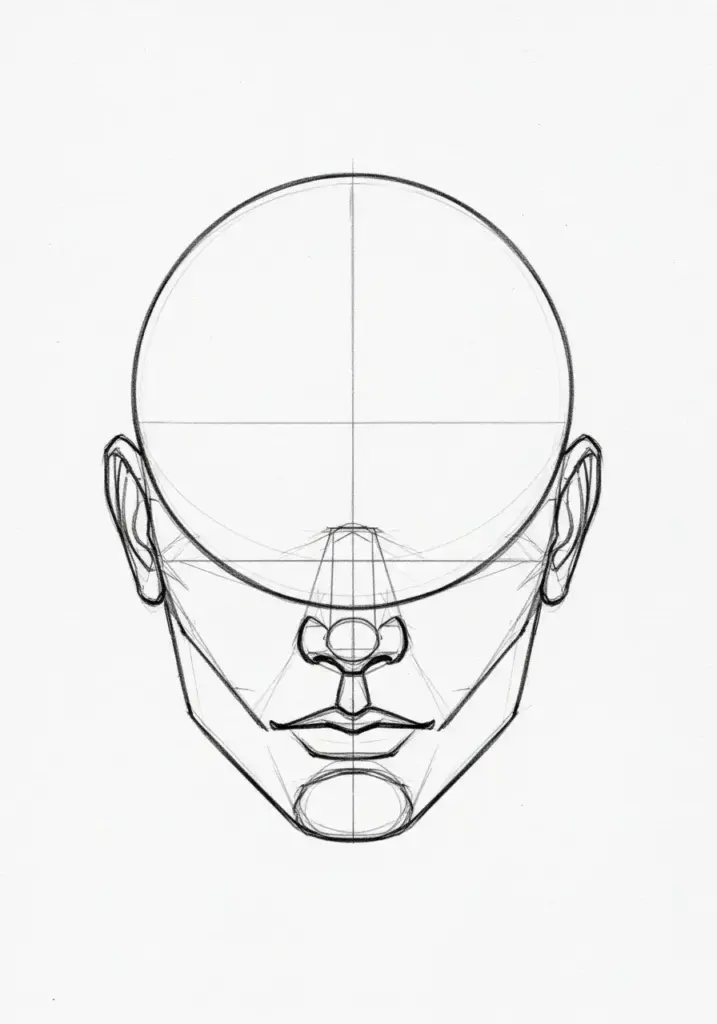
A useful construction model combines a rounded cranial mass with a more angular jaw. It simplifies the head so you can think about volume and direction before drawing eyes or lips. It is a drawing aid, not a literal description of every skull.
In Proko’s demonstration of the Loomis approach, the rounded mass has flattened sides, and the jaw attaches below. The lesson also emphasizes that individual proportions differ from the average model. :contentReference[oaicite:0]{index=0}
If that construction feels complicated at first, begin with a loose oval for a straight-on study. The important task is to compare the head’s overall height, width, and jaw shape before committing to details.
Treat Facial Thirds as a Rough Map
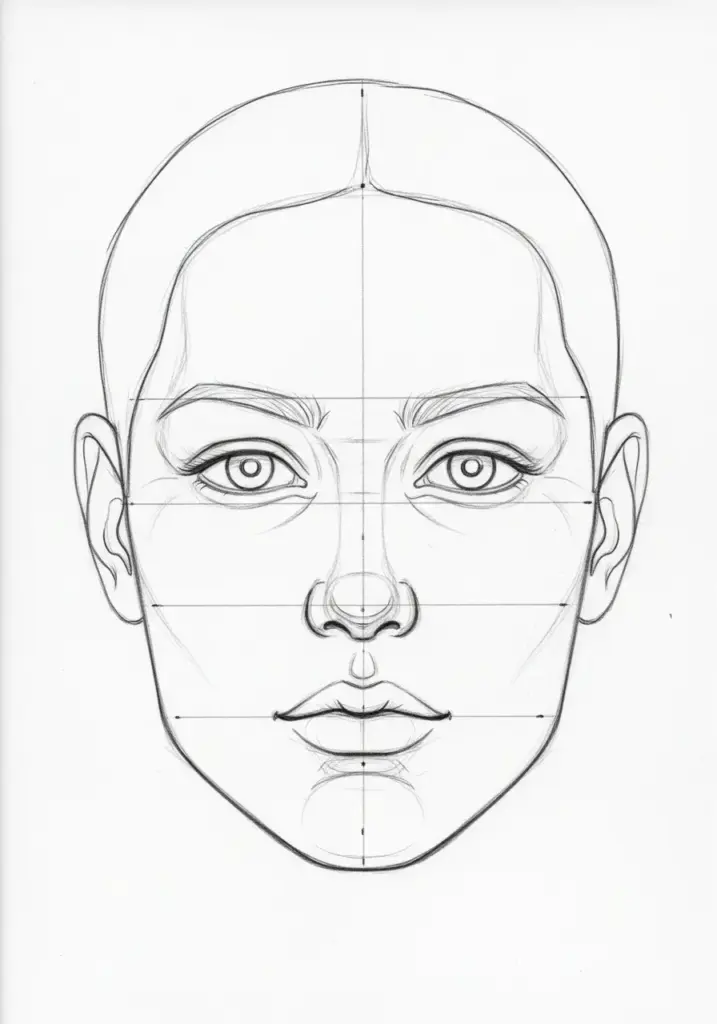
A common construction guide divides the face into three approximate sections: hairline to brow, brow to the base of the nose, and nose base to chin. Notice that this measures the face from the hairline, not the entire head from its highest point.
Use these sections to make an initial estimate, then compare them with your subject. A high or receding hairline, a longer nose, or a shorter chin can change the pattern. Do not move someone’s features to make them fit equal thirds.
How to Draw Faces Step by Step
1. Block In the Head, Jaw, and Neck
Mark the top and bottom of the head with small dashes. Add its widest points, then connect them with light, simple lines. Compare the width at the temples, cheekbones, and jaw instead of making every face the same oval.
Add the neck and a suggestion of the shoulders early. Check where the neck emerges behind the jaw; drawing two straight lines down from the chin can make the head feel disconnected from the body.
2. Establish the Center Line and Head Tilt
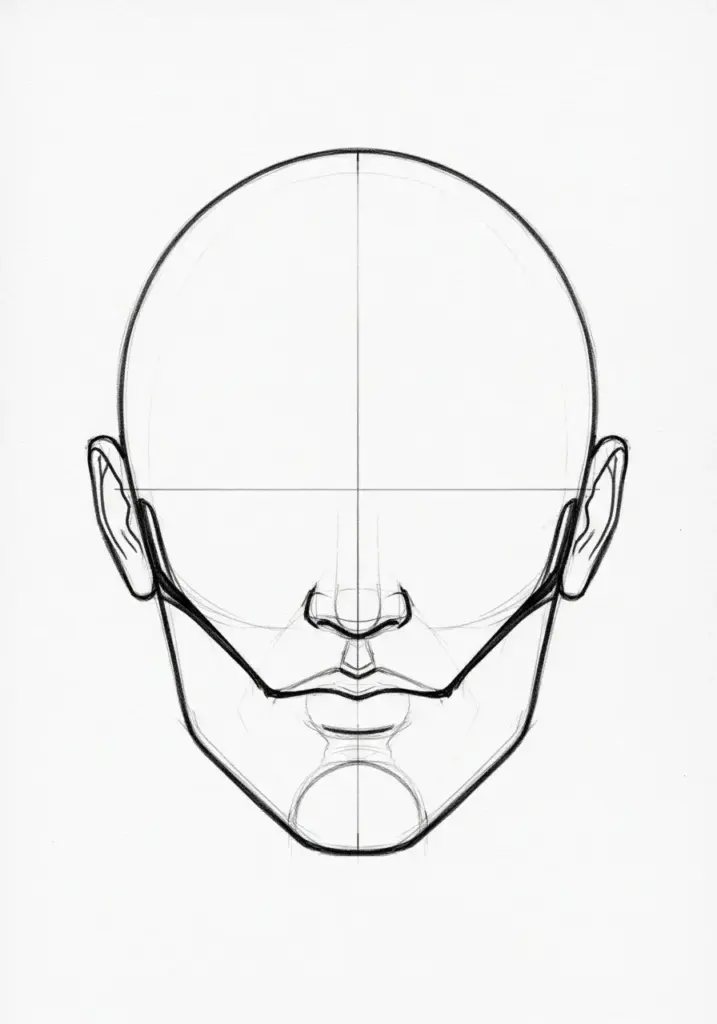
Draw a light center line through the forehead, nose, mouth, and chin. On a straight-on head it runs near the middle. When the head turns, this guide follows the surface toward the direction of the turn, leaving unequal visible widths on either side.
Mark the angle across the brows as well. If the person tilts their head toward one shoulder, the features should share that tilt. Avoid drawing a tilted jaw with a level pair of eyes.
For a separate exercise in building forms in space, the simple stairs drawing guide can help you practice checking angles before adding surface detail.
3. Estimate the Eye Line, Then Measure It
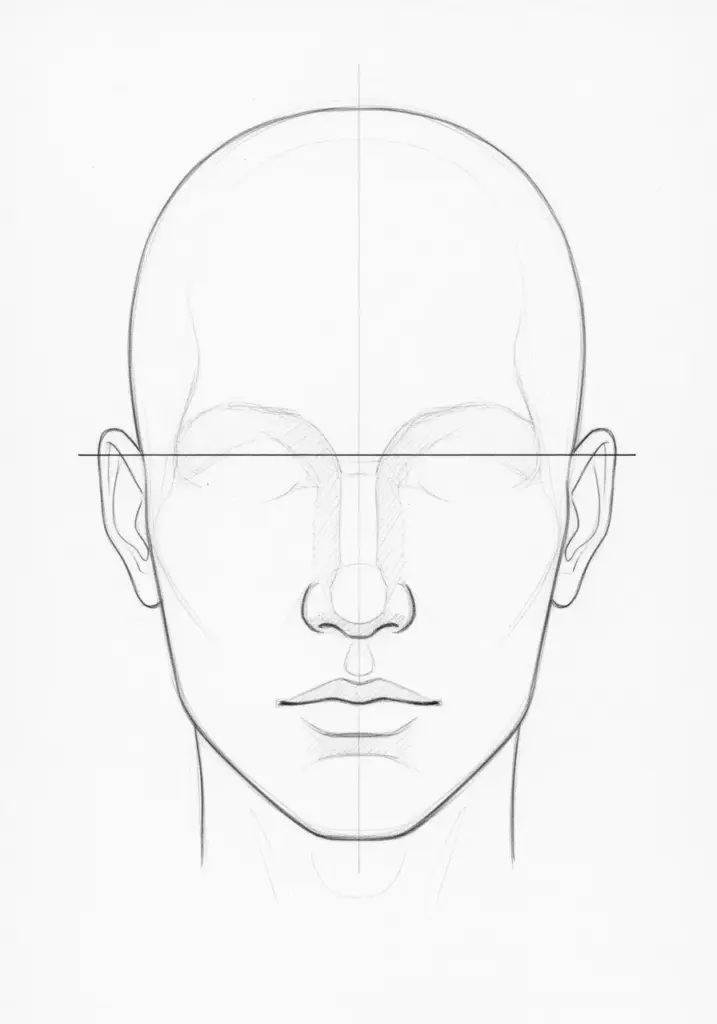
On a front-facing adult head without an upward or downward tilt, the eyes often fall around halfway between the top of the skull and the chin. This is an approximate check, not an exact placement for every subject. Hair volume sits outside the skull shape and can make the apparent midpoint misleading.
Compare the distance above the eyes with the distance below them in your reference. Then mark the inner and outer corners of both eyes. Establish both together so one finished eye does not dictate the scale of the entire portrait.
4. Place the Nose Base and Mouth Opening
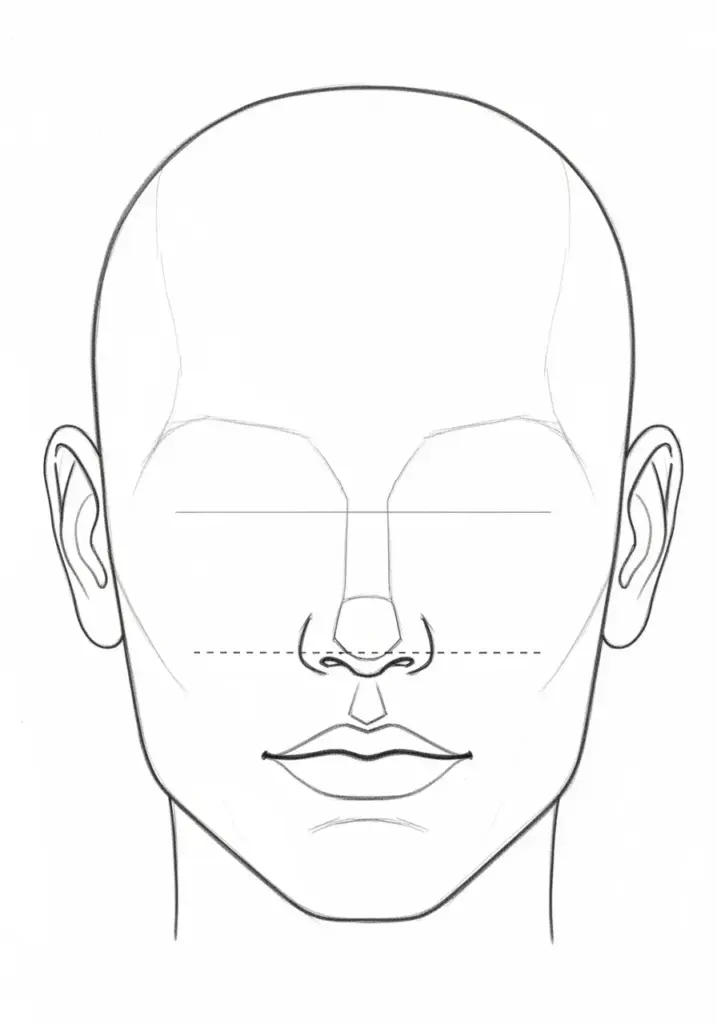
Locate the nose base using your rough facial thirds, then correct it from observation. Between the nose and chin, mark the opening between the lips and the bottom of the lower lip separately. They are different landmarks.
Rather than placing the lower lip automatically halfway down this section, compare three spaces: nose to mouth opening, mouth opening to lower lip, and lower lip to chin. Their relationship helps capture the subject’s expression and likeness.
5. Check the Whole Face Before Refining It
Pause while everything is still easy to erase. Compare eye spacing, nose length, mouth width, and the distance from the mouth to the chin. Use imaginary vertical lines through the eye corners to see how the nose and mouth sit beneath them.
For example, if the mouth looks too low, check both the mouth and the chin before moving anything. The problem may be a shortened chin rather than the mouth’s position. Correct the underlying relationship instead of repeatedly redrawing one feature.
Draw the Features as Forms
Eyes: Establish the Lids and Gaze First
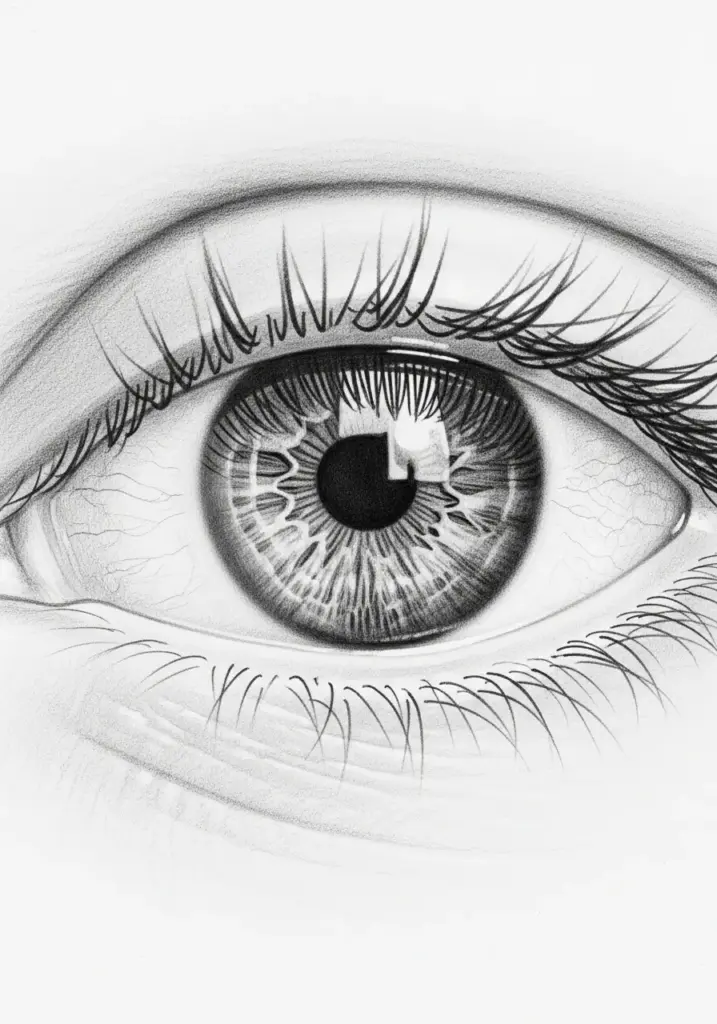
One visible eye-width between the eyes is a useful rough check in a straight-on view, but measure your reference. Compare the angles of the upper lids, the lower-lid curves, and the height of each eye opening. Natural differences do not always need correcting.
Think of the lids wrapping around a rounded eyeball. Place both irises and pupils before adding lashes, checking that the gaze agrees. The upper lid often overlaps the iris; a complete visible circle can change the expression.
Shade the whites of the eyes according to the reference. They may include pale grays and lid shadows, while a small reflection may remain very light. Avoid outlining every edge with the same dark line.
Nose: Find Its Width and Shadow Shapes
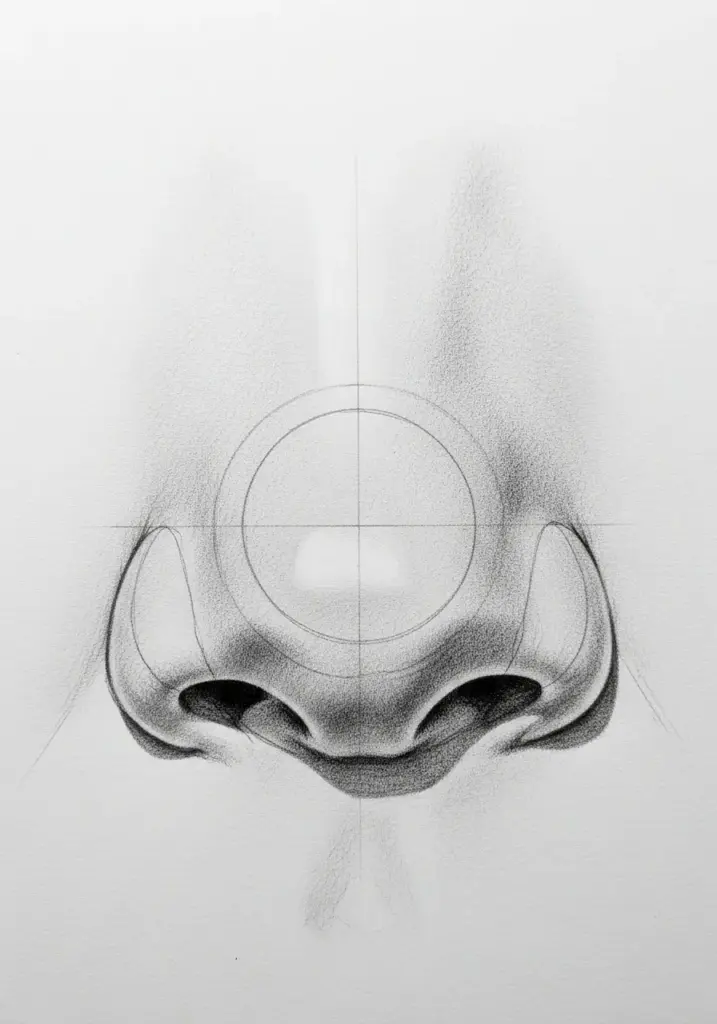
Begin with the bridge direction, the width across the nostril wings, and the position of the tip. A wedge or small box can help you imagine the front, sides, and underside. Round those simple shapes as you refine the drawing.
Look for changes in tone along the bridge rather than automatically drawing two dark borders. Nostril openings can be very dark, but their shape and visibility depend on the angle and light. A head tilted down may reveal little of them; an upward tilt may reveal much more.
Mouth: Draw the Opening Before the Lip Borders
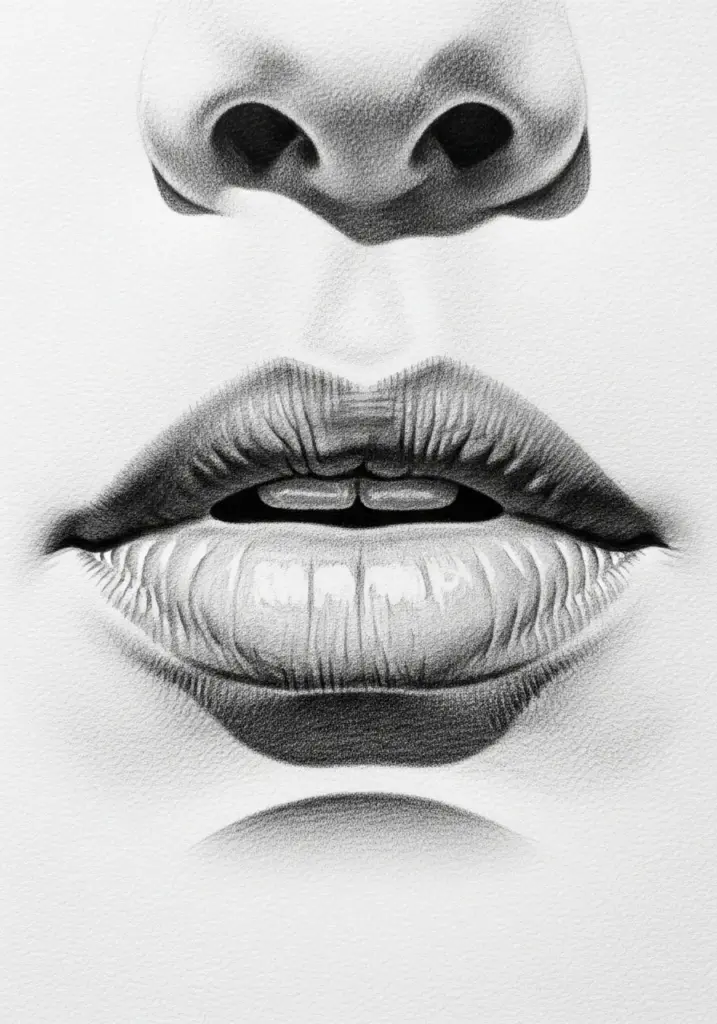
Mark the corners and lightly draw the line where the lips meet. Follow its actual changes in direction. Do not assume the corners must sit directly beneath the pupils; use those vertical alignments only as comparisons.
Build the upper and lower lip around that opening. Under light from above, the upper lip may appear darker, but the reference should decide. Keep the lower border subtle wherever it blends into the surrounding skin.
For a smile, first draw the shape of the open mouth and the visible teeth as one light mass. Add only the divisions you can see clearly. Heavy outlines around every tooth can overwhelm the expression.
Add Shading Without Making the Face Look Flat
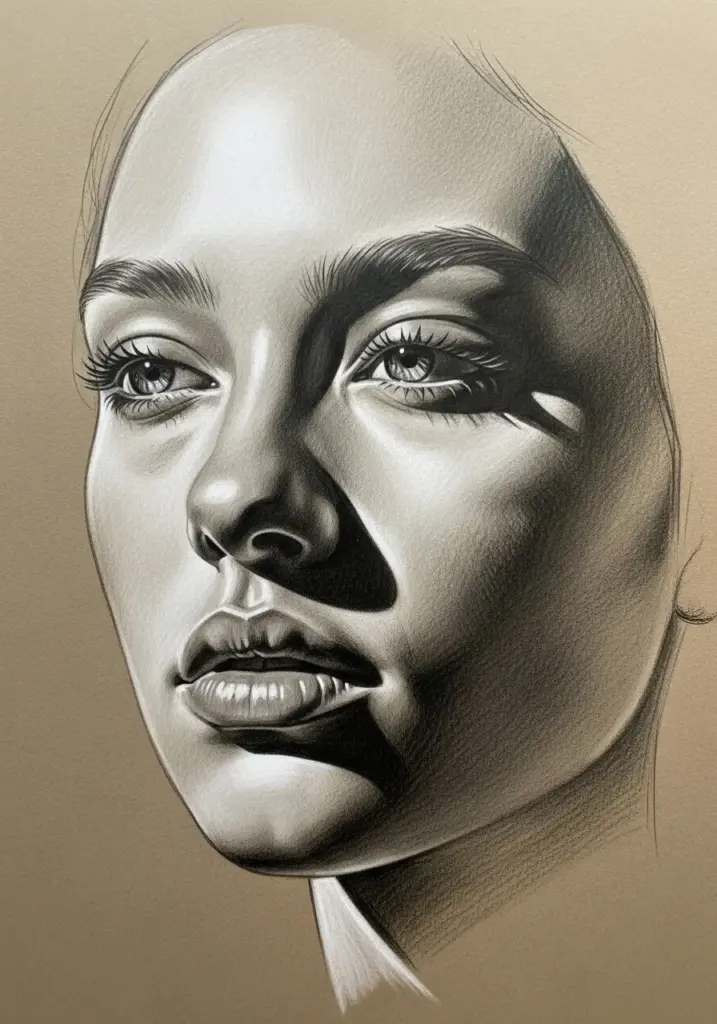
Before shading, identify the light source and simplify the reference into three values: light, middle tone, and dark. A value is simply how light or dark an area looks. Squinting slightly can help you notice large groups instead of tiny details.
- Map the main shadows. Look around the eye sockets, beside and beneath the nose, below the lower lip, and under the jaw. Shade only the areas that are dark in your reference.
- Connect related shadow areas. Build a light first layer so you can assess the whole head before deepening individual patches.
- Add middle tones. Use them where rounded forms turn gradually away from the light.
- Reserve the strongest accents. Place your darkest marks and lightest highlights selectively, according to what you observe.
Distinguish a form shadow, where a surface turns away from light, from a cast shadow, where another form blocks the light. A cheek may turn gradually into shade, while the nose may cast a more distinct shadow across it. Edge softness still depends on the lighting.
Hatching, cross-hatching, and gentle blending are all valid choices. If you blend, soften selected transitions rather than rubbing the whole portrait into one gray. Across different skin tones, compare the actual light and shadow relationships instead of automatically leaving large areas as bare paper.
Fix Common Portrait Drawing Problems
The Forehead Looks Too Small
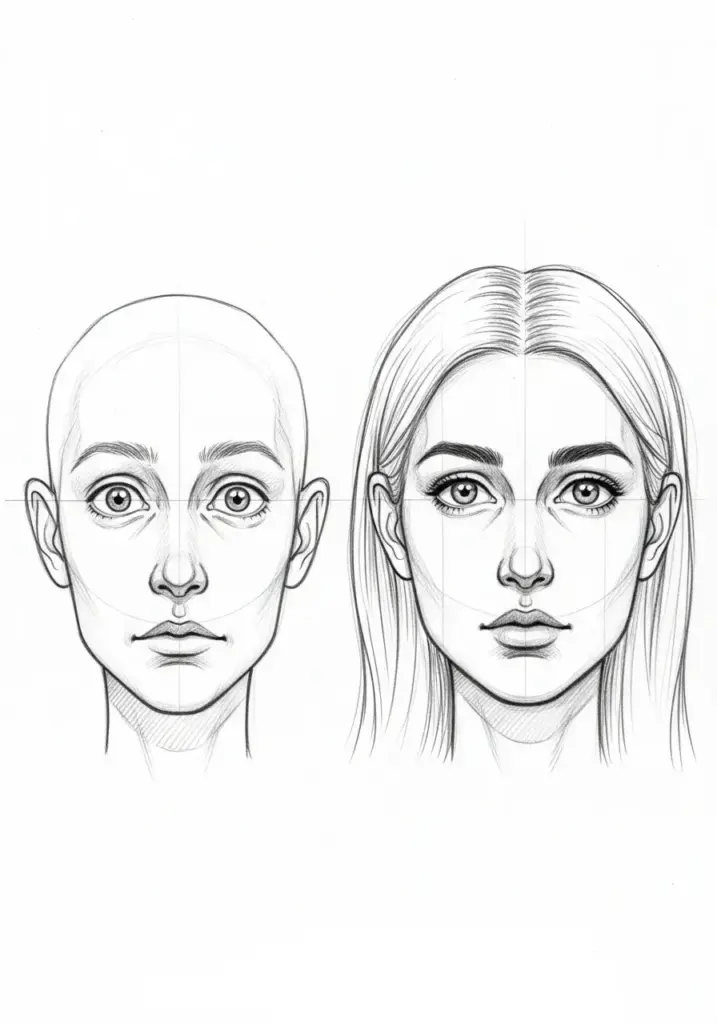
Recheck the entire skull shape, not just the hairline. You may have placed the eyes too high or cut off the top of the head. Lightly redraw the outer envelope before adjusting individual features.
The Ears Look Misplaced
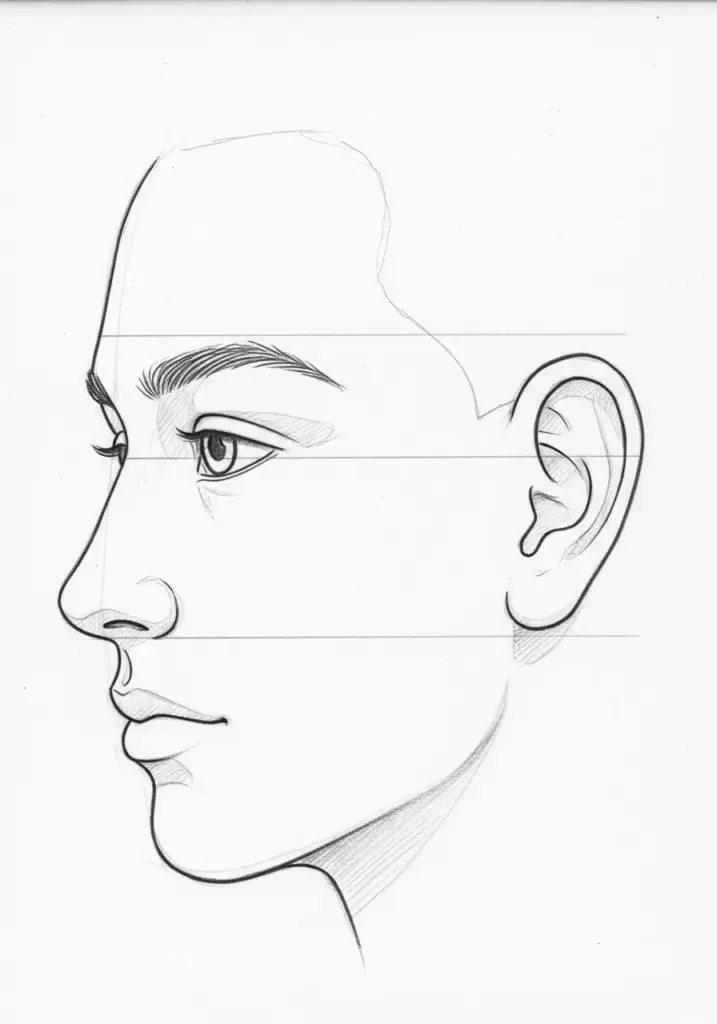
In a level front view, the brow and nose base provide rough upper and lower landmarks for the ears. Actual ear size and position vary, and these alignments change with head tilt. Compare each visible ear with the nearby jaw and brow instead of forcing a fixed placement.
The Hair Looks Like a Helmet
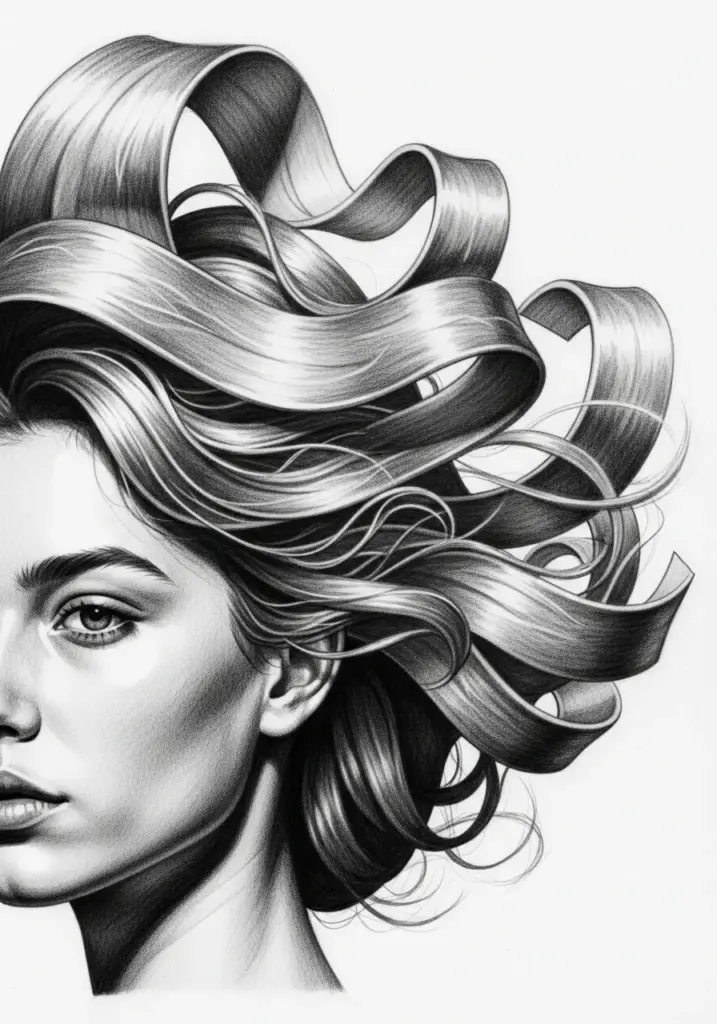
Draw the hairstyle’s outer silhouette and its volume beyond the skull first. Divide it into large light and dark masses, then indicate a few locks or curl groups. Vary the edge: some sections may be smooth, others broken by loose hairs. Save individual strands for selected accents.
The Face Has a Heavy Outline
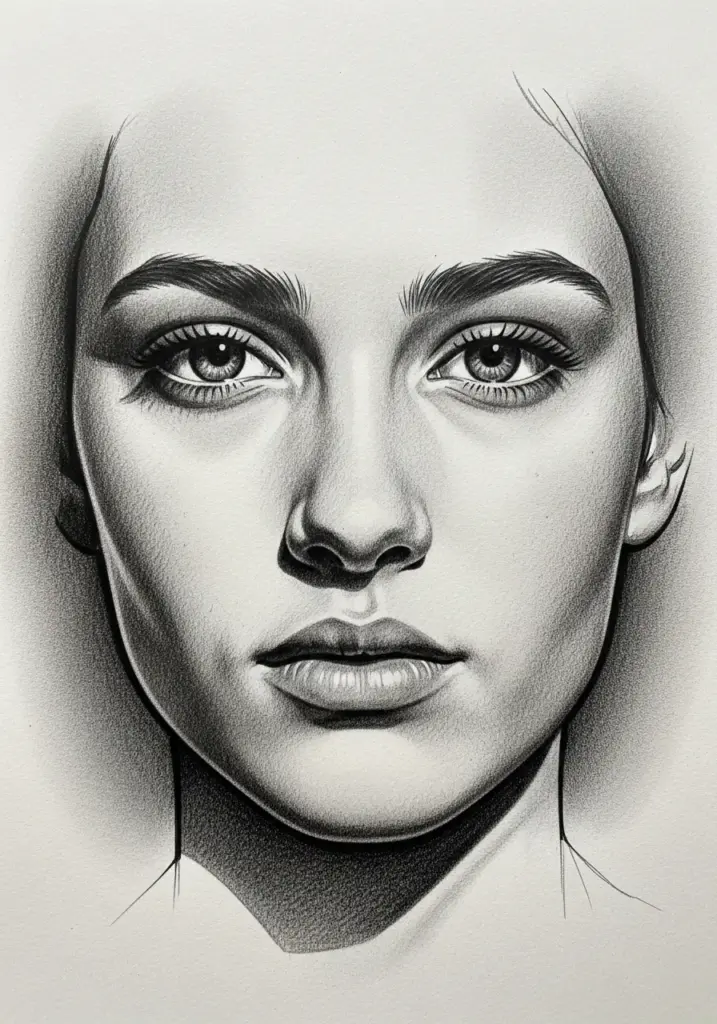
For a softly rendered portrait, reduce any outline that is darker than the surrounding values justify. Let some edges fade and others remain clear. A bold contour can also be a deliberate choice in a line drawing; the goal is to control the effect.
The Eyes Still Look Uneven
Check the head tilt, eye-corner positions, lid openings, and pupil placement in that order. If you use a mirror or flip a digital canvas, flip the reference too. The comparison can reveal a drawing error without confusing it with the subject’s natural asymmetry.
When photographing a sketch to inspect it, keep the camera centered and parallel to the paper. An angled photograph can introduce distortion of its own.
Adapt Your Method for Different Faces and Angles
In a three-quarter view, one side of the face turns away. The far eye may appear narrower, the nose can overlap part of the far cheek, and the mouth wraps around the form. Do not copy a straight-on face and simply shift the nose sideways.
For children, older adults, and people with different facial structures, begin again with observation. Compare the cranial mass, jaw, cheeks, and feature spacing. Avoid substituting fixed templates based on age, gender, or ethnicity.
When drawing an older face, establish volume and expression before wrinkles. When drawing an expression, watch several features together: a smile can change the cheeks, eyelids, mouth corners, and jaw position.
A grid can help transfer positions from a photograph, while construction studies help you practice thinking in volume. You can use both. Whichever method you choose, pause to ask what shape each line or shadow describes.
Try a Focused 20-Minute Face Drawing Exercise
Choose one reference and give the session a narrow goal: accurate placement before detail.
- Minutes 1–4: Sketch the head envelope, jaw, neck, and center line.
- Minutes 5–9: Place both eyes, the nose base, mouth opening, and ears. Compare the spaces between them.
- Minutes 10–15: Block in the largest shadow shapes with a small range of tones.
- Minutes 16–20: Step back, identify the most distracting mismatch, and correct it. Leave eyelashes and hair strands unfinished.
If simplifying shapes feels difficult, use a flower drawing exercise to practice comparing outlines and overlaps. For another subject that combines rounded forms and surface texture, try drawing a cat.
Date your face study and write one specific observation beside it, such as “the jaw is too narrow” or “the pupils point in different directions.” Use that observation as the focus of your next sketch. A useful practice session ends with something concrete you can see and adjust.