


You place your hand against the side of your kitchen refrigerator and notice it feels unusually warm—almost hot to the touch. In the quiet of the late evening, you realize the rhythmic hum of the compressor has been running continuously for hours without cycling off. Your produce in the crisper drawer feels cool, but not crisp, and your ice cream in the freezer is suspiciously soft around the edges.
Your first panicked thought is that the appliance is dying, and you brace yourself for an unexpected \$2,500 replacement bill. Yet in over 70% of service calls for refrigerator cooling distress and compressor burnout, the appliance itself has no mechanical defect. The true culprit is invisible, quietly choking the underside or back of the unit: a dense, felt-like blanket of pet dander, lint, and aerosolized cooking grease suffocating the refrigerator condenser coils.
A refrigerator is not a device that generates cold; it is a thermal heat pump designed to capture heat from inside the insulated cabinet and reject it into your kitchen. When the exterior copper and aluminum condenser coils are buried under an insulating mat of dust, the physics of thermal transfer collapse. Compressor head pressures spike, duty cycles double, your monthly electric bill surges by up to \$15, and the compressor engine slowly cooks itself to death from the inside out. Fortunately, mastering the bi-annual convective coil restoration protocol takes less than 20 minutes and permanently preserves your appliance.
The Thermodynamics of Vapor-Compression: How Your Refrigerator Sheds Heat
To understand why dust accumulation is fatal to modern refrigerators, you must examine the closed thermodynamic loop known as the vapor-compression refrigeration cycle.
Inside the sealed tubing of your appliance, a specialized chemical refrigerant (historically R-134a, and now eco-friendly R-600a isobutane) continuously circulates through four mechanical stages:
- Evaporation (Heat Absorption): Cold, low-pressure liquid refrigerant expands inside the internal evaporator coils located behind your freezer wall. As it evaporates into a low-pressure gas, it aggressively absorbs thermal energy from your food, lowering the internal air temperature to 37°F in the fresh food section and 0°F in the freezer.
- Compression (Energy Concentration): The compressor—an electrically driven mechanical pump—sucks in the cold, heat-laden gas and compresses it under extreme pressure. This concentrates the absorbed thermal energy, transforming the refrigerant into a superheated, high-pressure vapor (reaching temperatures between 130°F and 160°F).
- Condensation (Heat Rejection): The superheated gas is pumped into the exterior condenser coils located beneath the chassis or across the back of the refrigerator. As cooler ambient room air is drawn across the coils by an electric fan, the refrigerant sheds its heat into the kitchen. Deprived of heat, the gas condenses back into a high-pressure liquid.
- Expansion: The liquid passes through a microscopic capillary tube, dropping in pressure and cooling dramatically, ready to repeat the cycle.
The entire refrigeration cycle hinges entirely on Stage 3: Condensation. If the condenser coils cannot shed that accumulated heat into the kitchen air, the refrigerant enters the expansion valve still hot, and the refrigerator completely loses its cooling capacity.
“A refrigerator does not create cold; it removes heat. When you cover the condenser coils in a layer of household lint, you wrap the appliance in a thermal winter coat, trapping the very heat it is desperately trying to expel.”
The Dust Blanket Effect: Thermal Insulation and Head Pressure Spikes
Household dust is not inert dirt; it is a complex, fibrous matrix composed of sloughed human skin cells, pet dander, microscopic carpet fibers, and aerosolized cooking oils. Because modern refrigerators feature an electric fan that actively draws hundreds of cubic feet of floor-level air across the condenser coils every hour, the coils act as an unshielded static air filter.
Over 12 to 24 months of continuous operation, this dust forms a dense, felted mat across the closely spaced aluminum cooling fins. This induces three catastrophic thermodynamic failures:
1. Collapse of Convective Heat Transfer
Aluminum has a high thermal conductivity rate of approximately 205 Watts per meter-Kelvin (W/m·K), allowing heat to radiate effortlessly into ambient air. The felted lint blanket, by contrast, has a thermal conductivity of less than 0.04 W/m·K. A 1/8-inch layer of dust reduces convective heat transfer from the coils by more than 60%.
2. Skyrocketing Compressor Head Pressure
Because the refrigerant cannot shed its heat, it remains a hot, expanded vapor. The compressor must work against massive resistance—known in HVAC engineering as head pressure. In a clean system, head pressure hovers around 110 to 125 PSI. In a severely choked condenser, head pressure surges past 185 to 210 PSI. Pumping against this hydraulic wall forces the compressor motor to draw twice its rated amperage, dramatically increasing electricity consumption.
3. Lubricant Carbonization and Valve Seizure
Inside the hermetic compressor dome, specialized synthetic ester oil lubricates the piston and crankshaft. When head pressures soar, compressor operating temperatures exceed 220°F (104°C). At these extreme temperatures, the lubricating oil breaks down, carbonizes into gritty sludge, and coats internal reed valves. Within months, the compressor suffers mechanical seizure, burning out the electrical windings and rendering the appliance unrepairable.
The Hidden Financial Toll: Energy Waste and Early Failure
A refrigerator is one of the few electrical appliances in your home that runs 24 hours a day, 365 days a year, accounting for approximately 7% to 12% of total residential electricity bills.
When condenser coils are clean, a properly sized compressor operates on a 40% to 50% duty cycle—running for approximately 20 minutes, then shutting off for 20 minutes while the insulated cabinet maintains temperature. When coils are insulated with dust, the compressor must run on an 80% to 95% duty cycle simply to maintain safe food storage temperatures.
According to appliance energy audits by the U.S. Department of Energy (DOE), dirty condenser coils increase a refrigerator’s monthly energy consumption by 25% to 35%. Over a three-year period, this unnecessary energy waste adds \$120 to \$240 to your utility bills—more than enough to pay for professional cleaning tools multiple times over.

Amazon US Verified
Long Flexible Refrigerator Coil Brush & Crevice Kit
29-inch bendable wire brush with dense scratch-free nylon bristles and ultra-thin universal vacuum hose adapter engineered to clean deep between condenser fins without damaging coils.
The Step-by-Step Bi-Annual Coil Restoration Protocol
Cleaning your refrigerator’s condenser coils is simple, highly satisfying, and requires no technical trade certifications. Perform this maintenance protocol every six months (or every 90 days in homes with shedding pets):
Step 1: Electrical Disconnection & Floor Protection
Unplug the refrigerator from the wall outlet to prevent electrical shock and ensure the condenser fan does not spin while cleaning. If you must slide the refrigerator forward to access rear coils, place a sheet of clean corrugated cardboard or masonite under the front wheels to prevent gouging soft hardwood floorboards or tearing linoleum.
Step 2: Accessing the Coils
Modern refrigerators house their condenser coils in one of two configurations:
- Under-Chassis Coils (Most Modern Models): Located behind the bottom front kick-plate. Firmly pull or snap off the plastic toe grille across the front base of the refrigerator.
- Rear-Mounted Coils: Located on the lower rear of the appliance. Pull the unit away from the wall and unthread the 1/4-inch hex screws securing the thin cardboard or galvanized sheet-metal rear service panel.
Step 3: The Mechanical Brush Agitation
Insert a dedicated, flexible 28-inch conical condenser coil brush into the channels between the copper loops and aluminum fins. Gently rotate the brush in a twisting motion to wrap up compacted dander and lint mats. Pull the brush straight out, strip the lint into a trash bag, and repeat until the copper tubing shines.
Step 4: Vacuum Extraction with a Crevice Wand
Attach a narrow, flat crevice wand to your household vacuum cleaner. Carefully vacuum away all dislodged dust from the floor of the appliance tray, the coil fins, and the surrounding wiring harness. Inspect the axial condenser fan blade: wipe any greasy grime off the plastic fan blades with a damp microfiber cloth so it can spin at full aerodynamic velocity.
Step 5: Reassembly and Restoration
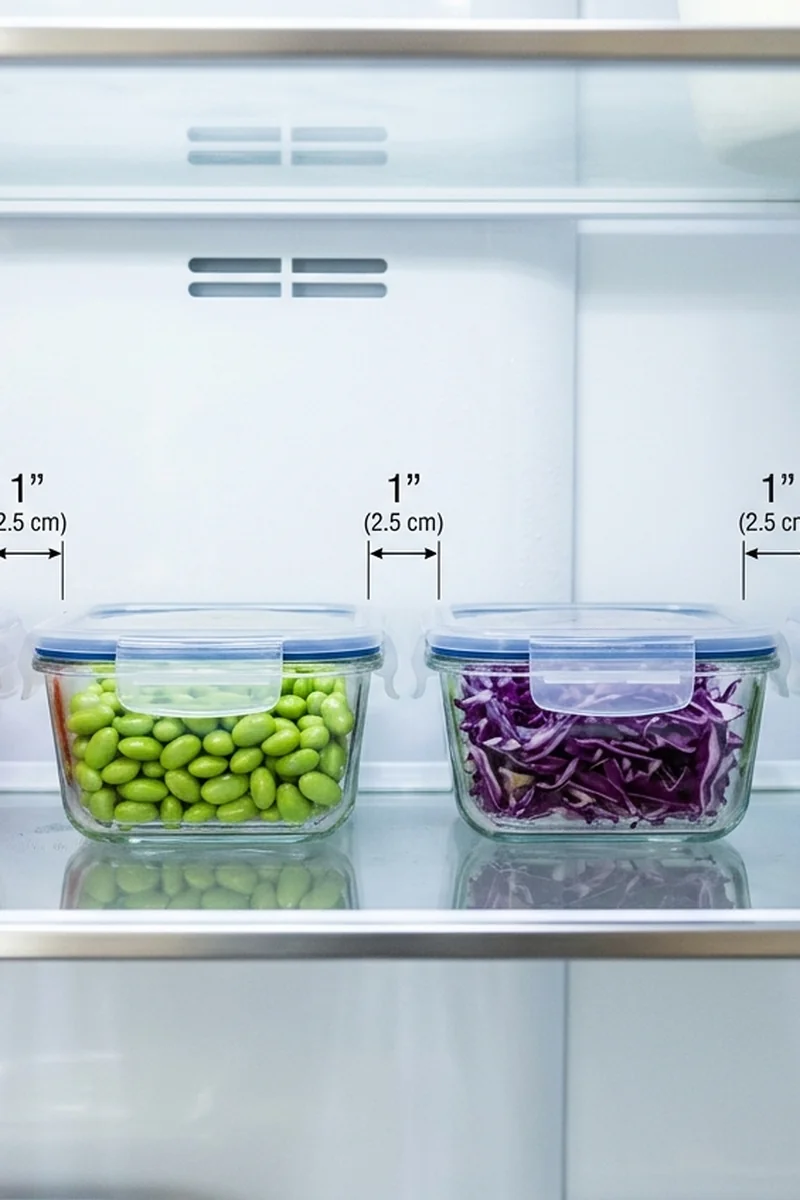
Reattach the lower access panel or front snap-in toe grille. Slide the refrigerator back into position, ensuring at least 1 inch of clear air gap between the back wall and the appliance to maintain unrestricted convective airflow. Plug the unit back in. Within 30 minutes, your compressor will run noticeably quieter, cooler, and with restored thermal efficiency.
📥 Free Download: Refrigerator Condenser Coil Airflow & Cleaning Field Guide
Vapor-compression thermodynamics, head pressure charts, pet household maintenance intervals, and electrical safety checklists.
As an Amazon Associate, azuloz.com earns from qualifying purchases.