
How to Turn a Thrifted Crystal Jar Into a Glowing Accent Light
A thrifted crystal or cut-glass jar can become a beautiful accent light with one simple addition: a battery-operated LED puck or a short strand of fairy lights. The textured glass catches and scatters the light, creating a soft glow without wiring, drilling, or permanently altering the jar.
This decorating idea, shared by redeux_style, works especially well with vintage biscuit jars, candy dishes, lidded canisters, and other translucent vessels. The project is easy, but choosing a suitable jar and a safe light source makes all the difference.
What You Need to Make a DIY Jar Light
- A clean, undamaged glass or crystal jar
- A battery-operated LED puck light or fairy-light strand
- Fresh batteries
- Removable mounting putty, hook-and-loop dots, or another nonpermanent fastener
- A microfiber cloth
- Optional decorative filler, such as glass pebbles or artificial greenery
Use only a light intended for indoor decorative use, and follow its manufacturer’s instructions. A real candle, incandescent bulb, or improvised wired fixture should never be enclosed inside a jar.
How to Choose the Right Thrifted Jar
Thrift stores, estate sales, flea markets, and garage sales often have inexpensive glass containers that suit this project. You do not need genuine crystal. Pressed glass and cut-glass-style jars can produce a similarly attractive effect.
Look for translucent glass
Clear, frosted, tinted, and textured glass all allow light to pass through. Faceted patterns create brighter highlights, while frosted surfaces produce a softer and more even glow. Opaque ceramic, wood, and solid metal containers will not illuminate in the same way.
Inspect the jar carefully
Check the body, rim, lid, and base under good lighting. Avoid any jar with a crack, spreading fracture, or unstable base. Even a minor chip can leave a sharp edge, so choose an undamaged vessel whenever possible.
Set the jar on a flat surface to confirm that it does not wobble. If it has a lid, make sure the lid rests securely without placing pressure on the light or its battery compartment.
Measure before buying the light
Measure the jar’s opening, interior width, and available height. A puck light may look small on its packaging but still be too wide to pass through a narrow opening. Also check whether you can reach the switch and battery compartment once the light is positioned.
Choosing Between Puck Lights and Fairy Lights
Both types of battery-operated LEDs work, but they create different effects.
| Light type | Best for | Effect | What to check |
|---|---|---|---|
| LED puck light | Small or medium lidded jars | Focused illumination that highlights the glass pattern | Diameter, mounting method, timer, and battery access |
| Fairy lights | Tall, wide, or open jars | Soft points of light throughout the vessel | Wire length, battery-pack size, and switch placement |
| Remote-controlled puck | Jars placed on shelves or mantels | Adjustable brightness or color without moving the jar | Remote range and whether several lights share one control |
Use warm white for an everyday glow
Warm-white LEDs usually complement vintage glass, wood furniture, and traditional interiors. Neutral or cool white creates a crisper look and may work better with modern décor. Color-changing lights can be fun for seasonal displays, but saturated colors may conceal some of the jar’s glass detail.
Prioritize a timer over extra brightness
A built-in timer makes an accent light easier to live with and can help conserve batteries. Dimming is also useful because a puck light that looks subtle during the day may feel overly bright after dark. Choose a product with these functions built in rather than modifying its wiring or battery connections.
How to Assemble a Thrifted Jar Light
- Clean the jar. Wash it according to the care requirements of the material. Avoid sudden temperature changes with vintage glass, which may be more vulnerable to thermal shock.
- Remove adhesive residue. Soften stubborn label glue with an appropriate glass-safe adhesive remover. Test any product on a discreet spot first.
- Dry everything completely. Moisture can damage batteries and electronic components.
- Test the light outside the jar. Install the batteries, check the controls, and run the light long enough to confirm that it operates normally.
- Choose the light position. Place a puck beneath the jar, attach it inside the lid, or set it at the bottom. Each position produces a different pattern.
- Secure loose components. Use removable mounting material if necessary. Do not cover ventilation openings, switches, warning labels, or the battery compartment.
- Turn on the light and adjust it. Rotate the jar or reposition the light until the most attractive facets face the room.
Try the light beneath the jar first
Placing the puck under a clear jar is often the simplest arrangement. The controls remain accessible, and you do not need adhesive inside the vessel. Make sure the jar sits securely and does not rock on the light.
Mounting the light inside the lid
If the lid has enough flat space, a removable fastener can hold the puck beneath it. This sends light downward through the glass and leaves the bottom available for a small decorative arrangement. Confirm that the light cannot fall and chip the jar.
Arranging fairy lights
Loosely coil the strand instead of packing it into a tight bundle. Place the battery pack behind the jar, under a removable lid, or in another position where the switch remains accessible. Do not pinch the wire between heavy or sharp-edged pieces of glass.
Essential Safety Rules for DIY Jar Lights
Battery-operated does not automatically mean risk-free. Use a commercially manufactured LED light in good condition, inspect it regularly, and discontinue use if it becomes unusually hot, leaks, flickers, smells strange, or shows battery-compartment damage.
- Never place a real flame inside or directly beside the jar.
- Do not use a mains-powered light with its cord trapped beneath a lid.
- Keep the display dry and away from sinks, tubs, showers, and outdoor moisture unless every component is specifically rated for that location.
- Do not pack dried leaves, paper, fabric, or other combustible decorations tightly around the light.
- Do not drill, cut, or grind an unknown vintage glass jar. Older decorative glass may chip, crack, or create hazardous dust.
- Remove depleted batteries promptly and follow local recycling or disposal requirements.
- Turn the light off before leaving home unless its instructions expressly support timed, unattended decorative use.
Be especially careful with button and coin batteries
Some miniature lights and remote controls contain button or coin batteries. These batteries can cause severe internal injuries if swallowed. The U.S. Consumer Product Safety Commission advises keeping products with accessible batteries away from children and replacing products with damaged battery compartments.
If children or pets live in the home, choose a light with a securely fastened battery compartment that requires a tool or two independent movements to open. Store spare and depleted batteries out of reach. A decorative jar containing accessible batteries is not a toy.
Where to Display a Glowing Jar
On a mantel or bookcase
Place the jar near a wall so its pattern creates reflections behind it. Leave enough open space around the vessel for the silhouette to remain visible instead of burying it among numerous accessories.
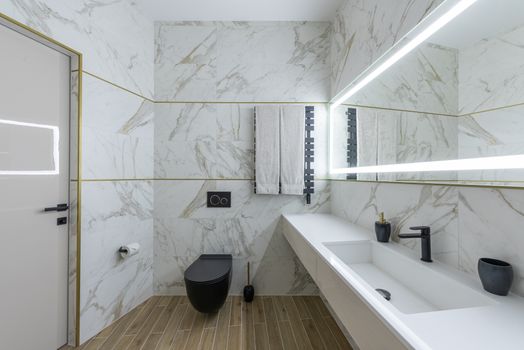
Amazon US Verified
Peel and Stick Textured Linen Wallpaper
Removable neutral wall covering providing architectural warmth and tactile depth.
On an entryway console
A softly glowing jar can make an entry feel welcoming in the evening. Use a tray or nonslip coaster to protect the furniture and keep the jar away from the edge.
Near artwork or plants
Position the jar beside, rather than directly in front of, the feature you want to emphasize. The accent light should support the arrangement without producing distracting glare on framed glass.
On a dining table
One substantial jar can serve as a simple centerpiece. For a longer table, use a group of three vessels at varying heights. Keep the tallest pieces low enough that guests can see one another comfortably.
In a bathroom
A jar light can create a relaxing glow, but it should stay well away from the sink, shower, tub edge, and any place where it could be splashed or knocked into water. Do not handle the light with wet hands.
How to Create a Clustered Jar-Light Centerpiece
A collection looks most intentional when the jars share one visual element. They might all have clear glass, similar faceted patterns, matching lids, or the same light color.
- Choose three jars in different heights or widths.
- Place the largest jar slightly off center.
- Arrange the smaller pieces close enough to read as one group.
- Use warm-white lights with similar color temperatures.
- Add only a few low decorative elements around the base.
Glass pebbles, polished stones, or nonflammable ornaments can help connect the grouping. Avoid unstable risers and loose materials that could obstruct the controls or battery compartments.
Seasonal Ways to Customize DIY Jar Lights
The easiest seasonal update is changing the LED color or arranging decorations around the outside of the jar. This preserves the glass and keeps materials away from the electronics.
- Autumn: Use amber light with miniature pumpkins, pinecones, or faux leaves around the base.
- Halloween: Select orange or purple light and place the jar beside a ceramic pumpkin.
- Winter: Pair warm-white light with metallic ornaments or artificial evergreen sprigs.
- Valentine’s Day: Use a restrained pink or red glow with ribbon tied around the jar’s neck.
- Spring: Surround the jar with artificial blossoms or pastel-colored glass pieces.
- Coastal décor: Arrange shells and smooth stones around the vessel rather than covering the light inside it.
If you put anything inside the jar, use a small amount of dry, nonflammable material and maintain access to the light. Never add water, fresh flowers, oil, scented liquid, or damp natural material to a jar containing electronics.
Can You Frost or Paint a Plain Glass Jar?
A plain jar can be given a softer appearance with a glass-compatible frosted finish, but modification is optional. Apply any spray or paint only as directed by its manufacturer, work in a well-ventilated area, and allow the coating to cure fully before assembling the light.
Applying a removable film or frosting treatment to the exterior generally makes future changes easier. Do not coat the battery-operated light, its controls, or its compartment. Once a jar has been painted or treated with a decorative coating, do not return it to food-storage use unless the product is specifically approved for that purpose.
Opaque wood, porcelain, and metal jars will not suddenly glow when painted. For those containers, place the puck on top to create an uplight or use the vessel as the base of a separate decorative arrangement.
Are Jar Lights Appropriate for Children’s Rooms?
A jar light should be treated as adult-installed décor, not as a child’s interactive nightlight. Glass can break, small decorative pieces can present choking hazards, and some LEDs or remotes use button batteries.
If you use one in a child’s room, choose a stable location that the child cannot reach. Use an intact jar, omit loose fillers, select a product with a secure battery compartment, and manage the controls yourself. A purpose-built, age-appropriate nightlight is the safer choice when the child needs a light close to the bed or wants to handle it independently.
Frequently Asked Questions
Does the jar need to be real crystal?
No. Clear pressed glass, patterned glass, and many vintage canisters work beautifully. Genuine crystal may produce especially sharp reflections, but the pattern, clarity, and shape usually matter more than the material’s label.
Which direction should the puck light face?
Facing it upward from beneath the jar emphasizes the sides and lid. Mounting it inside the lid and directing it downward can highlight objects near the base. Test both positions before attaching anything.
Why does textured glass create more sparkle?
Ridges, facets, and cut patterns redirect light at different angles. Smooth clear glass allows more direct transmission, while frosted surfaces scatter the light and produce a gentler, more uniform glow.
Can solar fairy lights be used indoors?
Only if the solar panel receives enough direct light to recharge and the manufacturer permits the intended setup. A battery-powered strand is generally more predictable for an indoor shelf or mantel.

Amazon US Verified
Ceramic Fluted Decorative Vase Set
Modern minimalist ceramic vases perfect for shelves, consoles, and dried florals.
Can the light stay on overnight?
Follow the light manufacturer’s instructions. A timer that switches the light off after a set period is preferable. Stop using any unit that becomes hot or shows damage, corrosion, leakage, or unusual behavior.
How do I prevent the jar from scratching furniture?
Place a clear nonslip pad, felt coaster, or small tray beneath it. Choose a material that remains stable and does not block controls or trap heat around the light.
A successful DIY jar light does not require complicated alterations. Start with an undamaged translucent jar, add a properly enclosed battery-operated LED, and experiment with the direction and brightness of the light. The glass remains intact, the arrangement can change with the seasons, and an overlooked thrift-store piece gains an entirely new decorative purpose.
As an Amazon Associate, azuloz.com earns from qualifying purchases.